HWI Quick Start Guide
Below is a brief overview of how to get started with our standard API integration. This section is intended to provide a high-level description of how our API integration is intended to work. After familiarizing yourself with the basics, please review our full API documentation for more details.
Generating API Keys
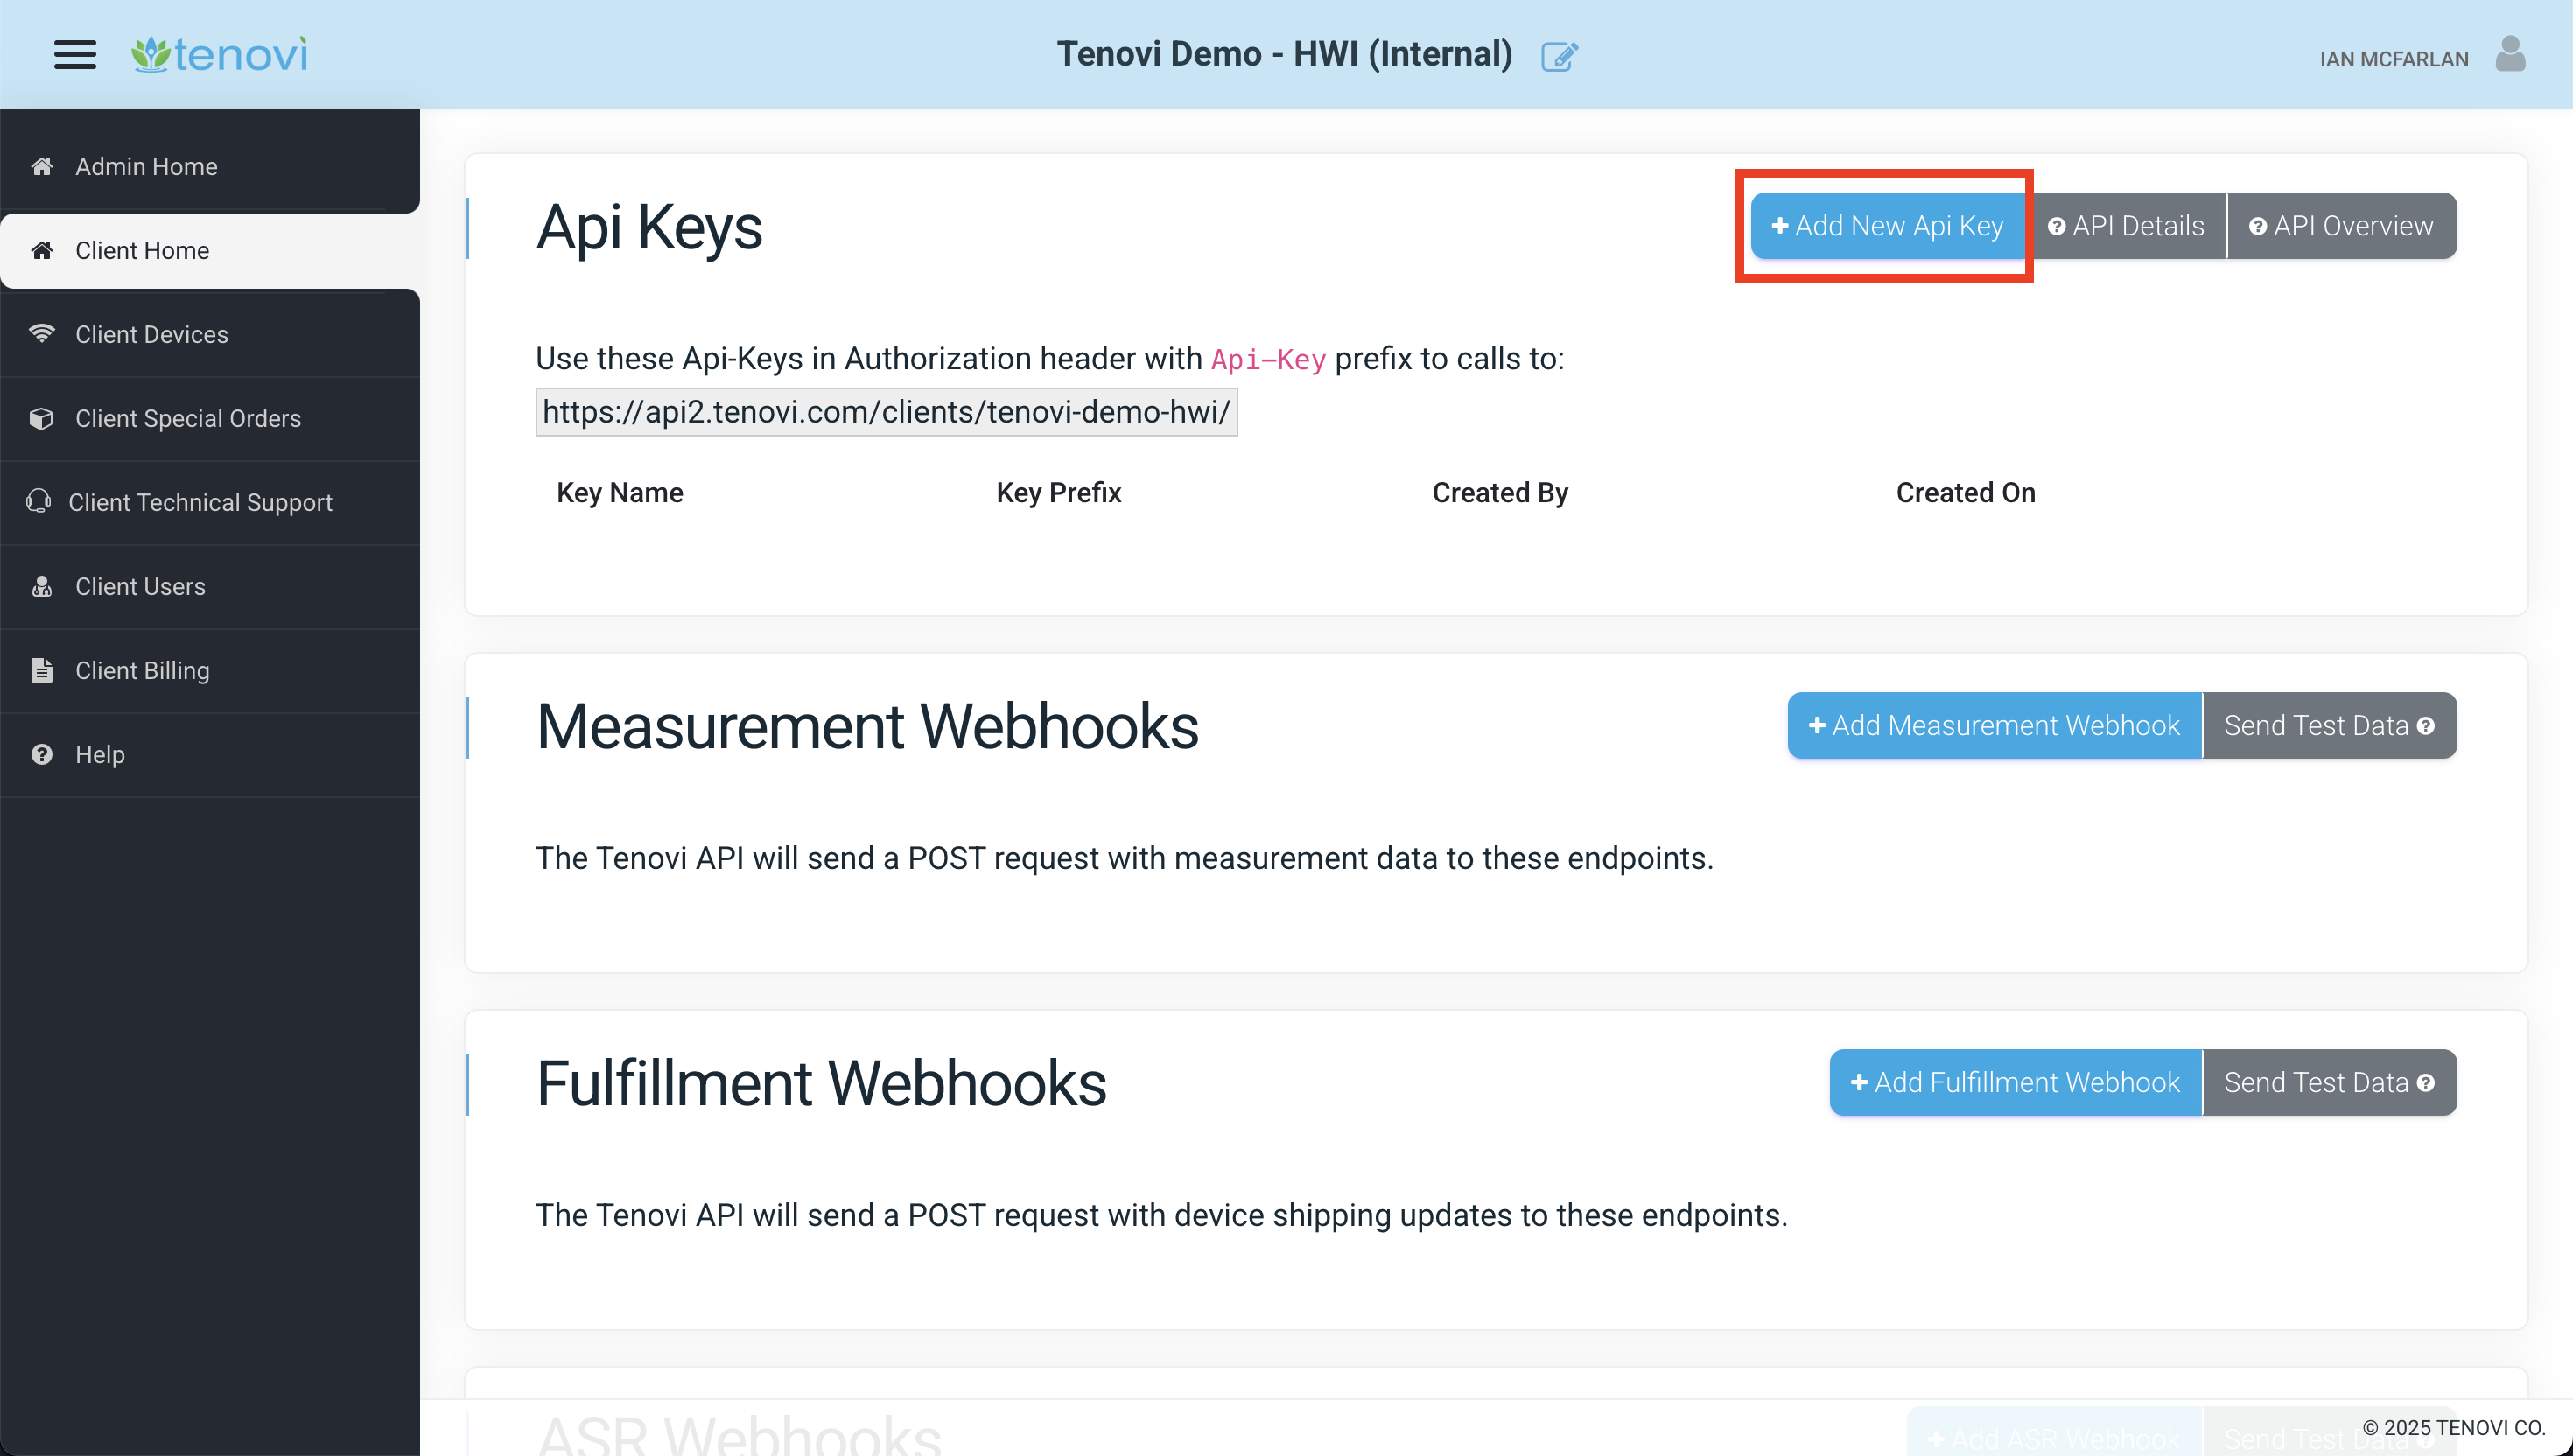
Login to the Tenovi WebApp to generate API key(s) for your various environments. Be sure to copy/paste these API keys to a secure location as they are only fully displayed once upon generation.

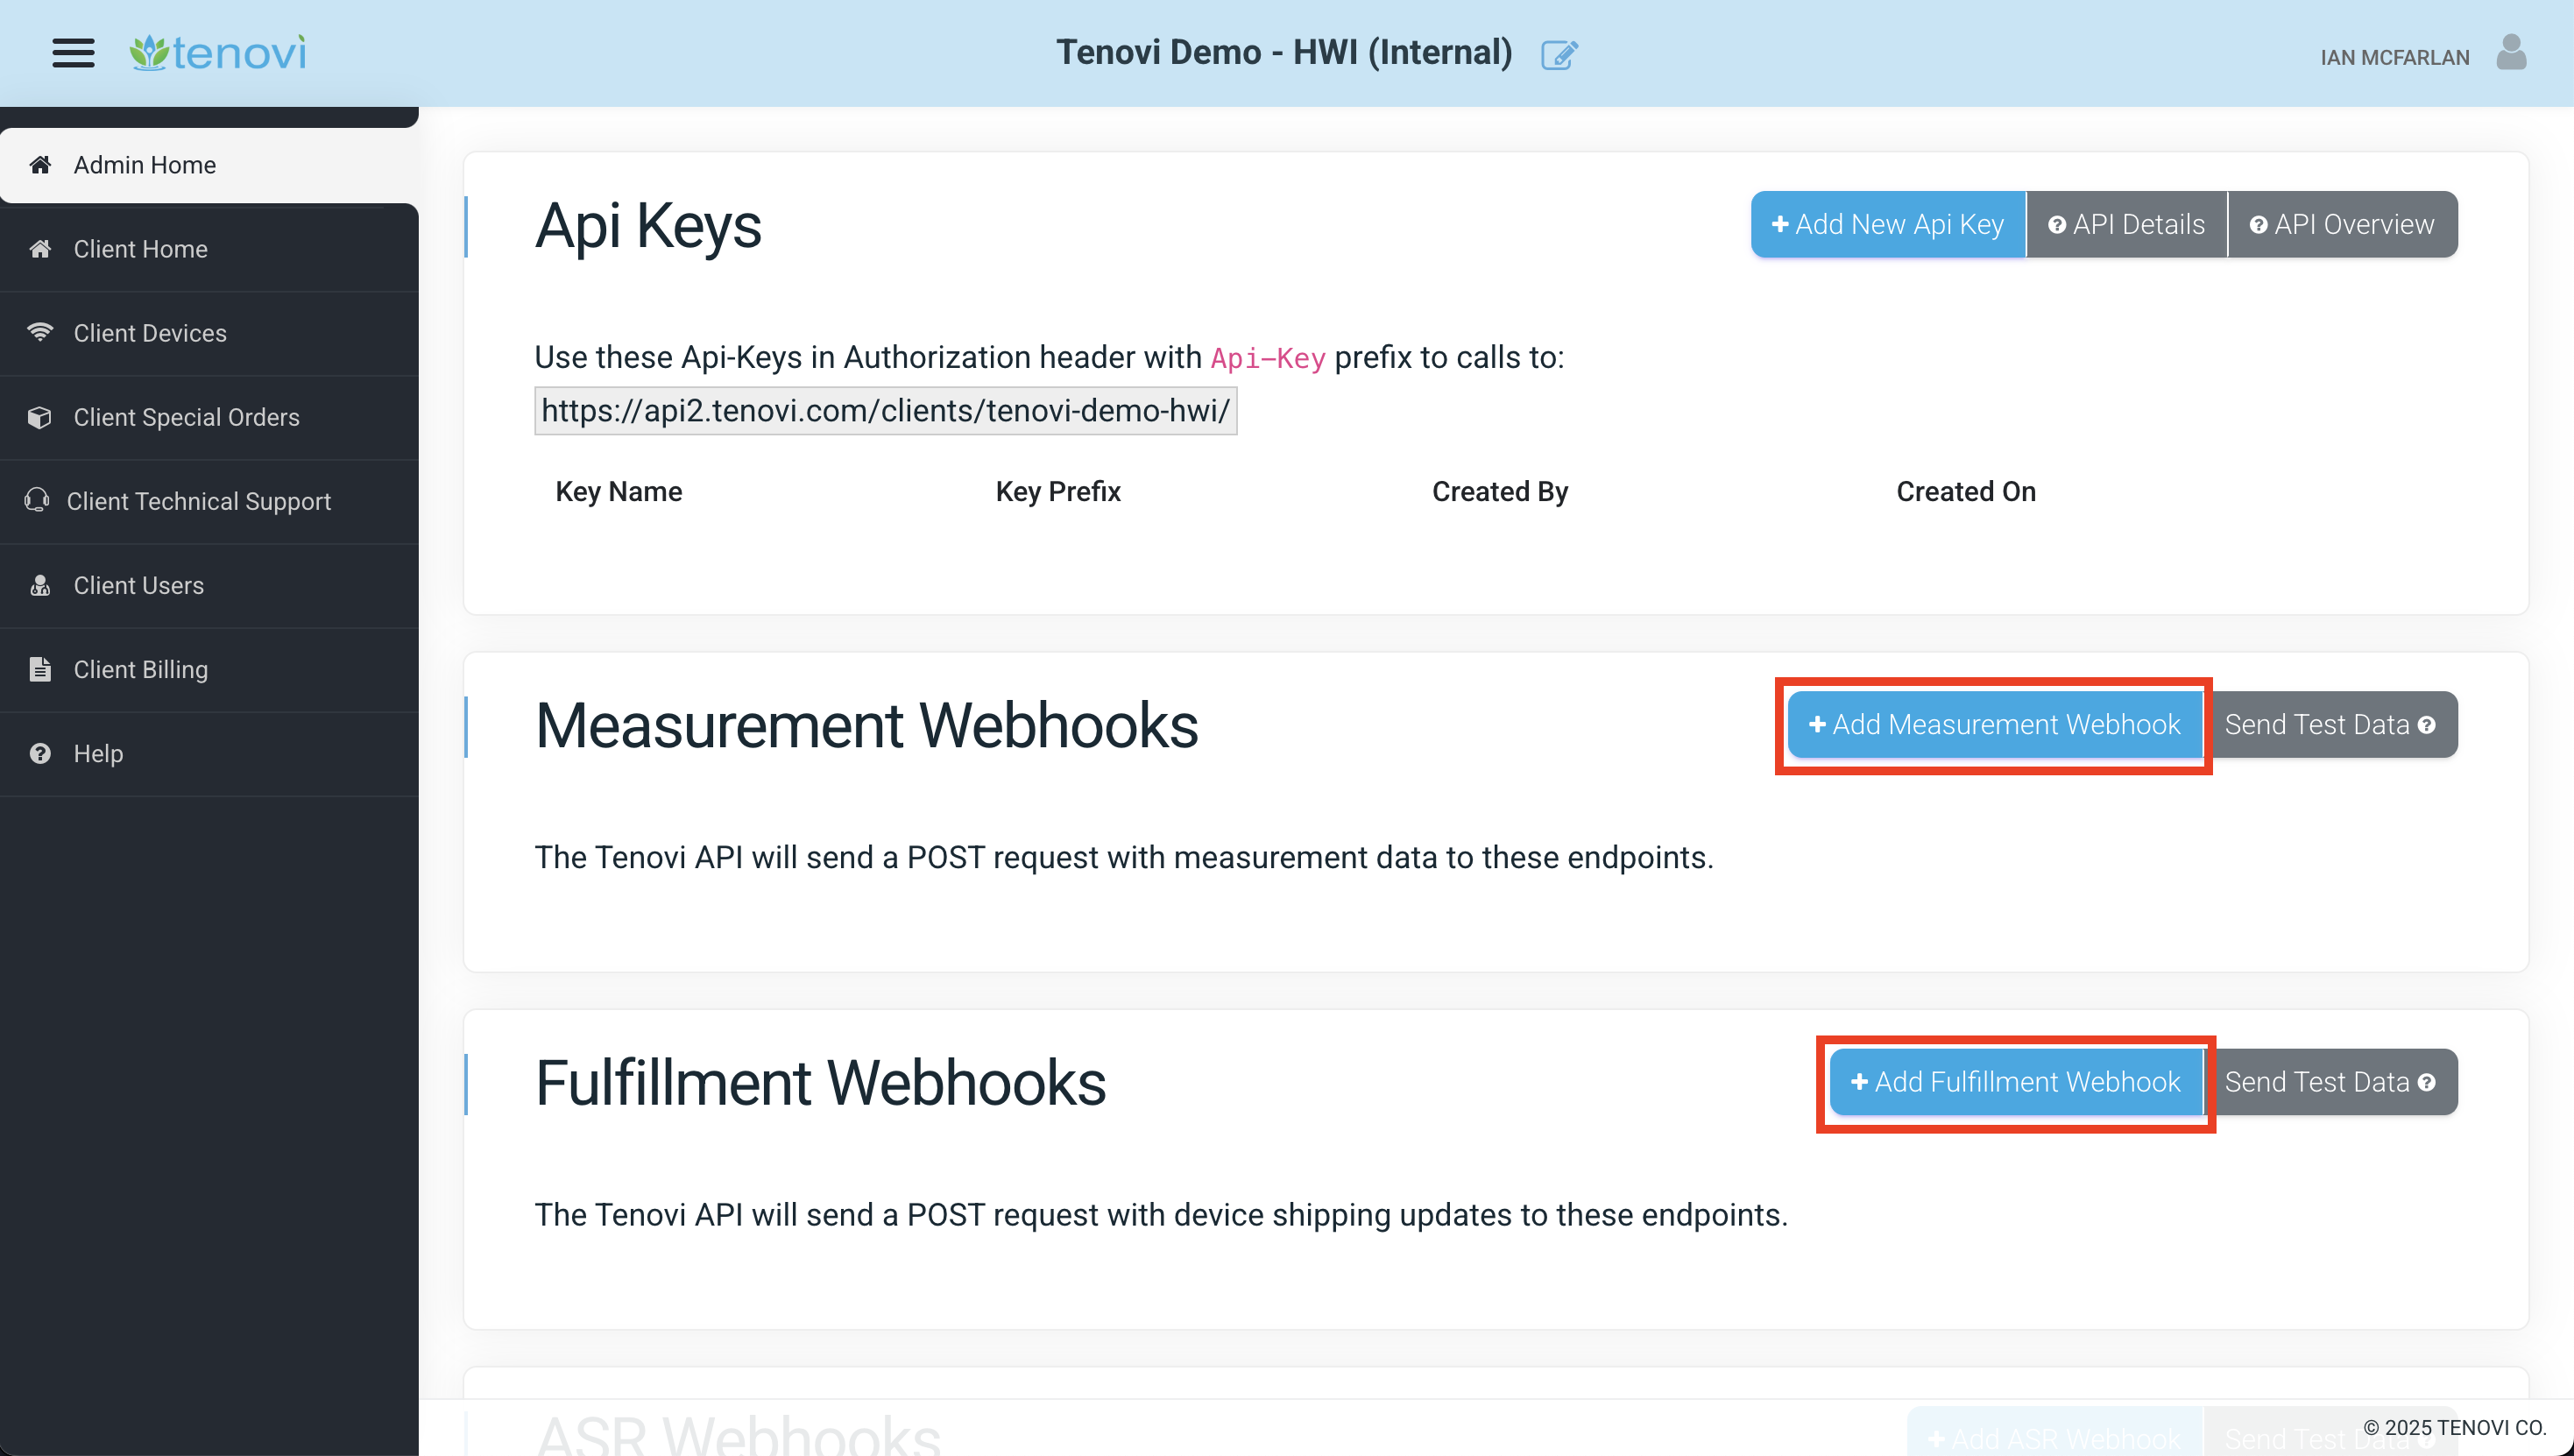
Within the Tenovi WebApp, you can also add Webhooks that will receive data from Tenovi’s systems for all device measurements, fulfillment updates for dropshipped orders, and special/bulk order updates. If you don’t have these endpoints setup on your server yet, you can always come back to add them later.

Activating/Ordering Devices
Tenovi offers two main options for delivering our devices to customers: bulk ordering and dropshipping. For bulk ordered devices, an individual device must be “activated” by the customer before data from that device will flow into their account (this can be done manually via an API call or automatically, if pre-activation is enabled for your account). For dropshipped devices, Tenovi will automatically activate your devices at shipment time.
In order to activate or order a dropshipped Tenovi device, you will need to make an API call to our servers with the relevant device information and (if applicable) shipping information. These API calls are outlined in detail in our API documentation and our JSON schema reference.
Once a dropshipped order is placed, Tenovi will push data to the Fulfillment Webhooks you configured above as the device is shipped, delivered, or replaced. The data sent in our Fulfillment Webhooks is outlined in the Fulfillment Webhooks section of our documentation.
Receiving Measurement Data
Once a Tenovi device is activated, data from that device will be routed to your account in our system. If you do not have your Measurement Webhooks configured, data will still be stored on Tenovi’s system for later retrieval via our measurement retrieval endpoints. Once your Measurement Webhook is set up, Tenovi will push data to that Webhook in real time, as it is received.
The JSON schema used in our Measurement Webhooks is standardized across all device and measurement types and is outlined in detail in the Measurement Webhooks section of our documentation and the Device Overview documentation.
Below is an example of the standardized JSON schema used for device measurements:
{ "metric": "blood_pressure", "device_name": "Tenovi BPM - L", "hwi_device_id": "12345678-abcd-1234-abcd-1234567890ab", "patient_id": "98765", "hardware_uuid": "1234ABCD5678", "sensor_code": "10", "value_1": "120.00", "value_2": "80.00", "created": "2024-08-24T14:15:35Z", "timestamp": "2024-08-24T14:15:22Z", "timezone_offset": -7, "estimated_timestamp": false, "filter_params": {}}Testing Webhooks
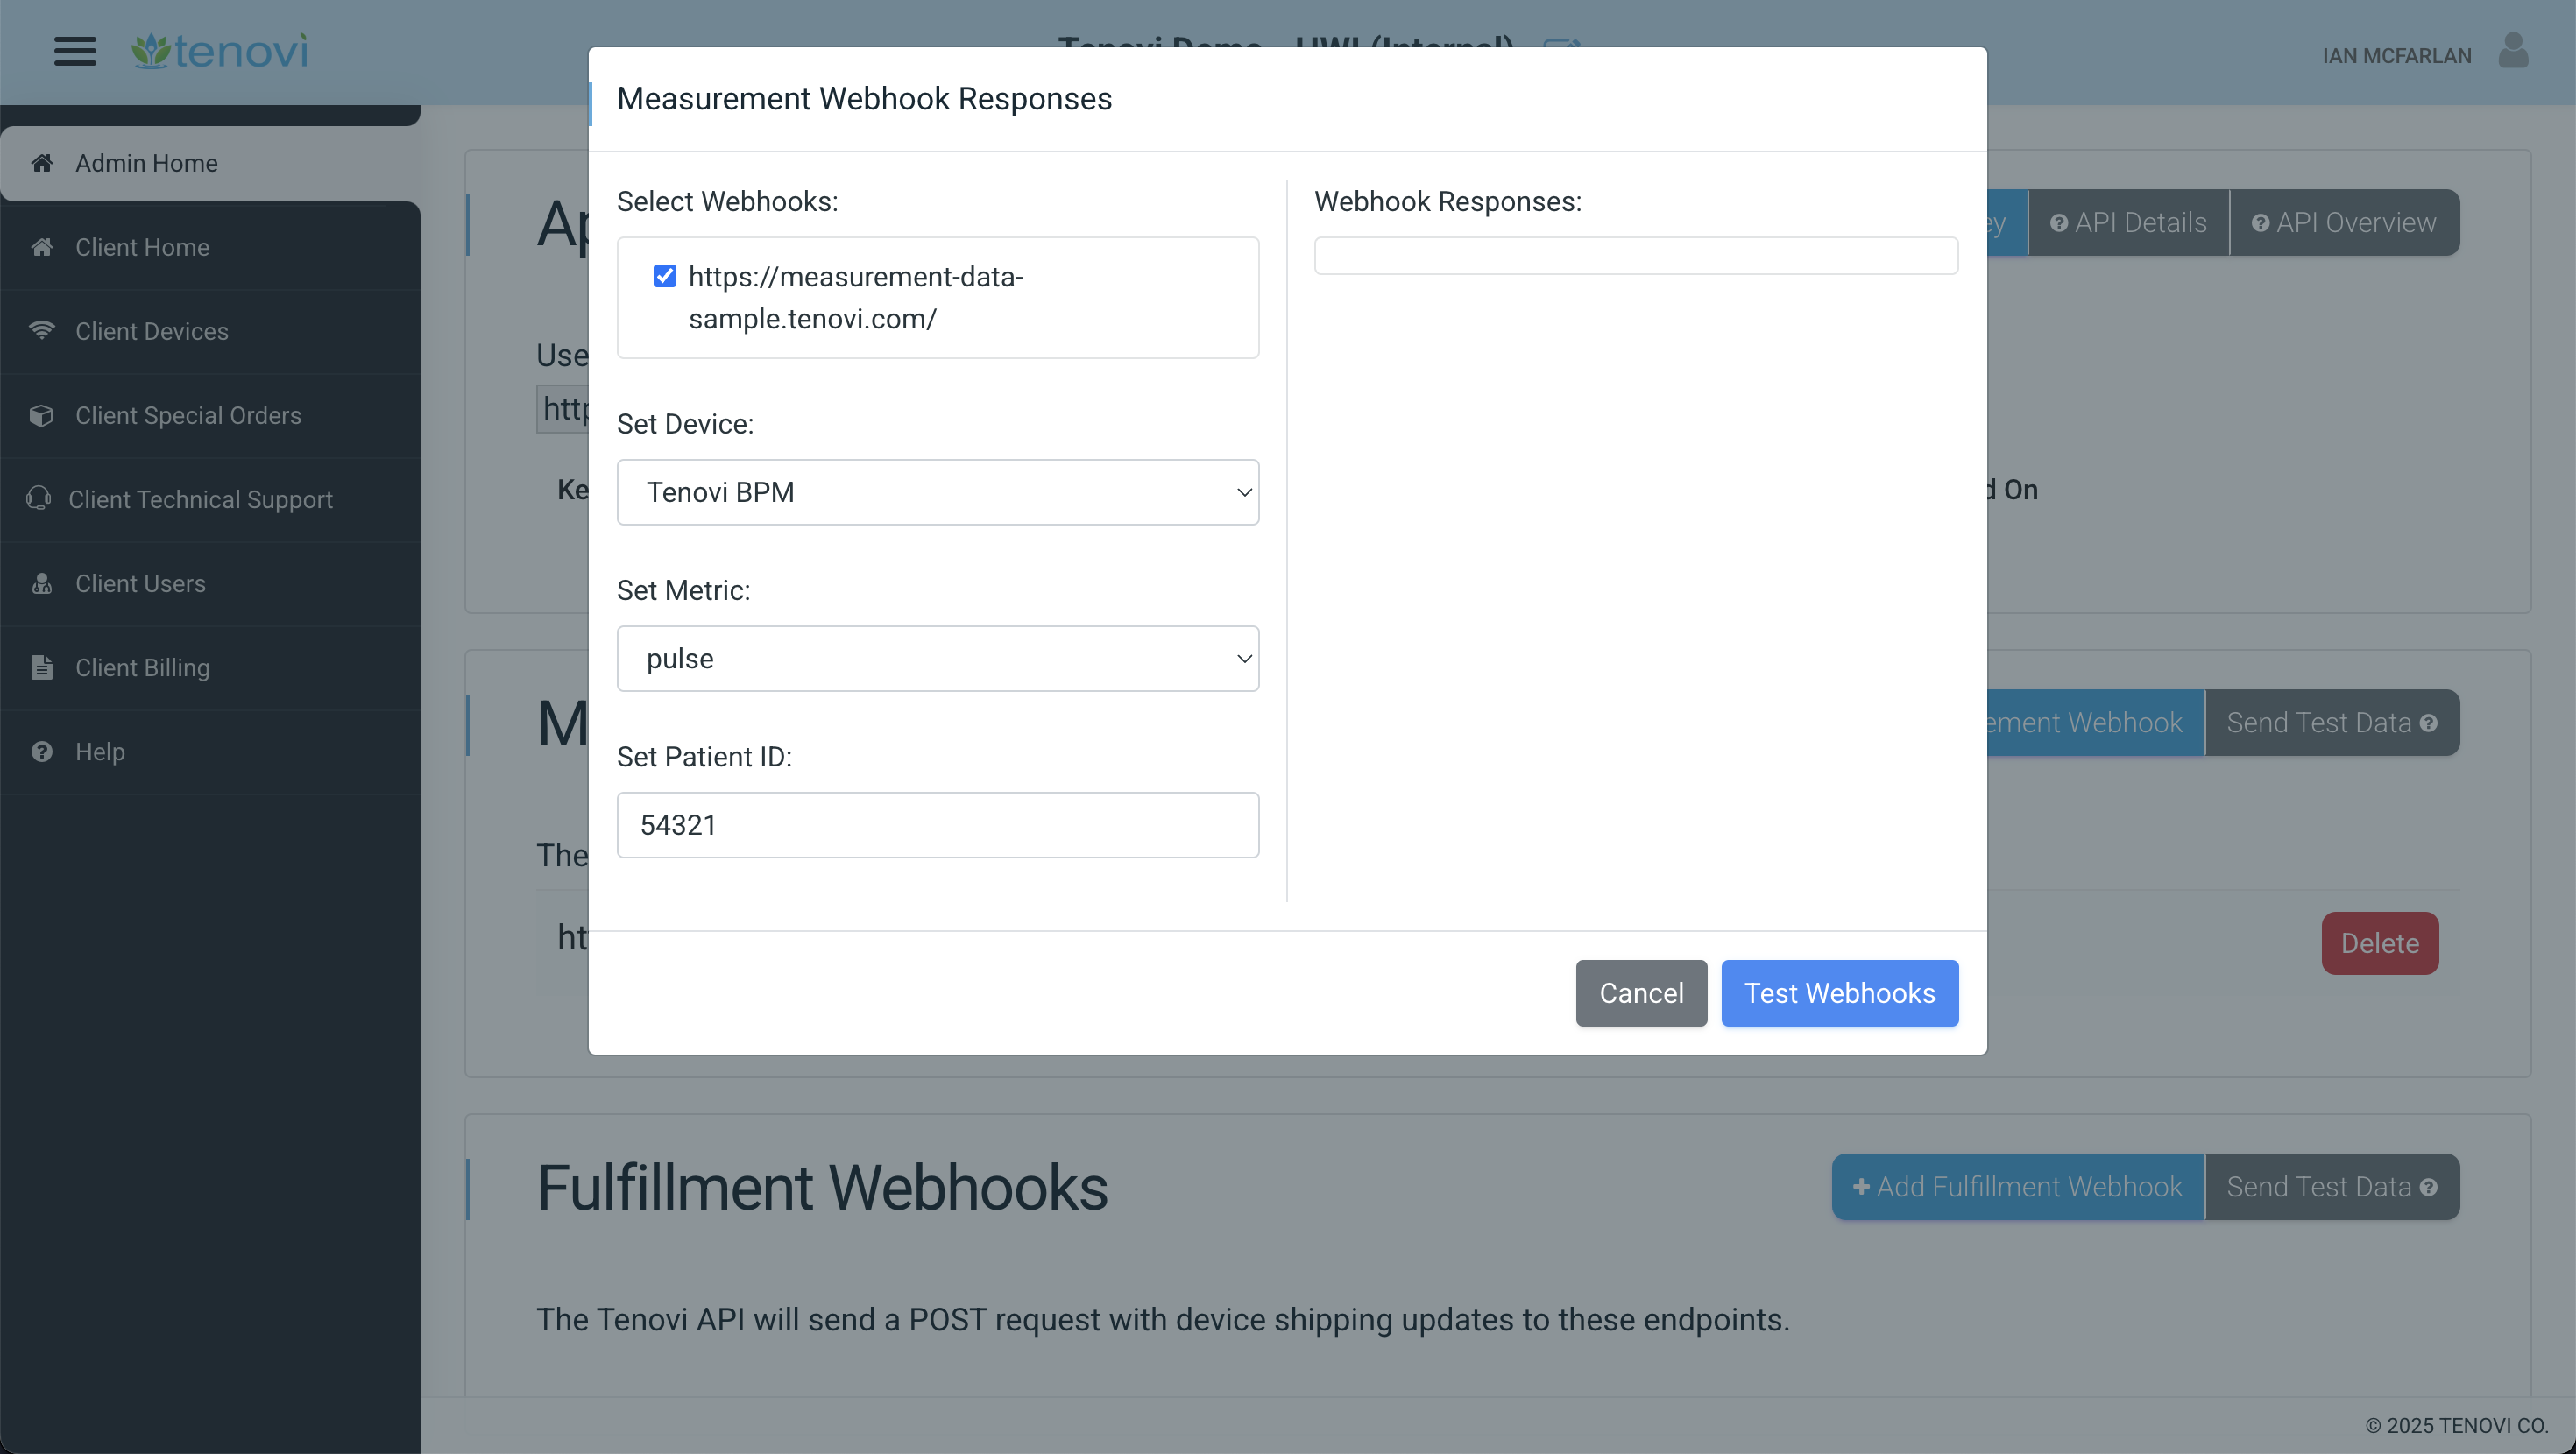
The Tenovi WebApp offers convenient testing tools to verify your Measurement, Fulfillment, and Special Order Webhooks are configured properly.
Simply click the “Send Test Data” button for each of the types of webhooks to configure and push sample data to your servers on-demand. This will speed up your development as you can send test data to your systems without the need of ordering new devices or taking many measurements.

You can also use API calls to send test JSON payloads to your webhook endpoints.
Test Orders
Once you have your webhooks set up, your fulfillment process/logistics in place, and you are able to properly process test measurement data, Tenovi highly encourages you to test your workflows using real devices (example: shipping, receiving, and connecting new devices; taking measurements from connected devices).
In order to help facilitate this the Customer Success Team can assist in getting this setup before your account goes live.
