This is the full developer documentation for Tenovi Docs
# Tenovi API Docs
> Tenovi connects RPM devices to your platform via API. If this is your first time here, start with the Quick Start Guide.
## Recently Added
[New Support Dashboard ](/changelog/#new-support-dashboard-in-the-web-app)A new Support Dashboard in the Web App for enhanced visibility and control over your support requests.
[Available for Pickup Webhook Status ](/hwi-api/webhooks/fulfillment-webhooks/)A new fulfillment webhook status for packages held at a carrier facility.
[Pagination ](/hwi-api/pagination/)Device, measurement, and supply order endpoints now support pagination.
For AI assistants
These docs follow the [llms.txt standard](https://llmstxt.org/), which serves an LLM-friendly, plain-text map of our documentation for AI coding assistants and agents. Point your AI layer at `llms.txt` for a concise index, or `llms-full.txt` for the entire docs site in a single file.
```plaintext
https://docs.tenovi.com/llms.txt
```
```plaintext
https://docs.tenovi.com/llms-full.txt
```
## New to Tenovi? Getting Started
Quick Start Guide
High-level description of how our API integration is intended to work.
[Read More](/guides/quick-start/)
Typical Dataflow
How data goes from a device to your system.
[Read More](/hwi-api/typical-dataflow/)
Tenovi Devices
Details on all of our devices supported by the HWI API.
[Read More](/devices/)
Postman Collection
Work with the Tenovi API using our Postman environment and collection.
[Read More](/tools/postman-collection/)
## Hardware Integration (HWI) API
HWI Overview
HWI API allows third-party Clients to interact with devices, gateways, fulfillment workflows, supplies, and more.
[Read More](/hwi-api/overview/)
Webhooks Overview
Learn about how Tenovi measurement and fulfillment webhooks work.
[Read More](hwi-api/webhooks/webhooks-overview)
HWI JSON Schemas
Detailed information on our Hardware Integration (HWI) API endpoints with their required JSON schemas.
[Read More](https://api2.tenovi.com/hwi-redoc/)
Working with Devices
Learn how to request dropshipped devices, unlink devices from gateways, and more.
[Read More](hwi-api/devices/activating-devices)
Patients
Create patient records to attach devices, issue fulfillment requests, and validate shipping addresses.
[Read More](/hwi-api/patients/)
Bulk Orders
Interact with bulk orders and gain visibility on their contents/manifests.
[Read More](/hwi-api/bulk-orders/)
Pagination
Pagination is available on all measurement, device, and supply order endpoints.
[Read More](/hwi-api/pagination/)
## API Recipes
Bulk Unlinking
Device audits, unenrolling many patients, etc.
[Read More](/recipes/bulk-unlinking/)
Backfilling Measurement Data
Fetching measurement data enmasse for many devices.
[Read More](/recipes/backfilling-measurement-data/)
Gateway Connectivity Report
Pull signal strength, last check-in, firmware version, and whitelisted devices per Gateway.
[Read More](/recipes/gateway-connectivity-report/)
## Automated Supply Replenishment (ASR) API
ASR Overview
Automate the creation and tracking of new supply orders for items such as glucometer lancets, test strips, batteries, BPM cuffs, and more.
[Read More](/asr-api/overview/)
ASR JSON Schemas
Detailed information on our Automated Supply Replenishment (ASR) endpoints for working with supply orders for your devices.
[Read More](https://api2.tenovi.com/supply-redoc/)
# 404 Not Found
> We couldn't find the resource you were looking for but the links below or the search above can point you in the right direction.
Device Overview
High-level overview of our devices including the types of metrics sent and API requirements.
[Read More](guides/device-overview)
Webhooks Overview
Learn about how Tenovi measurement and fulfillment webhooks work.
[Read More](hwi-api/webhooks/webhooks-overview)
HWI API Reference
Detailed information on our Hardware Integration (HWI) API endpoints with their required JSON schemas.
[Read More](https://api2.tenovi.com/hwi-redoc/)
ASR API Reference
Detailed information on our Automated Supply Replenishment (ASR) endpoints for working with supply orders for your devices.
[Read More](https://api2.tenovi.com/supply-redoc/)
Working with Devices
Learn how to request dropshipped devices, unlink devices from gateways, and more.
[Read More](hwi-api/devices/activating-devices)
Developer FAQs
Common questions and answers when working with the HWI API and webhooks.
[Read More](guides/dev-faqs)
# Managing Glucometer Supply Information
> Glucometer supply amount tracking
If a client is enrolled in our ASR program, Tenovi will automatically track the estimated number of strips remaining (based on supplies shipped and average measurement velocity) for every glucometer used by a client. Clients can use this information to track and order new supplies themselves, or, if desired, Tenovi can automaically place new supply orders for the patient (test strips, lancets, etc.) when certain thresholds are met to ensure the patient doesn’t run out of supplies.
## GET Current Supply Information
[Section titled “GET Current Supply Information”](#get-current-supply-information)
You can retrieve current supply information by doing a GET request to this API endpoint (be sure to include the `hardware_uuid` / gateway ID / IMEI the glucometer is associated with).
```js
/asr/glucometer_supplies/{hardware_uuid}/
```
This will return an object containing the following fields:
```json
{
"strips_sent": 100,
"estimated_strips_remaining": 25,
"average_measurements_per_day": 2
}
```
* `strips_sent` - a measure of the number of glucometer strips Tenovi has shipped to the patient associated with the provided `hardware_uuid` (i.e. the Gateway ID or IMEI of the corresponding device).
* `estimated_strips_remaining` - the different between the number of strips we have provided and the number of valid glucometer measurements taken, with an offset factor to account for lost strips, strips provided by the client, strips purchased by the patient, etc.
* `average_measurements_per_day` - provides an estimate of how many strips are used per day, based on the patient’s most recent activity.
This API endpoint is covered in more detail in our [API Reference](https://api2.tenovi.com/supply-redoc/#operation/glucometer_supplies_read).
## Updating Current Supply Information
[Section titled “Updating Current Supply Information”](#updating-current-supply-information)
Using the same endpoint as above, you can make a PUT request to update the `estimated_strips_remaining` field associated with this glucometer. This field is important for how Tenovi calculates when to send a new order of supplies to the patient.
This API endpoint is covered in more detail in our [ASR API Reference](https://api2.tenovi.com/supply-redoc/#operation/glucometer_supplies_update).
# Ordering Supplies with ASR API
> Requesting a new supply order using the Tenovi Automated Supply Replenishment (ASR) API
You can request new supply orders for a patient to ensure they never run out of supplies for their devices. For a complete listing of all the types of supply see the [Supply Types documentation](/asr-api/supply-types/).
All the methods described below will use the same API endpoint:
```js
/asr/supply-requests
```
## Retrieve List of All Supply Orders
[Section titled “Retrieve List of All Supply Orders”](#retrieve-list-of-all-supply-orders)
You can retrieve a list of all your supply orders using the GET method. This will return an array of objects with order information such as supply type and shipping information. You can narrow this response using two query parameters.
* `fulfilled` - will only return orders that have been shipped already
More detail about this API endpoint can be found in our [ASR API Reference](https://api2.tenovi.com/supply-redoc/#operation/supply-requests_list).
## Create a New Supply Request
[Section titled “Create a New Supply Request”](#create-a-new-supply-request)
To request a specific supply, you must use the **exact** `supply_name` parameter along with the shipping information for where you want the supply to be sent using the POST method.
Once a request is fulfilled, you will automatically be billed for the item at the end of your month. You can view all pending invoices on your [Tenovi dashboard under client billing](https://app.tenovi.com/client/billing/).
We recommend you **always** include the Gateway ID (for [Gateway-connected devices](/guides/device-overview#gateway-connected-devices)) or IMEI (for [direct-cellular devices](/guides/device-overview#direct-celluar-devices)) associated with the patient for whom you are requesting supplies in each request. This will help ensure that the proper supply type is sent to that patient based on their activated devices. For example, some glucometer strips only work with a certain glucometer type. Our fulfillment team will be able to look this information up by Gateway ID when completing a request, if it is included.
You can optionally set the `related_client_device_id` property with an HWI Device ID. This connects the supply order with the device for tracking purposes and enables Tenovi to validate the supply type you are requesting is compatible with the device.
More detail about this API endpoint can be found in our [ASR API Reference](https://api2.tenovi.com/supply-redoc/#operation/supply-requests_create).
### Example JSON for Creating a Request
[Section titled “Example JSON for Creating a Request”](#example-json-for-creating-a-request)
```json
{
"supply_name": "Tenovi Glucometer Strips & Lancets (100 Pack)",
"gateway_id": "123412341234",
"imei": "",
"shipping_name": "John Doe",
"shipping_address": "100 Cate St",
"shipping_city": "Portsmouth",
"shipping_state": "NH",
"shipping_zip_code": "03528",
"notify_emails": "orders@domain.tld",
"related_client_device_id": "497f6eca-6276-4993-bfeb-53cbbbba6f08"
}
```
## Delete a Pending Supply Request
[Section titled “Delete a Pending Supply Request”](#delete-a-pending-supply-request)
You can remove a pending request using the DELETE method on this endpoint.
Note
Only orders that haven’t yet been fulfilled can be deleted.
More detail about this API endpoint can be found in our [API Reference](https://api2.tenovi.com/supply-redoc/#operation/supply-requests_delete).
# Automated Supply Replenishment (ASR) API Overview
> A high-level overview of the Tenovi Automated Supply Replenishment (ASR) API
The ASR API enables you to automate the creation and tracking of new supply orders for items such as glucometer lancets, test strips, batteries, BPM cuffs, and more. Charges for new supplies will accrue automatically on your account as supply orders are shipped, with payment due at the end of the month.
Notably, when the ASR module is enabled, **Tenovi will also track the number of remaining supplies for devices with consumable items** (for example, the strips used for glucometer devices) based on the number of supplies Tenovi has shipped vs the number of readings that Tenovi has received. If desired, Tenovi can automatically place orders for new supplies when certain thresholds are met (e.g. a user has less than 10 days of supplies remaining).
Learn more about our ASR module
We strongly recommend contacting your Tenovi Business Development Rep or your Customer Success Manager for more information regarding our ASR module and how you can effectively leverage it to streamline your supply ordering workflows.
## Enabling the ASR Module
[Section titled “Enabling the ASR Module”](#enabling-the-asr-module)
The Automated Supply Replenishment module must be enabled separately from the HWI endpoints described above, though the same authentication method (an API Key generated on the [Tenovi dashboard](https://app.tenovi.com/client)) should be used. See our detailed [ASR API Reference](https://api2.tenovi.com/supply-redoc/) for more information on this feature. Please contact your Account Representative to enable this feature.
## Use Cases
[Section titled “Use Cases”](#use-cases)
Using the ASR, you can create automated solutions to have Tenovi dropship supplies to your patients. This is of great benefit to patients with glucometers in particular as you can setup your system to order new supplies for them based upon how many measurements they have taken with their current device, ensuring they never run out of supplies.
In addition, our ASR module can be optionally configured to place new orders on your behalf automatically when certain thresholds are met. Specifically, our system will track the estimated number of supplies on hand as well as the estimated number of days of supplies remaining (based on a running average of historical supply usage), and automatically place a new supply order when the total number of supplies or days of supplies remaining is below a set amount (e.g. 25 strips and 10 days of supplies remaining).
## Webhooks for Supply Orders
[Section titled “Webhooks for Supply Orders”](#webhooks-for-supply-orders)
Tenovi will send webhooks you define on the HWI Settings screen for all special orders, this includes supply orders. For more information, see our [Special/Bulk Order Webhook](/hwi-api/webhooks/special-order-webhooks) document.
## API Calls to ASR
[Section titled “API Calls to ASR”](#api-calls-to-asr)
Once enabled, you can use the following endpoints to manage supplies, create orders, and more. Be sure you are using your [client domain](/hwi-api/api-url-config/) as the URL prefix when working with these API calls.
* [Request, list, and cancel](/asr-api/ordering-supplies/) pending supply requests
```js
/asr/supply-requests/
```
* Get a detailed list of [supply types](/asr-api/supply-types/) available for order on your account
```js
/asr/asr-supply-types/
```
* Update [glucometer supply counts](/asr-api/glucometer-info/) for a device for automated ordering
```js
/asr/glucometer_supplies/{hardware_uuid}/
```
# ASR Supply Types
> Getting a detailed list of availble supplies for order using the Tenovi ASR API
Similar to the Tenovi Hardware Integration (HWI) API’s endpoint for [getting available devices for your account](/hwi-api/devices/device-types/), the ASR API has an endpoint that outlines all the available supplies you can order.
## API Endpoint
[Section titled “API Endpoint”](#api-endpoint)
You can make a GET request to this endpoint and it will return an array of objects outlining all the available supplies you can order.
```js
/asr/supply-types/
```
Some supply types require the Hardware UUID (i.e. a Gateway ID or IMEI) of the corresponding device (e.g. a Tenovi Glucometer) to be included with new supply orders in order to facilitate the accurate tracking of the number of supplies remaining for that device. This is indicated by the `hardware_uuid_required` parameter in the Supply type JSON response. These parameters are outlined in more detail in our [ASR API Reference](https://api2.tenovi.com/supply-redoc/#operation/asr-supply-types_list).
Note
If you do not see a particular supply in your available supply types, let your Business Development representative know, and they can activate new supply types for your account.
## Example JSON Response
[Section titled “Example JSON Response”](#example-json-response)
```json
[
{
"id": "497f6eca-6276-4993-bfeb-53cbbbba6f08",
"name": "Tenovi Glucometer Strips & Lancets (100 Pack)",
"description": "",
"image": "http://example.com",
"up_front_cost": "17.00",
"shipping_cost": "8.00",
"hardware_uuid_required": true,
"deprecated": false
}
]
```
# Changelog
> Recent updates and changes to the Tenovi API.
## Signup for API Updates
This changelog lists all updates, additions, and changes to the Tenovi APIs. To receive email notifications whenever new updates are published, complete the form and we'll keep you in the loop.
[Subscribe for Updates](#)
***
August 2, 2026
### [AI-Friendly Docs: llms.txt & Downloadable AI Prompts](#ai-friendly-docs-llms-txt-downloadable-ai-prompts)
DocumentationNew Feature
We’ve made the Tenovi docs easier to use with AI coding assistants.
**llms.txt support**
The full documentation site is now published in the [llms.txt standard](https://llmstxt.org/) — a plain-text, LLM-friendly format you can point your AI layer at:
* [`llms.txt`](https://docs.tenovi.com/llms.txt) — a concise index of the docs
* [`llms-full.txt`](https://docs.tenovi.com/llms-full.txt) — the entire docs site in a single file
Links are available in the site footer, sidebar, and homepage.
**Downloadable AI prompts for recipes**
Select recipes now include a ready-to-use AI prompt you can hand to your assistant of choice. Rather than adapting a fixed code sample, the prompt interviews you and generates a working script in the language of your choice. First available for the [Gateway Connectivity Report](/recipes/gateway-connectivity-report/).
August 2, 2026
### [Quick Start: Authentication Walkthrough](#quick-start-authentication-walkthrough)
DocumentationImprovement
The [Quick Start Guide](/guides/quick-start/) now includes a complete authentication section — the client-specific base URL, the `Api-Key` authorization header, and a copy-paste cURL example — so you can make your first request immediately after generating an API key.
July 1, 2026
### [Device Name Change: Tenovi BPM - L is now Tenovi BPM - Wide Range](#device-name-change-tenovi-bpm-l-is-now-tenovi-bpm-wide-range)
DevicesSystem Update
The blood pressure monitor cuff previously named `Tenovi BPM - L` has been renamed to `Tenovi BPM - Wide Range` (22 - 45cm cuff). The device, sensor code, and functionality are unchanged — only the device name has been updated.
We automatically map the legacy `Tenovi BPM - L` name to the new `Tenovi BPM - Wide Range` name, so existing integrations will continue to work. Updating to the new name is not required, but it is encouraged.
For comprehensive information on all device types available for order on your specific account, use the [`hwi-device-types` endpoint](/hwi-api/devices/device-types/) — it returns the current, valid device names for use when [activating devices](/hwi-api/devices/activating-devices/).
See the [Tenovi BPM device docs](/devices/tenovi-bpm/) for the full list of available cuff sizes.
June 30, 2026
### [Automatic Retry for Failed Measurement Webhooks](#automatic-retry-for-failed-measurement-webhooks)
HWI APIWebhooksMeasurementsImprovement
Failed [measurement webhook](/hwi-api/webhooks/measurement-webhooks/) deliveries are now automatically retried with exponential backoff, rather than failing on the first attempt. A failure tracker records each unsuccessful delivery and re-attempts it, so transient outages on your receiving endpoint no longer drop measurement data.
This applies to measurement webhooks. Fulfillment, special-order, and patient webhooks are not yet on the automatic retry path.
June 4, 2026
### [Shipping Details in Special Orders CSV Export](#shipping-details-in-special-orders-csv-export)
Web AppBulk OrdersImprovement
The Special Orders CSV export in the [Tenovi Web App](https://app.tenovi.com/) now includes shipping-detail columns, populated for customer accounts:
* `shipping_carrier`
* `shipping_cost`
* `shipping_tracking_link`
* `shipping_label_link`
* `shipping_qr_code_link`
* `address_status`
* `shipping_phone_number`
* `do_not_bill_for_shipping`
This lets you reconcile shipments — carrier, cost, tracking/label links, and address-verification status — directly from the export without a separate lookup. Column values are populated when the corresponding shipping data is present on the order.
June 1, 2026
### [New Support Dashboard in the Web App](#new-support-dashboard-in-the-web-app)
Web AppNew Feature
A new Support Dashboard is now available in the [Tenovi Web App](https://app.tenovi.com/), giving you enhanced visibility and control over your support requests.
**What’s New**
* **Company-Wide Visibility** — See all tickets submitted by anyone within your company in one centralized location.
* **Real-Time Status Updates** — Easily track the progress of your requests and instantly see whether a ticket is Open or Closed.
* **Comprehensive Details at a Glance** — View who requested the ticket, the relevant Gateway ID, Category, and Device Type directly from the dashboard.
* **Advanced Search & Filtering** — Search by Ticket ID, subject, or specific properties. Filter or sort columns (like Created Date or Last Activity) to prioritize your view.
* **Export Capabilities** — Export your ticket list directly from the dashboard with the click of a button.
**What’s Staying the Same**
Nothing is changing regarding how you submit tickets. You can continue to submit your support requests exactly as you always have.
**How to Access**
1. Look at the navigation menu on the left side of your screen.
2. Scroll down to the **Help & Support** section.
3. Click on **Support Dashboard**.
May 27, 2026
### [Self-Service: Suppress Battery & Status Data from Webhooks](#self-service-suppress-battery-status-data-from-webhooks)
HWI APIWebhooksWeb AppImprovement
You can now request whether battery and other device status data is included in your outbound webhook payloads. To disable status data, contact your Customer Success Manager.
May 23, 2026
### [Special Order Timestamps & Bug Fixes](#special-order-timestamps-bug-fixes)
HWI APIBulk OrdersWebhooksNew FeatureBug Fix
**New Feature**
* All special orders now include `created_on`, `updated_on`, `shipped_on`, `delivered_on` fields in [Special Order Webhooks](/hwi-api/webhooks/special-order-webhooks/) and [API requests](/hwi-api/bulk-orders/).
**Bug Fixes**
* Fix for `GET /clients/{client}/hwi/hwi-replacements/`: the endpoint now returns the full set of [replacement orders](/hwi-api/devices/replacing-devices/) for your client instead of a truncated subset, and also can return the standard [pagination](/hwi-api/pagination/) envelope rather than a bare array.
* Fix for `GET hwi-devices/{id}` so the `status` field correctly returns “Available for Pickup” when a device is being held at a carrier facility for pickup. Previously these devices were returned with status “Dropshipped” [via the API](/hwi-api/webhooks/fulfillment-webhooks/#fulfillmentdevice-status-definitions) even though the web app showed the correct status.
May 5, 2026
### [Pagination: Phase 2](#pagination-phase-2)
HWI APIDeviceMeasurementsImprovement
Pagination is available on all measurement, device, and supply order endpoints. If you have not yet updated your integration to use pagination or timestamp filtering, requests to the following endpoints will return truncated responses:
* `patients/{id}/measurements` - 1,000-result cap on unpaginated requests, last 30 days
* `hwi-devices/{id}/measurements` - 1,000-result cap on unpaginated requests, last 30 days
* `hwi-patient-measurements` - 1,000-result cap on unpaginated requests, last 30 days
* `hwi-devices`, `hwi-hardware-uuid-logs`, `hwi-replacements` - 1,000-result cap
See the [Pagination Guide](/hwi-api/pagination/) for details and migration notes.
April 20, 2026
### [New Fulfillment Webhook Status: Available for Pickup](#new-fulfillment-webhook-status-available-for-pickup)
HWI APIWebhooksFulfillmentNew Feature
A new `Available for Pickup` status has been added to Fulfillment Webhooks. This status fires when a carrier marks a package as held at a facility (e.g. FedEx OnSite, local Post Office) rather than delivered to the patient’s address.
**Delivered status change:** `Delivered` will now only fire when a package is successfully dropped off at the patient’s address. Previously, carrier-held packages were categorized as `Delivered`.
**Action required:** If your integration triggers workflows on `Delivered` (e.g. patient enrollment, billing, or welcome messages), those actions will not fire for packages held for pickup. Update your logic to handle both `Delivered` and `Available for Pickup` as appropriate for your workflows.
See the [Fulfillment Webhooks docs](/hwi-api/webhooks/fulfillment-webhooks/) for full details.
April 13, 2026
### [Pagination: Phase 1](#pagination-phase-1)
HWI APIDeviceMeasurementsImprovement
Pagination is available on all measurement, device, and supply order endpoints. Add `?page=1` to any affected endpoint to enable pagination. See the [Pagination Guide](/hwi-api/pagination/) for details and migration notes.
October 30, 2025
### [Patients Object](#patients-object)
HWI APINew Feature
You can now create patient records in Tenovi via API. This enables you to attach patient information to devices, fulfillment requests, and measurements with more ease. See the [Patients API reference](https://api2.tenovi.com/hwi-redoc/#tag/hwi-patients/operation/hwi-patients_list) for full details.
August 29, 2025
### [Bulk Orders API & Special Order Webhooks](#bulk-orders-api-special-order-webhooks)
HWI APIBulk OrdersWebhooksNew Feature
Two new additions for managing bulk and special orders:
* **Get Bulk Orders endpoint** — retrieve shipping info, fulfillment status, and complete device manifests in a single request.
* **Special/Bulk Order Webhook** — receive real-time updates on supply, bulk, replacement, return label, and demo unit orders.
See the [Bulk Orders docs](/hwi-api/bulk-orders/) and [Special Order Webhooks docs](/hwi-api/webhooks/special-order-webhooks/) for details.
July 28, 2025
### [Device Replacement API Endpoint](#device-replacement-api-endpoint)
HWI APIDevicesImprovement
A new endpoint simplifies the device replacement process, providing a dedicated API pathway for requesting replacement physical devices — including Gateways — without creating a new HWI Device object or triggering a duplicate order flag.
**Workflow:** Create a replacement order via the endpoint specifying device, Gateway, or both → Tenovi dropships to the provided address → the original HWI Device record is maintained → if a replacement Gateway was requested, `hardware_uuid` is automatically updated on all corresponding devices and a Fulfillment Webhook is sent. Track all replacement orders via the Special Orders dashboard in the [Tenovi WebApp](https://app.tenovi.com/).
Note: warranty replacements must still be requested through the Tenovi Web App via a support ticket. See the [Replacing Devices docs](/hwi-api/devices/replacing-devices/).
June 26, 2025
### [Legacy Delivery Types Deprecated](#legacy-delivery-types-deprecated)
HWI APIFulfillmentSystem Update
The legacy “Priority” and “Shipping” order delivery types have been deprecated. All orders requiring proof-of-delivery must now use the `require_signature` flag in the Fulfillment Request object. Clients can still submit orders using the legacy names, but they will be shipped with default options (no proof-of-delivery) if the flag is not set.
April 15, 2025
### [New Fulfillment Webhook Events](#new-fulfillment-webhook-events)
HWI APIWebhooksFulfillmentImprovement
Fulfillment Webhooks now fire for three additional events to keep you better informed on dropshipment request status:
* **Client Action Required** — the request needs attention (e.g. invalid address or duplicate submission).
* **On Hold** — the request is temporarily on hold at Tenovi (e.g. device out of stock).
* **Ready to Ship** — the request has passed internal validation and is queued for fulfillment.
See the [Fulfillment Webhooks docs](/hwi-api/webhooks/fulfillment-webhooks/) for full event details.
March 20, 2025
### [Device Compatibility Validation for Supply Orders](#device-compatibility-validation-for-supply-orders)
ASR APISupplyNew Feature
When requesting a new supply order via the `request_supplies` endpoint, you may now include an optional `related_client_device_id` field (for HWI clients, this is the HWI Device ID). When included, Tenovi will validate that the requested supply is compatible with the corresponding device before processing the order.
October 7, 2024
### [Glucometer Strip Tracking for Cellular Glucometers](#glucometer-strip-tracking-for-cellular-glucometers)
ASR APIGlucometerImprovement
Clients on ASR plans can now track glucometer strip quantities and request replacement strips specifically for Tenovi Cellular Glucometers. Use the device IMEI (rather than Gateway ID) when retrieving or updating glucometer supply information or creating a new supply request. Gateway-connected glucometers can continue to use the corresponding Gateway ID.
September 26, 2024
### [Ship Gateway Only Flag](#ship-gateway-only-flag)
HWI APIDevicesFulfillmentNew Feature
A new `ship_gateway_only` flag has been added to the Fulfillment Request object on the `hwi-devices` endpoint. Use this flag when a patient already owns a Tenovi Gateway-compatible device but still needs a Gateway dropshipped. Only the Gateway cost is billed for these requests.
August 2, 2024
### [Webhook enabled\_by\_default Flag](#webhook-enabled-by-default-flag)
HWI APIWebhooksImprovement
Measurement Webhooks now support an `enabled_by_default` flag. When set to `false`, the webhook is added to your account without automatically receiving measurement data from all devices. Use the `measurement_webhook_id` Device Property to selectively enable the webhook for specific devices — useful for testing a new webhook with a small subset of devices before rolling it out broadly. The flag defaults to `true`.
July 15, 2024
### [API Access Restricted to Trusted Hosts](#api-access-restricted-to-trusted-hosts)
HWI APISecurityImprovement
Browser-based calls to the Tenovi API are now restricted to trusted hosts only.
May 21, 2024
### [Prior hardware\_uuid in Fulfillment Webhooks](#prior-hardware-uuid-in-fulfillment-webhooks)
HWI APIWebhooksFulfillmentImprovement
“Replaced” and “Unlinked” Fulfillment Webhooks now include the `hardware_uuid` for the *prior* device (e.g. the Gateway being replaced or unlinked) in the previously deprecated `device_id` field. The `hardware_uuid` field continues to carry the *current* hardware UUID (i.e. the replacement Gateway, or `null` if unlinked).
May 7, 2024
### [Per-Device Measurement Webhook Routing](#per-device-measurement-webhook-routing)
HWI APIWebhooksDevicesNew Feature
HWI clients can now route measurement data from a specific device to a single, user-selected Measurement Webhook instead of broadcasting to all webhooks. Set the `measurement_webhook_id` Device Property to the desired webhook ID to enable this, or set it to an empty string to revert to the default behavior.
You can also query all devices associated with a specific webhook using the `properties__key` and `properties__value` query parameters on the `hwi-devices` endpoint.
April 17, 2024
### [Gateway List & Info Endpoint Updates](#gateway-list-info-endpoint-updates)
HWI APIGatewaysNew Feature
Two updates to Gateway endpoints for HWI clients:
* **New `hwi-gateways` endpoint** — returns a paginated list of all Gateways associated with your account, including useful dates for sorting and filtering.
* **Updated `hwi-gateway-info` endpoint** — now includes explicit fields indicating when a Gateway was assigned to your account, when it was dropshipped (if applicable), and which devices (if any) are whitelisted to it.
April 11, 2024
### [Optional patient.external\_id & Email Support](#optional-patient-external-id-email-support)
HWI APIDevicesPatientsImprovement
When activating a new HWI Device with patient information, the `patient.external_id` field is now optional. You may also include a patient email address — it is not validated and is for reference purposes only, though Tenovi Tech Support may use it when resolving service requests.
January 11, 2024
### [ASR Supply Types Endpoint](#asr-supply-types-endpoint)
ASR APISupplyNew Feature
A new `asr-supply-types` endpoint is available for ASR clients, returning a list of valid supply names that can be used when ordering supplies via API. See the [ASR API reference](https://api2.tenovi.com/supply-redoc/#tag/asr-supply-types) for details.
October 11, 2023
### [Glucometer Supplies Endpoint & Supply Request Refactor](#glucometer-supplies-endpoint-supply-request-refactor)
ASR APIGlucometerSupplyNew FeatureImprovement
**New:** A Glucometer Supplies endpoint is now available for ASR clients to query the estimated number of glucometer strips remaining for a patient (based on strips shipped minus measurements taken), or to update this estimate manually. See the [ASR API reference](https://api2.tenovi.com/supply-redoc) for details.
**Improvement:** The “Request Supply” endpoint has been refactored to sit alongside all other ASR-specific endpoints. The original endpoint (`CLIENT_DOMAIN/devices/supply-requests/`) remains available temporarily for backwards compatibility, but clients should migrate to the new path (`CLIENT_DOMAIN/asr/supply-requests/`).
September 18, 2023
### [Array Webhooks, Signature Requests & API Improvements](#array-webhooks-signature-requests-api-improvements)
HWI APIWebhooksMeasurementsDevicesNew FeatureImprovement
**New features:**
* **Array-based Webhook POST** — Measurement Webhooks can now be configured to POST related measurements (e.g. blood pressure and pulse from a single BPM reading) as a single JSON array instead of individual requests.
* **Simplified Signature Confirmation** — Request delivery signature confirmation via a boolean field in the Fulfillment Request object instead of a separate device name (additional charges may apply).
**Improvements:**
* All timestamps in Webhook data are now standardized to `YYYY-MM-DDTHH:MM:SS.ssssssZ` format — please verify your Webhook integrations handle this correctly.
* The `hwi-devices` endpoint no longer requires a matching `sensor_code`; only the `device.name` field is required.
* A `webhook_responses` field has been added to the Measurements object, recording HTTP response codes for all webhooks that fired for a given measurement (comma-separated).
* HWI Webhooks are now enabled for all measurements, including those from RPM software-based accounts.
* The `hwi-device-types` endpoint now includes `image`, `up_front_cost`, and `shipping_cost` fields to support custom shop integrations.
# Device Overview
> A list of available Tenovi devices and the metrics they measure
This page provides detailed technical information for all of the devices Tenovi currently supports regarding how data is stored and transmitted, the types of measurement and metadata collected, and any configuration options available.
Note
The Metrics noted as “Non-Vital” in the tables on each device page are not counted towards the # of days with data in our RPM billing reports (i.e. these Metrics are not considered “physiologic parameters” under current Medicare guidelines).
Tenovi offers two main types of devices: **Gateway-Connected** devices, which use our proprietary Tenovi Gateway to automate the transfer of data from one or more devices while providing clear visual cues to patients to indicate if a reading has been taken for the current day, and **Direct-Cellular** devices, which send data directly to Tenovi’s servers. The preferred device type depends on several factors, so we strongly recommend you speak with your Business Development Rep to determine which devices best suit your specific needs.
Each of these devices can be ordered using [API calls](/hwi-api/devices/activating-devices/), via the [Tenovi Web App](https://app.tenovi.com), or by speaking with your Business Development Rep.
## Gateway-Connected Devices
[Section titled “Gateway-Connected Devices”](#gateway-connected-devices)
[Tenovi BPM ](/devices/tenovi-bpm)Blood pressure and heart rate monitor
[Tenovi Pulse Ox (POx) ](/devices/tenovi-pulse-ox)Blood oxygen saturation and pulse oximeter
[Tenovi Glucometer (BGM) ](/devices/tenovi-glucometer)Blood glucose meter
[Tenovi Scale ](/devices/tenovi-scale)Body weight scale
[Tenovi Bariatric Scale ](/devices/tenovi-bariatric-scale)High-capacity body weight scale
[Tenovi Thermometer ](/devices/tenovi-thermometer)Infrared body temperature thermometer
[Tenovi Watch ](/devices/tenovi-watch)Activity, steps, sleep, and heart rate tracker
[Tenovi Peak Flow Meter (PFM) ](/devices/tenovi-peak-flow-meter)Peak expiratory flow and FEV respiratory monitor
[Tenovi Pillbox ](/devices/tenovi-pillbox)Smart pillbox for medication adherence tracking
[Tenovi Fetal Doppler ](/devices/tenovi-fetal-doppler)Fetal heart rate monitor
[A\&D BPM ](/devices/and-bpm)A\&D Medical blood pressure and heart rate monitor
[A\&D Pulse Ox (POx) ](/devices/and-pulse-ox)A\&D Medical blood oxygen and perfusion index monitor
[A\&D Scale ](/devices/and-scale)A\&D Medical body weight scale
[A\&D XL Scale ](/devices/and-xl-scale)A\&D Medical wide-base body weight scale
[Hailie Sensor ](/devices/hailie-sensor)Adherium smart inhaler medication adherence sensor
[Nonin Pulse Ox (POx) ](/devices/nonin-pulse-ox)Nonin blood oxygen and perfusion index monitor
[Omron BPM / Omron Wrist BPM ](/devices/omron-bpm)Omron blood pressure and heart rate monitor
[PatchRx PatchCap ](/devices/patchrx-patchcap)Smart medication cap for adherence tracking
[Trividia Glucometer ](/devices/trividia-glucometer)Trividia blood glucose meter
[Welch Allyn 1500 Series BPM ](/devices/welch-allyn-1500-bpm)Welch Allyn 1500 Series blood pressure monitor
[Welch Allyn 1700 Series BPM ](/devices/welch-allyn-1700-bpm)Welch Allyn 1700 Series blood pressure monitor
[Welch Allyn Scale ](/devices/welch-allyn-scale)Welch Allyn body weight scale
[XK Essence New ](/devices/xk-essence)Xandar Kardian contactless heart rate, respiratory rate, and sleep monitor
## Direct-Cellular Devices
[Section titled “Direct-Cellular Devices”](#direct-cellular-devices)
[Tenovi Cellular BPM ](/devices/tenovi-cellular-bpm)Cellular blood pressure and heart rate monitor
[Tenovi Cellular Glucometer (BGM) ](/devices/tenovi-cellular-glucometer)Cellular blood glucose meter
[Tenovi Cellular Scale ](/devices/tenovi-cellular-scale)Cellular body weight scale
[Tenovi Cellular Pulse Ox (POx) ](/devices/tenovi-cellular-pulse-ox)Cellular blood oxygen and perfusion index monitor
## Coming Soon
[Section titled “Coming Soon”](#coming-soon)
[Tenovi Care Band ](/devices/tenovi-care-band)Beacon proximity tracking device — coming soon
# A&D BPM
> A&D blood pressure monitor data, metrics, and configuration
[← Back to Device Overview](/devices)
Visualization Guidance
For guidance on visualizing data from this device, see [Blood Pressure Monitors](/visualization-guides/blood-pressure-monitors).
* **Data Transfer:** Via Tenovi Gateway, whenever a reading is taken
* **Sensor Code:** 35
* **On-Device Measurement Storage:** Yes – measurements taken outside of range of the Tenovi Gateway will be saved locally and uploaded the next time the Gateway is in range.
* **Supports tracking multiple devices per gateway via Sensor IDs:** No – only one device with this Sensor Code can be assigned to a gateway at one time.
Note
The Metrics noted as “Non-Vital” in the tables on each device page are not counted towards the # of days with data in our RPM billing reports (i.e. these Metrics are not considered “physiologic parameters” under current Medicare guidelines).
## Metrics
[Section titled “Metrics”](#metrics)
| Name | API Format | Value 1 | Value 2 | Is Vital?\* |
| ------------------- | -------------------- | ------------------------------------------------------------------ | -------------------- | ----------- |
| Blood Pressure | blood\_pressure | Systolic BP (mmHG) | Diastolic BPM (mmHG) | ✅ |
| Heart Rate | pulse | Pulse (beats/minute) | N/A | ✅ |
| Irregular Heartbeat | irregular\_heartbeat | 1 (measurement is only sent if an irregular heartbeat is detected) | N/A | ✅ |
| Battery Level | battery\_percentage | Battery Life (%) | N/A | ❌ |
## Additional Data Included in Filter Params
[Section titled “Additional Data Included in Filter Params”](#additional-data-included-in-filter-params)
| Key | Possible Values | Description |
| ------------------ | -------------------- | ---------------------------------------------------------------------------------------------------------------------------------------------------------------------------------- |
| measurement\_index | Any Positive Integer | An index value that can be used to identify if a measurement with the same timestamp were captured in the same physical reading. Not globally unique across all physical readings. |
## Additional Parameters That Can be Set Via Device Properties
[Section titled “Additional Parameters That Can be Set Via Device Properties”](#additional-parameters-that-can-be-set-via-device-properties)
| Key | Possible Values | Description |
| ------------------------ | --------------- | --------------------------------------------------------------------------------------------------------------------------------------------------------------------------------- |
| measurement\_webhook\_id | Webhook UUID | Set this property to configure a Device to [only send measurement data to a single Webhook](/hwi-api/webhooks/device-properties-with-webhooks/) (specified by that Webhook’s ID). |
## Downloads & Device Support
[Section titled “Downloads & Device Support”](#downloads--device-support)
| Device | Resources |
| ----------------------------------- | -------------------------------------------------------------------------------------------------------------------------------------------------------------------- |
| A\&D Medical Blood Pressure Monitor | [Quick Start Guide](https://www.tenovi.com/support-download/ad-bpm/quick-start-guide/) \| [User Manual](https://www.tenovi.com/support-download/ad-bpm/user-manual/) |
# A&D Pulse Ox (POx)
> A&D pulse oximeter data, metrics, and configuration
[← Back to Device Overview](/devices)
* **Data Transfer:** Via Tenovi Gateway, whenever a reading is taken
* **Sensor Code:** 36
* **On-Device Measurement Storage:** Yes – measurements taken outside of range of the Tenovi Gateway will be saved locally and uploaded the next time the Gateway is in range.
* **Supports tracking multiple devices per gateway via Sensor IDs:** No – only one device with this Sensor Code can be assigned to a gateway at one time.
Note
The Metrics noted as “Non-Vital” in the tables on each device page are not counted towards the # of days with data in our RPM billing reports (i.e. these Metrics are not considered “physiologic parameters” under current Medicare guidelines).
## Metrics
[Section titled “Metrics”](#metrics)
| Name | API Format | Value 1 | Value 2 | Is Vital?\* |
| --------------- | ---------------- | --------------------- | ------------------------ | ----------- |
| Blood Oxygen | spO2 | Oxygen Saturation (%) | Standard Deviation (N/A) | ✅ |
| Heart Rate | pulse | Pulse (beats/minute) | Standard Deviation (N/A) | ✅ |
| Perfusion Index | perfusion\_index | Perfusion Index (%) | Standard Deviation (N/A) | ✅ |
## Additional Data Included in Filter Params
[Section titled “Additional Data Included in Filter Params”](#additional-data-included-in-filter-params)
| Key | Possible Values | Description |
| ------------------ | -------------------- | --------------------------------------------------------------------------------------------------------------------------------------------------------------------------------------------------------- |
| measurement\_index | Any Positive Integer | An index value that can be used to identify if a Blood Oxygen and Pulse measurement with the same timestamp were captured in the same physical reading. Not globally unique across all physical readings. |
## Additional Parameters That Can be Set Via Device Properties
[Section titled “Additional Parameters That Can be Set Via Device Properties”](#additional-parameters-that-can-be-set-via-device-properties)
| Key | Possible Values | Description |
| ------------------------ | --------------- | --------------------------------------------------------------------------------------------------------------------------------------------------------------------------------- |
| measurement\_webhook\_id | Webhook UUID | Set this property to configure a Device to [only send measurement data to a single Webhook](/hwi-api/webhooks/device-properties-with-webhooks/) (specified by that Webhook’s ID). |
## Downloads & Device Support
[Section titled “Downloads & Device Support”](#downloads--device-support)
| Device | Resources |
| --------------------------- | ------------------------------------------------------------------------------------------------------------------------------------------------------------------------------------------------------------------------------------------------------------------------ |
| A\&D Medical Pulse Oximeter | [Quick Start Guide](https://www.tenovi.com/support-download/ad-pulse-oximeter/quick-start-guide/) \| [User Manual](https://www.tenovi.com/support-download/ad-pulse-oximeter/user-manual/) \| [Device Support](https://www.tenovi.com/support/ad-pulse-oximeter-device/) |
# A&D Scale
> A&D scale data, metrics, and configuration
[← Back to Device Overview](/devices)
* **Data Transfer:** Via Tenovi Gateway, whenever a reading is taken.
* **Sensor Code:** 34
* **On-Device Measurement Storage:** Yes – measurements taken outside of range of the Tenovi Gateway will be saved locally and uploaded the next time the Gateway is in range.
* **Supports tracking multiple devices per gateway via Sensor IDs:** No – only one device with this Sensor Code can be assigned to a gateway at one time.
Note
The Metrics noted as “Non-Vital” in the tables on each device page are not counted towards the # of days with data in our RPM billing reports (i.e. these Metrics are not considered “physiologic parameters” under current Medicare guidelines).
## Metrics
[Section titled “Metrics”](#metrics)
| Name | API Format | Value 1 | Value 2 | Is Vital?\* |
| ------------- | ------------------- | --------------------- | ------- | ----------- |
| Weight | weight | Weight (in US pounds) | N/A | ✅ |
| Battery Level | battery\_percentage | Battery Life (%) | N/A | ❌ |
## Additional Parameters That Can be Set Via Device Properties
[Section titled “Additional Parameters That Can be Set Via Device Properties”](#additional-parameters-that-can-be-set-via-device-properties)
| Key | Possible Values | Description |
| ------------------------ | --------------- | --------------------------------------------------------------------------------------------------------------------------------------------------------------------------------- |
| measurement\_webhook\_id | Webhook UUID | Set this property to configure a Device to [only send measurement data to a single Webhook](/hwi-api/webhooks/device-properties-with-webhooks/) (specified by that Webhook’s ID). |
## Downloads & Device Support
[Section titled “Downloads & Device Support”](#downloads--device-support)
| Device | Resources |
| ------------------ | ------------------------------------------------------------------------------------------------------------------------------------------------------------------------ |
| A\&D Medical Scale | [Quick Start Guide](https://www.tenovi.com/support-download/ad-scale/quick-start-guide/) \| [User Manual](https://www.tenovi.com/support-download/ad-scale/user-manual/) |
# A&D XL Scale
> A&D XL scale data, metrics, and configuration
[← Back to Device Overview](/devices)
* **Data Transfer:** Via Tenovi Gateway, whenever a reading is taken.
* **Sensor Code:** 33
* **On-Device Measurement Storage:** Yes – measurements taken outside of range of the Tenovi Gateway will be saved locally and uploaded the next time the Gateway is in range.
* **Supports tracking multiple devices per gateway via Sensor IDs:** No – only one device with this Sensor Code can be assigned to a gateway at one time.
Note
The Metrics noted as “Non-Vital” in the tables on each device page are not counted towards the # of days with data in our RPM billing reports (i.e. these Metrics are not considered “physiologic parameters” under current Medicare guidelines).
## Metrics
[Section titled “Metrics”](#metrics)
| Name | API Format | Value 1 | Value 2 | Is Vital?\* |
| ------------- | ------------------- | --------------------- | ------- | ----------- |
| Weight | weight | Weight (in US pounds) | N/A | ✅ |
| Battery Level | battery\_percentage | Battery Life (%) | N/A | ❌ |
## Additional Parameters That Can be Set Via Device Properties
[Section titled “Additional Parameters That Can be Set Via Device Properties”](#additional-parameters-that-can-be-set-via-device-properties)
| Key | Possible Values | Description |
| ------------------------ | --------------- | --------------------------------------------------------------------------------------------------------------------------------------------------------------------------------- |
| measurement\_webhook\_id | Webhook UUID | Set this property to configure a Device to [only send measurement data to a single Webhook](/hwi-api/webhooks/device-properties-with-webhooks/) (specified by that Webhook’s ID). |
## Downloads & Device Support
[Section titled “Downloads & Device Support”](#downloads--device-support)
| Device | Resources |
| ---------------------------- | -------------------------------------------------------------------------------------------------------------------------------------------------------------------------------------------- |
| A\&D Medical Wide Base Scale | [Quick Start Guide](https://www.tenovi.com/support-download/ad-wide-base-scale/quick-start-guide/) \| [User Manual](https://www.tenovi.com/support-download/ad-wide-base-scale/user-manual/) |
# Hailie Sensor
> Hailie inhaler sensor data, metrics, and configuration
[← Back to Device Overview](/devices)
* **Data Transfer:** Via Tenovi Gateway, whenever a reading is taken
* **Sensor Code:** 25
* **On-Device Measurement Storage:** Yes – measurements taken outside of range of the Tenovi Gateway will be saved locally and uploaded the next time the Gateway is in range.
* **Supports tracking multiple devices per gateway via Sensor IDs:** Yes (required) – the Hailie Sensor’s Serial No must be included as the `sensor_id` when activating new devices. Measurements will be linked to the Client Devices with the Serial No of the physical device used.
Note
The Metrics noted as “Non-Vital” in the tables on each device page are not counted towards the # of days with data in our RPM billing reports (i.e. these Metrics are not considered “physiologic parameters” under current Medicare guidelines).
## Metrics
[Section titled “Metrics”](#metrics)
| Name | API Format | Value 1 | Value 2 | Is Vital?\* |
| -------------------------------- | ----------------------------------- | ----------------------------- | ------------------- | ----------- |
| Hailie Medication Event | hailie\_medication\_event | 1 | N/A | ✅ |
| Low Battery Event | low\_battery\_event | 1 or 0 (critical/low) | N/A | ❌ |
| Hailie Turbohaler Rotation Event | hailie\_turbohaler\_rotation\_event | 1 or 0 (click/non-click) | N/A | ❌ |
| Hailie Respiratory Flow Log | hailie\_respiratory\_flow\_log | Max Flow Rate (L/M) | Avg Flow Rate (L/M) | ✅ |
| Hailie Respiratory Timing Log | hailie\_respiratory\_timing\_log | Duration (s) | Time to Peak (s) | ✅ |
| Hailie Shake Detection Event | hailie\_shake\_detection\_event | 1 or 0 (valid shake or not) | Shake Duration (s) | ❌ |
| Hailie Inhaler Installed Event | hailie\_inhaler\_installed\_event | 1 or 0 (installed or removed) | N/A | ❌ |
| Hailie Medication Cap Event | hailie\_medication\_cap\_event | 1 or 0 (cap on/cap off) | N/A | ❌ |
## Additional Data Included in Filter Params
[Section titled “Additional Data Included in Filter Params”](#additional-data-included-in-filter-params)
| Key | Possible Values | Description |
| ------------------ | ----------------------------------------------------------------------------------------------- | ------------------------------------------------------------------------------------------------------------------------------------------------------------------------------------------------------------------------------------------------------------------------------------------------------------------------------------------------------------------------------------------- |
| angle | NA0 to 22.5 22.5 to 45 45 to 67.5 67.5 to 90 90 to 112.5 112.5 to 135 135 to 157.5 157.5 to 180 | The angle the device was in when the medication log was stored |
| flags | key-value pairs | Variable vendor-defined flags (depending on metric type):hailie\_respiratory\_flow\_log:inhalation\_valid: 0/1flow\_error: 0/1exhalation\_detected: 0/1hailie\_shake\_detection\_event:shake\_intensity: positive integerhailie\_medication\_event or halie\_turbohaler\_rotation\_event:respiration\_enabled: 0/1orientation\_enabled: 0/1orientation\_stored: 0/1orientation\_valid: 0/1 |
| serial\_number | 6 to 8 alphanumeric characters | Serial number of the sensor associated with the event |
| device\_log\_index | Any Positive Integer | An index value provided by the Hailie Sensor that can be used to identify if a reading is unique or a duplicate of a previous reading. |
## Additional Parameters That Can be Set Via Device Properties
[Section titled “Additional Parameters That Can be Set Via Device Properties”](#additional-parameters-that-can-be-set-via-device-properties)
| Key | Possible Values | Description |
| ------------------------ | --------------- | --------------------------------------------------------------------------------------------------------------------------------------------------------------------------------- |
| measurement\_webhook\_id | Webhook UUID | Set this property to configure a Device to [only send measurement data to a single Webhook](/hwi-api/webhooks/device-properties-with-webhooks/) (specified by that Webhook’s ID). |
## Downloads & Device Support
[Section titled “Downloads & Device Support”](#downloads--device-support)
| Device | Resources |
| ------------------------------------------------ | ------------------------------------------------------------------------------------------------------------------------------------------------------------------------------------------------------------------------------------------------------------------------------ |
| Adherium Hailie® Advair Diskus/Flovent Diskus | [Quick Start Guide](https://www.tenovi.com/support-download/hailie-diskus/quick-start-guide/) |
| Adherium Hailie® Advair Flovent HFA (Next Gen) | [Quick Start Guide](https://www.tenovi.com/support-download/hailie-advair-flovent/quick-start-guide/) \| [Device Support](https://www.tenovi.com/support/adherium-symbicort-hailie-sensor/) |
| Adherium Hailie® Bevespi Aerosphere | [Quick Start Guide](https://www.tenovi.com/support-download/hailie-bevespi-aerosphere/quick-start-guide/) |
| Adherium Hailie® Ellipta (Next Gen) | [Quick Start Guide](https://www.tenovi.com/support-download/hailie-ellipta/quick-start-guide/) \| [User Manual](https://www.tenovi.com/support-download/hailie-ellipta/user-manual/) \| [Device Support](https://www.tenovi.com/support/adherium-ellipta-hailie-sensor/) |
| Adherium Hailie® Handihaler | [Quick Start Guide](https://www.tenovi.com/support-download/hailie-handihaler/quick-start-guide/) |
| Adherium Hailie® Symbicort HFA (Next Gen) | [Quick Start Guide](https://www.tenovi.com/support-download/hailie-symbicort/quick-start-guide/) \| [User Manual](https://www.tenovi.com/support-download/hailie-symbicort/user-manual/) \| [Device Support](https://www.tenovi.com/support/adherium-symbicort-hailie-sensor/) |
| Adherium Hailie® Ventolin HFA (Next Gen) | [Quick Start Guide](https://www.tenovi.com/support-download/hailie-ventolin/quick-start-guide/) \| [Device Support](https://www.tenovi.com/support/adherium-symbicort-hailie-sensor/) |
| Adherium Hailie® for Teva ProAir® HFA (Next Gen) | [Quick Start Guide](https://www.tenovi.com/support-download/hailie-teva-proair/quick-start-guide/) \| [Device Support](https://www.tenovi.com/support/adherium-symbicort-hailie-sensor/) |
# Nonin Pulse Ox (POx)
> Nonin pulse oximeter data, metrics, and configuration
[← Back to Device Overview](/devices)
* **Data Transfer:** Via Tenovi Gateway, whenever a reading is taken
* **Sensor Code:** 24
* **On-Device Measurement Storage:** Yes – measurements taken outside of range of the Tenovi Gateway will be saved locally and uploaded the next time the Gateway is in range.
* **Supports tracking multiple devices per gateway via Sensor IDs:** No – only one device with this Sensor Code can be assigned to a gateway at one time.
Note
The Metrics noted as “Non-Vital” in the tables on each device page are not counted towards the # of days with data in our RPM billing reports (i.e. these Metrics are not considered “physiologic parameters” under current Medicare guidelines).
## Metrics
[Section titled “Metrics”](#metrics)
| Name | API Format | Value 1 | Value 2 | Is Vital?\* |
| --------------- | ------------------- | --------------------- | ------- | ----------- |
| Blood Oxygen | spO2 | Oxygen Saturation (%) | N/A | ✅ |
| Heart Rate | pulse | Pulse (beats/minute) | N/A | ✅ |
| Perfusion Index | perfusion\_index | Perfusion Index (%) | N/A | ✅ |
| Battery Level | battery\_percentage | Battery Life (%) | N/A | ❌ |
## Additional Data Included in Filter Params
[Section titled “Additional Data Included in Filter Params”](#additional-data-included-in-filter-params)
| Key | Possible Values | Description |
| ------------------ | -------------------- | --------------------------------------------------------------------------------------------------------------------------------------------------------------------------------------------------------- |
| measurement\_index | Any Positive Integer | An index value that can be used to identify if a Blood Oxygen and Pulse measurement with the same timestamp were captured in the same physical reading. Not globally unique across all physical readings. |
## Additional Parameters That Can be Set Via Device Properties
[Section titled “Additional Parameters That Can be Set Via Device Properties”](#additional-parameters-that-can-be-set-via-device-properties)
| Key | Possible Values | Description |
| ------------------------ | --------------- | --------------------------------------------------------------------------------------------------------------------------------------------------------------------------------- |
| measurement\_webhook\_id | Webhook UUID | Set this property to configure a Device to [only send measurement data to a single Webhook](/hwi-api/webhooks/device-properties-with-webhooks/) (specified by that Webhook’s ID). |
## Downloads & Device Support
[Section titled “Downloads & Device Support”](#downloads--device-support)
| Device | Resources |
| -------------------- | ------------------------------------------------------------------------------------------------------------------------------------------------------------------------------------------------ |
| Nonin Pulse Oximeter | [Quick Start Guide](https://www.tenovi.com/support-download/nonin-pulse-oximeter/quick-start-guide/) \| [User Manual](https://www.tenovi.com/support-download/nonin-pulse-oximeter/user-manual/) |
# Omron BPM / Omron Wrist BPM
> Omron blood pressure monitor data, metrics, and configuration
[← Back to Device Overview](/devices)
Visualization Guidance
For guidance on visualizing data from this device, see [Blood Pressure Monitors](/visualization-guides/blood-pressure-monitors).
* **Data Transfer:** Via Tenovi Gateway, whenever a reading is taken
* **Sensor Code:** 10
* **On-Device Measurement Storage:** Yes – measurements taken outside of range of the Tenovi Gateway will be saved locally and uploaded the next time the Gateway is in range.
* **Supports tracking multiple devices per gateway via Sensor IDs:** No – only one device with this Sensor Code can be assigned to a gateway at one time.
Note
The Metrics noted as “Non-Vital” in the tables on each device page are not counted towards the # of days with data in our RPM billing reports (i.e. these Metrics are not considered “physiologic parameters” under current Medicare guidelines).
## Metrics
[Section titled “Metrics”](#metrics)
| Name | API Format | Value 1 | Value 2 | Is Vital?\* |
| -------------- | ------------------- | -------------------- | -------------------- | ----------- |
| Blood Pressure | blood\_pressure | Systolic BP (mmHG) | Diastolic BPM (mmHG) | ✅ |
| Heart Rate | pulse | Pulse (beats/minute) | N/A | ✅ |
| Battery Level | battery\_percentage | Battery Life (%) | N/A | ❌ |
## Additional Data Included in Filter Params
[Section titled “Additional Data Included in Filter Params”](#additional-data-included-in-filter-params)
| Key | Possible Values | Description |
| ------------------ | -------------------- | ---------------------------------------------------------------------------------------------------------------------------------------------------------------------------------- |
| measurement\_index | Any Positive Integer | An index value that can be used to identify if a measurement with the same timestamp were captured in the same physical reading. Not globally unique across all physical readings. |
## Additional Parameters That Can be Set Via Device Properties
[Section titled “Additional Parameters That Can be Set Via Device Properties”](#additional-parameters-that-can-be-set-via-device-properties)
| Key | Possible Values | Description |
| ------------------------ | --------------- | --------------------------------------------------------------------------------------------------------------------------------------------------------------------------------- |
| measurement\_webhook\_id | Webhook UUID | Set this property to configure a Device to [only send measurement data to a single Webhook](/hwi-api/webhooks/device-properties-with-webhooks/) (specified by that Webhook’s ID). |
## Downloads & Device Support
[Section titled “Downloads & Device Support”](#downloads--device-support)
| Device | Resources |
| ------------------------------------- | ------------------------------------------------------------------------------------------------------------------------------------------------------------------------------------------------------------------------------------------------------------------------------ |
| OMRON 5 Series Blood Pressure Monitor | [Quick Start Guide](https://www.tenovi.com/support-download/omron-bpm-series-5/quick-start-guide/) \| [User Manual](https://www.tenovi.com/support-download/omron-bpm-series-5/user-manual/) |
| OMRON Wrist Blood Pressure Monitor | [Quick Start Guide](https://www.tenovi.com/support-download/omron-wrist-bpm/quick-start-guide/) \| [User Manual](https://www.tenovi.com/support-download/omron-wrist-bpm/user-manual/) \| [Device Support](https://www.tenovi.com/support/omron-wrist-blood-pressure-monitor/) |
# PatchRx PatchCap
> PatchRx PatchCap medication adherence data, metrics, and configuration
[← Back to Device Overview](/devices)
* **Data Transfer:** Via Tenovi Gateway, once every 12 hours
* **Sensor Code:** 27
* **On-Device Measurement Storage:** Yes – measurements taken outside the range of the Tenovi Gateway will be saved locally and uploaded the next time the Gateway is in range.
* **Supports tracking multiple devices per gateway via Sensor IDs:** Yes – multiple devices with different “Sensor Codes” can be assigned to a gateway at one time
Note
The Metrics noted as “Non-Vital” in the tables on each device page are not counted towards the # of days with data in our RPM billing reports (i.e. these Metrics are not considered “physiologic parameters” under current Medicare guidelines).
## Metrics
[Section titled “Metrics”](#metrics)
Note
Data Type\* - Status Metrics are not counted towards the # of days with data in our RTM billing reports.\
No Measurement Event\*\* - This event is triggered if the PatchCap is not used for a 24 hour period
| Name | API Format | Value 1 | Value 2 | Data Type\* |
| ---------------------------- | ------------------------------ | ------------------------------- | ------- | ----------- |
| PatchCap Open or Close Event | patchcap\_open\_close\_event | 1 or 0 (open/close) | N/A | Adherence |
| No Measurement Event\*\* | no\_measurement\_event | 1 | N/A | Adherence |
| Low Battery Event | low\_battery\_event | 1 | N/A | Status |
| PatchCap Time Updated Event | patchcap\_time\_updated\_event | 1 | N/A | Status |
| PatchCap Bluetooth Event | patchcap\_bluetooth\_event | 1 or 0 (connected/disconnected) | N/A | Status |
## Additional Parameters That Can be Set Via Device Properties
[Section titled “Additional Parameters That Can be Set Via Device Properties”](#additional-parameters-that-can-be-set-via-device-properties)
| Key | Possible Values | Description |
| ------------------------ | --------------- | --------------------------------------------------------------------------------------------------------------------------------------------------------------------------------- |
| measurement\_webhook\_id | Webhook UUID | Set this property to configure a Device to [only send measurement data to a single Webhook](/hwi-api/webhooks/device-properties-with-webhooks/) (specified by that Webhook’s ID). |
## Downloads & Device Support
[Section titled “Downloads & Device Support”](#downloads--device-support)
| Device | Resources |
| ---------------- | ---------------------------------------------------------------------------------------- |
| PatchRx PatchCap | [Quick Start Guide](https://www.tenovi.com/support-download/patchcap/quick-start-guide/) |
# Tenovi Bariatric Scale
> Bariatric scale data, metrics, and configuration
[← Back to Device Overview](/devices)
* **Data Transfer:** Via Tenovi Gateway, whenever a reading is taken.
* **Sensor Code:** 13
* **On-Device Measurement Storage:** No – measurements taken outside of range of the Tenovi Gateway will NOT be saved locally.
* **Supports tracking multiple devices per gateway via Sensor IDs:** No – only one device with this Sensor Code can be assigned to a gateway at one time.
Note
The Metrics noted as “Non-Vital” in the tables on each device page are not counted towards the # of days with data in our RPM billing reports (i.e. these Metrics are not considered “physiologic parameters” under current Medicare guidelines).
## Metrics
[Section titled “Metrics”](#metrics)
| Name | API Format | Value 1 | Value 2 | Is Vital?\* |
| ------------- | ------------------- | --------------------- | ------- | ----------- |
| Weight | weight | Weight (in US pounds) | N/A | ✅ |
| Battery Level | battery\_percentage | Battery Life (%) | N/A | ❌ |
## Additional Parameters That Can be Set Via Device Properties
[Section titled “Additional Parameters That Can be Set Via Device Properties”](#additional-parameters-that-can-be-set-via-device-properties)
| Key | Possible Values | Description |
| ------------------------ | --------------- | --------------------------------------------------------------------------------------------------------------------------------------------------------------------------------- |
| measurement\_webhook\_id | Webhook UUID | Set this property to configure a Device to [only send measurement data to a single Webhook](/hwi-api/webhooks/device-properties-with-webhooks/) (specified by that Webhook’s ID). |
## Downloads & Device Support
[Section titled “Downloads & Device Support”](#downloads--device-support)
| Device | Resources |
| ---------------------------- | ---------------------------------------------------------------------------------------------------------------------------------------------------------------------------------------------------------- |
| Tenovi Bariatric Scale Gen 1 | [Quick Start Guide](https://www.tenovi.com/support-download/tenovi-bariatric-scale-v1/quick-start-guide/) \| [User Manual](https://www.tenovi.com/support-download/tenovi-bariatric-scale-v1/user-manual/) |
| Tenovi Bariatric Scale Gen 2 | [Quick Start Guide](https://www.tenovi.com/support-download/tenovi-bariatric-scale-v2/quick-start-guide/) \| [User Manual](https://www.tenovi.com/support-download/tenovi-bariatric-scale-v2/user-manual/) |
# Tenovi BPM
> Blood pressure monitor data, metrics, and configuration
[← Back to Device Overview](/devices)
Visualization Guidance
For guidance on visualizing data from this device, see [Blood Pressure Monitors](/visualization-guides/blood-pressure-monitors).
* **Data Transfer:** Via Tenovi Gateway, whenever a reading is taken
* **Sensor Code:** 10
* **On-Device Measurement Storage:** Yes – measurements taken outside of range of the Tenovi Gateway will be saved locally and uploaded the next time the Gateway is in range.
* **Supports tracking multiple devices per gateway via Sensor IDs:** No – only one device with this Sensor Code can be assigned to a gateway at one time.
* **Other Notes:** Multiple cuff sizes available; selected via Device Name.
* `Tenovi BPM - S`: 16 - 36cm
* `Tenovi BPM - Wide Range`: 22 - 45cm
* `Tenovi BPM - XL`: 40 - 52cm
Note
The Metrics noted as “Non-Vital” in the tables on each device page are not counted towards the # of days with data in our RPM billing reports (i.e. these Metrics are not considered “physiologic parameters” under current Medicare guidelines).
## Metrics
[Section titled “Metrics”](#metrics)
| Name | API Format | Value 1 | Value 2 | Vital |
| ------------------- | -------------------- | ------------------------------------------------------------------ | -------------------- | ----- |
| Blood Pressure | blood\_pressure | Systolic BP (mmHG) | Diastolic BPM (mmHG) | ✅ |
| Heart Rate | pulse | Pulse (beats/minute) | N/A | ✅ |
| Irregular Heartbeat | irregular\_heartbeat | 1 (measurement is only sent if an irregular heartbeat is detected) | N/A | ✅ |
| Battery Level | battery\_percentage | Battery Life (%) | N/A | ❌ |
## Additional Data Included in Filter Params
[Section titled “Additional Data Included in Filter Params”](#additional-data-included-in-filter-params)
| Key | Possible Values | Description |
| ------------------ | -------------------- | ---------------------------------------------------------------------------------------------------------------------------------------------------------------------------------- |
| measurement\_index | Any Positive Integer | An index value that can be used to identify if a measurement with the same timestamp were captured in the same physical reading. Not globally unique across all physical readings. |
## Additional Parameters That Can be Set Via Device Properties
[Section titled “Additional Parameters That Can be Set Via Device Properties”](#additional-parameters-that-can-be-set-via-device-properties)
| Key | Possible Values | Description |
| ------------------------ | --------------- | --------------------------------------------------------------------------------------------------------------------------------------------------------------------------------- |
| measurement\_webhook\_id | Webhook UUID | Set this property to configure a Device to [only send measurement data to a single Webhook](/hwi-api/webhooks/device-properties-with-webhooks/) (specified by that Webhook’s ID). |
## Downloads & Device Support
[Section titled “Downloads & Device Support”](#downloads--device-support)
| Device | Resources |
| ------------------------ | ---------------------------------------------------------------------------------------------------------------------------------------------------------------------------------------------------------------------------------------------------------------------------------------------------------------------------- |
| Tenovi BPM Gen 1 & Gen 2 | [Quick Start Guide](https://www.tenovi.com/support-download/tenovi-bpm/quick-start-guide/) \| [User Manual](https://www.tenovi.com/support-download/tenovi-bpm/user-manual/) \| [Device Support](https://www.tenovi.com/support/tenovi-bpm-device/) |
| Tenovi BPM Gen 3 | [Quick Start Guide](https://www.tenovi.com/support-download/tenovi-blood-pressure-monitor-g3/quick-start-guide/) \| [User Manual](https://www.tenovi.com/support-download/tenovi-blood-pressure-monitor-g3/user-manual/) \| [Device Support](https://www.tenovi.com/support/tenovi-blood-pressure-bpm-gen-3-device-support/) |
# Tenovi Care Band
> Beacon proximity tracking device — coming soon
[← Back to Device Overview](/devices)
* **Data Transfer:** Via Tenovi Gateway, not transmitted immediately, only transmitted with another device metrics
* **Sensor Code:** 44
* **On-Device Measurement Storage:** No – measurements taken outside of range of the Tenovi Gateway will NOT be saved locally.
* **Supports tracking multiple devices per gateway via Sensor IDs:** No – only one device with this Sensor Code can be assigned to a gateway at one time.
Note
The Metrics noted as “Non-Vital” in the tables on each device page are not counted towards the # of days with data in our RPM billing reports (i.e. these Metrics are not considered “physiologic parameters” under current Medicare guidelines).
## Metrics
[Section titled “Metrics”](#metrics)
| Name | API Format | Value 1 | Value 2 | Is Vital?\* |
| ---------------------- | ------------------------ | ------------------------------------------------------------------------------------------------------- | ------- | ----------- |
| Beacon Proximity Event | beacon\_proximity\_event | 1 for when beacon enters proximity 0 for when it leaves proximity | N/A | ❌ |
| Beacon ID Event | beacon\_id\_event | 1 for when a new beacon ID is associated with the gateway 0 for when the ID is removed from the gateway | N/A | ❌ |
## Additional Data Included in Filter Params
[Section titled “Additional Data Included in Filter Params”](#additional-data-included-in-filter-params)
| Key | Possible Values | Description |
| ---------- | ------------------- | ------------------------------------------- |
| beacon\_id | 12 character string | The MAC address of the beacon being tracked |
## Additional Parameters That Can be Set Via Device Properties
[Section titled “Additional Parameters That Can be Set Via Device Properties”](#additional-parameters-that-can-be-set-via-device-properties)
| Key | Possible Values | Description |
| ------------------------ | --------------- | --------------------------------------------------------------------------------------------------------------------------------------------------------------------------------- |
| measurement\_webhook\_id | Webhook UUID | Set this property to configure a Device to [only send measurement data to a single Webhook](/hwi-api/webhooks/device-properties-with-webhooks/) (specified by that Webhook’s ID). |
# Tenovi Cellular BPM
> Cellular blood pressure monitor data, metrics, and configuration
[← Back to Device Overview](/devices)
Visualization Guidance
For guidance on visualizing data from this device, see [Blood Pressure Monitors](/visualization-guides/blood-pressure-monitors).
* **Data Transfer:** Via Direct Cellular Connection, whenever a reading is taken
* **Sensor Code:** N/A
* **On-Device Measurement Storage:** Yes – measurements taken outside of range of a cellular network will be saved locally and uploaded the next time a cellular connection is established.
* **Supports tracking multiple devices per gateway via Sensor IDs:** N/A
Note
The Metrics noted as “Non-Vital” in the tables on each device page are not counted towards the # of days with data in our RPM billing reports (i.e. these Metrics are not considered “physiologic parameters” under current Medicare guidelines).
## Metrics
[Section titled “Metrics”](#metrics)
| Name | API Format | Value 1 | Value 2 | Is Vital?\* |
| ------------------------ | -------------------- | ------------------ | -------------------- | ----------- |
| Blood Pressure | blood\_pressure | Systolic BP (mmHG) | Diastolic BPM (mmHG) | ✅ |
| Heart Rate | pulse | Pulse (beats/min) | N/A | ✅ |
| IrregularHeartbeat Event | irregular\_heartbeat | 1 (N/A) | N/A | ✅ |
| Battery Level | battery\_percentage | Battery Life (%) | N/A | ❌ |
## Additional Parameters That Can be Set Via Device Properties
[Section titled “Additional Parameters That Can be Set Via Device Properties”](#additional-parameters-that-can-be-set-via-device-properties)
| Key | Possible Values | Description |
| ------------------------ | --------------- | --------------------------------------------------------------------------------------------------------------------------------------------------------------------------------- |
| measurement\_webhook\_id | Webhook UUID | Set this property to configure a Device to [only send measurement data to a single Webhook](/hwi-api/webhooks/device-properties-with-webhooks/) (specified by that Webhook’s ID). |
## Downloads & Device Support
[Section titled “Downloads & Device Support”](#downloads--device-support)
| Device | Resources |
| -------------------------------------- | ---------------------------------------------------------------------------------------------------------------------------------------------------------------------------------------------- |
| Tenovi Cellular Blood Pressure Monitor | [Quick Start Guide](https://www.tenovi.com/support-download/tenovi-cellular-bpm/quick-start-guide/) \| [User Manual](https://www.tenovi.com/support-download/tenovi-cellular-bpm/user-manual/) |
# Tenovi Cellular Glucometer (BGM)
> Cellular blood glucose meter data, metrics, and configuration
[← Back to Device Overview](/devices)
* **Data Transfer:** Via Direct Cellular Connection, whenever a reading is taken
* **Sensor Code:** N/A
* **On-Device Measurement Storage:** Yes – measurements taken outside of range of a cellular network will be saved locally and uploaded the next time a cellular connection is established.
* **Supports tracking multiple devices per gateway via Sensor IDs:** N/A
Note
The Metrics noted as “Non-Vital” in the tables on each device page are not counted towards the # of days with data in our RPM billing reports (i.e. these Metrics are not considered “physiologic parameters” under current Medicare guidelines).
## Metrics
[Section titled “Metrics”](#metrics)
| Name | API Format | Value 1 | Value 2 | Is Vital?\* |
| ------------- | ------------------- | --------------------- | ------- | ----------- |
| Blood Glucose | glucose | Glucose Level (mg/dL) | N/A | ✅ |
| Battery Level | battery\_percentage | Battery Life (%) | N/A | ❌ |
## Additional Parameters That Can be Set Via Device Properties
[Section titled “Additional Parameters That Can be Set Via Device Properties”](#additional-parameters-that-can-be-set-via-device-properties)
| Key | Possible Values | Description |
| ------------------------ | --------------- | --------------------------------------------------------------------------------------------------------------------------------------------------------------------------------- |
| measurement\_webhook\_id | Webhook UUID | Set this property to configure a Device to [only send measurement data to a single Webhook](/hwi-api/webhooks/device-properties-with-webhooks/) (specified by that Webhook’s ID). |
## Downloads & Device Support
[Section titled “Downloads & Device Support”](#downloads--device-support)
| Device | Resources |
| ------------------------------------- | ---------------------------------------------------------------------------------------------------------------------------------------------------------------------------------------------- |
| Tenovi Cellular Blood Glucose Monitor | [Quick Start Guide](https://www.tenovi.com/support-download/tenovi-cellular-bgm/quick-start-guide/) \| [User Manual](https://www.tenovi.com/support-download/tenovi-cellular-bgm/user-manual/) |
# Tenovi Cellular Pulse Ox (POx)
> Cellular pulse oximeter data, metrics, and configuration
[← Back to Device Overview](/devices)
* **Data Transfer:** Via Direct Cellular Connection, whenever a reading is taken
* **Sensor Code:** N/A
* **On-Device Measurement Storage:** No – measurements taken outside of range of a Cellular network will NOT be saved locally.
* **Supports tracking multiple devices per gateway via Sensor IDs:** N/A
Note
The Metrics noted as “Non-Vital” in the tables on each device page are not counted towards the # of days with data in our RPM billing reports (i.e. these Metrics are not considered “physiologic parameters” under current Medicare guidelines).
## Metrics
[Section titled “Metrics”](#metrics)
| Name | API Format | Value 1 | Value 2 | Is Vital?\* |
| --------------- | ---------------- | --------------------- | ------------------------ | ----------- |
| Blood Oxygen | spO2 | Oxygen Saturation (%) | Standard Deviation (N/A) | ✅ |
| Heart Rate | pulse | Pulse (beats/minute) | Standard Deviation (N/A) | ✅ |
| Perfusion Index | perfusion\_index | Perfusion Index (%) | Standard Deviation (N/A) | ✅ |
## Additional Parameters That Can be Set Via Device Properties
[Section titled “Additional Parameters That Can be Set Via Device Properties”](#additional-parameters-that-can-be-set-via-device-properties)
| Key | Possible Values | Description |
| ------------------------ | --------------- | --------------------------------------------------------------------------------------------------------------------------------------------------------------------------------- |
| measurement\_webhook\_id | Webhook UUID | Set this property to configure a Device to [only send measurement data to a single Webhook](/hwi-api/webhooks/device-properties-with-webhooks/) (specified by that Webhook’s ID). |
## Downloads & Device Support
[Section titled “Downloads & Device Support”](#downloads--device-support)
| Device | Resources |
| ------------------------------ | -------------------------------------------------------------------------------------------------------------------------------------------------------------------------------------------------------------------- |
| Tenovi Cellular Pulse Oximeter | [Quick Start Guide](https://www.tenovi.com/support-download/tenovi-cellular-pulse-oximeter/quick-start-guide/) \| [User Manual](https://www.tenovi.com/support-download/tenovi-cellular-pulse-oximeter/user-manual/) |
# Tenovi Cellular Scale
> Cellular scale data, metrics, and configuration
[← Back to Device Overview](/devices)
* **Data Transfer:** Via Direct Cellular Connection, whenever a reading is taken
* **Sensor Code:** N/A
* **On-Device Measurement Storage:** Yes – measurements taken outside of range of a cellular network will be saved locally and uploaded the next time a cellular connection is established.
* **Supports tracking multiple devices per gateway via Sensor IDs:** N/A
Note
The Metrics noted as “Non-Vital” in the tables on each device page are not counted towards the # of days with data in our RPM billing reports (i.e. these Metrics are not considered “physiologic parameters” under current Medicare guidelines).
## Metrics
[Section titled “Metrics”](#metrics)
| Name | API Format | Value 1 | Value 2 | Is Vital?\* |
| ------------- | ------------------- | ------------------ | ------- | ----------- |
| Weight | weight | Weight (US pounds) | N/A | ✅ |
| Battery Level | battery\_percentage | Battery Life (%) | N/A | ❌ |
## Additional Parameters That Can be Set Via Device Properties
[Section titled “Additional Parameters That Can be Set Via Device Properties”](#additional-parameters-that-can-be-set-via-device-properties)
| Key | Possible Values | Description |
| ------------------------ | --------------- | --------------------------------------------------------------------------------------------------------------------------------------------------------------------------------- |
| measurement\_webhook\_id | Webhook UUID | Set this property to configure a Device to [only send measurement data to a single Webhook](/hwi-api/webhooks/device-properties-with-webhooks/) (specified by that Webhook’s ID). |
## Downloads & Device Support
[Section titled “Downloads & Device Support”](#downloads--device-support)
| Device | Resources |
| --------------------- | -------------------------------------------------------------------------------------------------------------------------------------------------------------------------------------------------- |
| Tenovi Cellular Scale | [Quick Start Guide](https://www.tenovi.com/support-download/tenovi-cellular-scale/quick-start-guide/) \| [User Manual](https://www.tenovi.com/support-download/tenovi-cellular-scale/user-manual/) |
# Tenovi Fetal Doppler
> Fetal doppler data, metrics, and configuration
[← Back to Device Overview](/devices)
* **Data Transfer:** Via Tenovi Gateway, whenever a reading is taken
* **Sensor Code:** 37
* **On-Device Measurement Storage:** No – measurements taken outside of range of the Tenovi Gateway will NOT be saved locally.
* **Supports tracking multiple devices per gateway via Sensor IDs:** No – only one device with this Sensor Code can be assigned to a gateway at one time.
Note
The Metrics noted as “Non-Vital” in the tables on each device page are not counted towards the # of days with data in our RPM billing reports (i.e. these Metrics are not considered “physiologic parameters” under current Medicare guidelines).
## Metrics
[Section titled “Metrics”](#metrics)
| Name | API Format | Value 1 | Value 2 | Is Vital?\* |
| --------------- | -------------- | ------------------------ | ------- | ----------- |
| Fetal Heartrate | fetal\_pulse | Pulse (beats per minute) | N/A | ✅ |
| Invalid Event | invalid\_event | N/A | N/A | ❌ |
## Additional Data Included in Filter Params
[Section titled “Additional Data Included in Filter Params”](#additional-data-included-in-filter-params)
| Key | Possible Values | Description |
| ------------------ | --------------------------------------------------------------------------------------------------------------------- | ----------------------------------------------------------------------------------------------------------------------------------------------------------------------------- |
| measurement\_index | Any Positive Integer | An index value that can be used to identify measurement with the same timestamp were captured in the same physical reading. Not globally unique across all physical readings. |
| error | ”Received 6 seconds of data, but some values were 0” or “Received 6 seconds of data, but range of values exceeded 5%“ | A description of the error, if this was an invalid event |
## Additional Parameters That Can be Set Via Device Properties
[Section titled “Additional Parameters That Can be Set Via Device Properties”](#additional-parameters-that-can-be-set-via-device-properties)
| Key | Possible Values | Description |
| ------------------------ | --------------- | --------------------------------------------------------------------------------------------------------------------------------------------------------------------------------- |
| measurement\_webhook\_id | Webhook UUID | Set this property to configure a Device to [only send measurement data to a single Webhook](/hwi-api/webhooks/device-properties-with-webhooks/) (specified by that Webhook’s ID). |
## Downloads & Device Support
[Section titled “Downloads & Device Support”](#downloads--device-support)
| Device | Resources |
| -------------------- | ----------------------------------------------------------------------------------------------------------------------------------------------------------------------------------------------------------------------------------------------------------------------------------------- |
| Tenovi Fetal Doppler | [Quick Start Guide](https://www.tenovi.com/support-download/tenovi-fetal-doppler/quick-start-guide/) \| [User Manual](https://www.tenovi.com/support-download/tenovi-fetal-doppler/user-manual/) \| [Device Support](https://www.tenovi.com/support/tenovi-fetal-doppler-device-support/) |
# Tenovi Glucometer (BGM)
> Blood glucose meter data, metrics, and configuration
[← Back to Device Overview](/devices)
* **Data Transfer:** Via Tenovi Gateway, whenever a reading is taken.
* **Sensor Code:** 12
* **On-Device Measurement Storage:** Yes – measurements taken outside of range of the Tenovi Gateway will be saved locally and uploaded the next time the Gateway is in range.
* **Supports tracking multiple devices per gateway via Sensor IDs:** No – only one device with this Sensor Code can be assigned to a gateway at one time.
Note
The Metrics noted as “Non-Vital” in the tables on each device page are not counted towards the # of days with data in our RPM billing reports (i.e. these Metrics are not considered “physiologic parameters” under current Medicare guidelines).
## Metrics
[Section titled “Metrics”](#metrics)
| Name | API Format | Value 1 | Value 2 | Is Vital?\* |
| ------------- | ------------------- | ------------------------ | ------- | ----------- |
| Blood Glucose | glucose | Glucose Level (in mg/dL) | N/A | ✅ |
| Battery Level | battery\_percentage | Battery Life (%) | N/A | ❌ |
## Additional Data Included in Filter Params
[Section titled “Additional Data Included in Filter Params”](#additional-data-included-in-filter-params)
| Key | Possible Values | Description |
| --------------------- | --------------------------------------------------------------- | --------------------------------------------------------------------------------------------------------------------------- |
| alert | `sensor_result_above_range` | An alert flag that is only included if an out-of-range reading is detected. |
| meal\_context | `pre-prandial`, `post-prandial`, `fasting` | Contextual data entered by the end user to indicate if the reading was taken before a meal, after a meal, or while fasting. |
| measurement\_location | `finger`, `alternative site`,`earlobe`,`control solution`,`N/A` | Contextual data entered by the end user to indicate where the blood sample used for this measurement was collected from. |
## Additional Parameters That Can be Set Via Device Properties
[Section titled “Additional Parameters That Can be Set Via Device Properties”](#additional-parameters-that-can-be-set-via-device-properties)
| Key | Possible Values | Description |
| ------------------------ | --------------- | --------------------------------------------------------------------------------------------------------------------------------------------------------------------------------- |
| measurement\_webhook\_id | Webhook UUID | Set this property to configure a Device to [only send measurement data to a single Webhook](/hwi-api/webhooks/device-properties-with-webhooks/) (specified by that Webhook’s ID). |
## Downloads & Device Support
[Section titled “Downloads & Device Support”](#downloads--device-support)
| Device | Resources |
| -------------------------------- | ---------------------------------------------------------------------------------------------------------------------------------------------------------------------------------------------------------------------------------------------------------------------------- |
| Tenovi Blood Glucose Meter Gen 1 | [Quick Start Guide](https://www.tenovi.com/support-download/tenovi-bgm-v1/quick-start-guide/) \| [User Manual](https://www.tenovi.com/support-download/tenovi-bgm-v1/user-manual/) \| [Device Support](https://www.tenovi.com/support/tenovi-glucometer-device/) |
| Tenovi Blood Glucose Meter Gen 2 | [Quick Start Guide](https://www.tenovi.com/support-download/tenovi-bgm-v2/quick-start-guide/) \| [User Manual](https://www.tenovi.com/support-download/tenovi-bgm-v2/user-manual/) \| [Device Support](https://www.tenovi.com/support/blood-glucose-meter-v2/) |
| Gluco Blood Glucose Meter | [Quick Start Guide](https://www.tenovi.com/support-download/gluco-bgm/quick-start-guide/) \| [User Manual](https://www.tenovi.com/support-download/gluco-bgm/user-manual/) \| [Device Support](https://www.tenovi.com/support/gluco-blood-glucose-meter-bgm-device-support/) |
# Tenovi Peak Flow Meter (PFM)
> Peak flow meter data, metrics, and configuration
[← Back to Device Overview](/devices)
* **Data Transfer:** Via Tenovi Gateway, whenever a reading is taken.
* **Sensor Code:** 17
* **On-Device Measurement Storage:** No– measurements taken outside of range of the Tenovi Gateway will NOT be saved locally.
* **Supports tracking multiple devices per gateway via Sensor IDs:** No – only one device with this Sensor Code can be assigned to a gateway at one time.
Note
The Metrics noted as “Non-Vital” in the tables on each device page are not counted towards the # of days with data in our RPM billing reports (i.e. these Metrics are not considered “physiologic parameters” under current Medicare guidelines).
## Metrics
[Section titled “Metrics”](#metrics)
| Name | API Format | Value 1 | Value 2 | Is Vital?\* |
| ---- | -------------------------- | -------------- | ------- | ----------- |
| PEF | peak\_expiratory\_flow | PEF (in L/min) | N/A | ✅ |
| FEV | forced\_expiratory\_volume | FEV (in L) | N/A | ✅ |
## Additional Data Included in Filter Params
[Section titled “Additional Data Included in Filter Params”](#additional-data-included-in-filter-params)
| Key | Possible Values | Description |
| ------------------ | -------------------- | ---------------------------------------------------------------------------------------------------------------------------------------------------------------------------------- |
| measurement\_index | Any Positive Integer | An index value that can be used to identify if a measurement with the same timestamp were captured in the same physical reading. Not globally unique across all physical readings. |
## Additional Parameters That Can be Set Via Device Properties
[Section titled “Additional Parameters That Can be Set Via Device Properties”](#additional-parameters-that-can-be-set-via-device-properties)
| Key | Possible Values | Description |
| ------------------------ | --------------- | --------------------------------------------------------------------------------------------------------------------------------------------------------------------------------- |
| measurement\_webhook\_id | Webhook UUID | Set this property to configure a Device to [only send measurement data to a single Webhook](/hwi-api/webhooks/device-properties-with-webhooks/) (specified by that Webhook’s ID). |
## Downloads & Device Support
[Section titled “Downloads & Device Support”](#downloads--device-support)
| Device | Resources |
| ---------------------- | ----------------------------------------------------------------------------------------------------------------------------------------------------------------------------------------------------------------------------------------------------------------------------------------------- |
| Tenovi Peak Flow Meter | [Quick Start Guide](https://www.tenovi.com/support-download/tenovi-peak-flow-meter/quick-start-guide/) \| [User Manual](https://www.tenovi.com/support-download/tenovi-peak-flow-meter/user-manual/) \| [Device Support](https://www.tenovi.com/support/tenovi-peak-flow-meter-device-support/) |
# Tenovi Pillbox
> Smart pillbox adherence data, metrics, and configuration
[← Back to Device Overview](/devices)
* **Data Transfer:** Via Tenovi Gateway, whenever a compartment is opened or a refill event occurs.
* **Sensor Code:** 21
* **On-Device Measurement Storage:** YES – events recorded outside of range of the Tenovi Gateway will be saved locally and transmitted the next time the Gateway is in range.
* **Supports tracking multiple devices per gateway via Sensor IDs:** No – only one device with this Sensor Code can be assigned to a gateway at one time.
Note
The Metrics noted as “Non-Vital” in the tables on each device page are not counted towards the # of days with data in our RPM billing reports (i.e. these Metrics are not considered “physiologic parameters” under current Medicare guidelines).
## Metrics
[Section titled “Metrics”](#metrics)
| Name | API Format | Value 1 | Value 2 | Is Vital?\* |
| --------------------- | -------------------------- | -------------------------------- | --------------------------------- | ----------- |
| Open Event | pillbox\_opened | Day of Compartment(1=Sun, 7=Sat) | AM vs PM Compartment (1=AM, 2=PM) | ✅ |
| Refill Initiated | pillbox\_refill\_initiated | 1 (N/A) | 0 (N/A) | ✅ |
| Compartement Refilled | pillbox\_refilled | Day of Compartment(1=Sun, 7=Sat) | AM vs PM Compartment (1=AM, 2=PM) | ✅ |
| Battery Level | battery\_percentage | Battery Life (%) | N/A | ❌ |
Note
The Tenovi Pillbox monitors medication adherence, which can be used for RTM billing only.
## Additional Data Included in Filter Params
[Section titled “Additional Data Included in Filter Params”](#additional-data-included-in-filter-params)
| Key | Possible Values | Description |
| ----------- | ------------------------------------------ | ------------------------------------------------------------------------------------ |
| compartment | `Sunday AM`, `Sunday PM`,`Monday AM`, etc. | A human-readable indication of the compartment opened (only included in Open Events) |
## Additional Parameters That Can be Set Via Device Properties
[Section titled “Additional Parameters That Can be Set Via Device Properties”](#additional-parameters-that-can-be-set-via-device-properties)
| Key | Possible Values | Description |
| ------------------------ | --------------- | --------------------------------------------------------------------------------------------------------------------------------------------------------------------------------- |
| measurement\_webhook\_id | Webhook UUID | Set this property to configure a Device to [only send measurement data to a single Webhook](/hwi-api/webhooks/device-properties-with-webhooks/) (specified by that Webhook’s ID). |
## Downloads & Device Support
[Section titled “Downloads & Device Support”](#downloads--device-support)
| Device | Resources |
| -------------------- | --------------------------------------------------------------------------------------------------------------------------------------------------------------------------------------------------------------------------------------------------------------------------- |
| Tenovi Smart Pillbox | [Quick Start Guide](https://www.tenovi.com/support-download/tenovi-smart-pillbox/quick-start-guide/) \| [User Manual](https://www.tenovi.com/support-download/tenovi-smart-pillbox/user-manual/) \| [Device Support](https://www.tenovi.com/support/tenovi-pillbox-device/) |
# Tenovi Pulse Ox (POx)
> Pulse oximeter data, metrics, and configuration
[← Back to Device Overview](/devices)
* **Data Transfer:** Via Tenovi Gateway, whenever a reading is taken
* **Sensor Code:** 11
* **On-Device Measurement Storage:** No – measurements taken outside of range of the Tenovi Gateway will NOT be saved locally.
* **Supports tracking multiple devices per gateway via Sensor IDs:** No – only one device with this Sensor Code can be assigned to a gateway at one time.
Note
The Metrics noted as “Non-Vital” in the tables on each device page are not counted towards the # of days with data in our RPM billing reports (i.e. these Metrics are not considered “physiologic parameters” under current Medicare guidelines).
## Metrics
[Section titled “Metrics”](#metrics)
| Name | API Format | Value 1 | Value 2 | Is Vital?\* |
| --------------- | ---------------- | --------------------- | ------------------------ | ----------- |
| Blood Oxygen | spO2 | Oxygen Saturation (%) | Standard Deviation (N/A) | ✅ |
| Heart Rate | pulse | Pulse (beats/minute) | Standard Deviation (N/A) | ✅ |
| Perfusion Index | perfusion\_index | Perfusion Index (%) | Standard Deviation (N/A) | ✅ |
## Additional Data Included in Filter Params
[Section titled “Additional Data Included in Filter Params”](#additional-data-included-in-filter-params)
| Key | Possible Values | Description |
| ------------------ | -------------------- | --------------------------------------------------------------------------------------------------------------------------------------------------------------------------------------------------------- |
| measurement\_index | Any Positive Integer | An index value that can be used to identify if a Blood Oxygen and Pulse measurement with the same timestamp were captured in the same physical reading. Not globally unique across all physical readings. |
## Additional Parameters That Can be Set Via Device Properties
[Section titled “Additional Parameters That Can be Set Via Device Properties”](#additional-parameters-that-can-be-set-via-device-properties)
| Key | Possible Values | Description |
| ------------------------ | --------------- | --------------------------------------------------------------------------------------------------------------------------------------------------------------------------------- |
| measurement\_webhook\_id | Webhook UUID | Set this property to configure a Device to [only send measurement data to a single Webhook](/hwi-api/webhooks/device-properties-with-webhooks/) (specified by that Webhook’s ID). |
## Downloads & Device Support
[Section titled “Downloads & Device Support”](#downloads--device-support)
| Device | Resources |
| --------------------- | ------------------------------------------------------------------------------------------------------------------------------------------------------------------------------------------------------------------------------------------------------------------------------------ |
| Tenovi Pulse Oximeter | [Quick Start Guide](https://www.tenovi.com/support-download/tenovi-pulse-oximeter/quick-start-guide/) \| [User Manual](https://www.tenovi.com/support-download/tenovi-pulse-oximeter/user-manual/) \| [Device Support](https://www.tenovi.com/support/tenovi-pulse-oximeter-device/) |
# Tenovi Scale
> Scale data, metrics, and configuration
[← Back to Device Overview](/devices)
* **Data Transfer:** Via Tenovi Gateway, whenever a reading is taken.
* **Sensor Code:** 13
* **On-Device Measurement Storage:** No – measurements taken outside of range of the Tenovi Gateway will NOT be saved locally.
* **Supports tracking multiple devices per gateway via Sensor IDs:** No – only one device with this Sensor Code can be assigned to a gateway at one time.
Note
The Metrics noted as “Non-Vital” in the tables on each device page are not counted towards the # of days with data in our RPM billing reports (i.e. these Metrics are not considered “physiologic parameters” under current Medicare guidelines).
## Metrics
[Section titled “Metrics”](#metrics)
| Name | API Format | Value 1 | Value 2 | Is Vital?\* |
| ------------- | ------------------- | --------------------- | ------- | ----------- |
| Weight | weight | Weight (in US pounds) | N/A | ✅ |
| Battery Level | battery\_percentage | Battery Life (%) | N/A | ❌ |
## Additional Parameters That Can be Set Via Device Properties
[Section titled “Additional Parameters That Can be Set Via Device Properties”](#additional-parameters-that-can-be-set-via-device-properties)
| Key | Possible Values | Description |
| ------------------------ | --------------- | --------------------------------------------------------------------------------------------------------------------------------------------------------------------------------- |
| measurement\_webhook\_id | Webhook UUID | Set this property to configure a Device to [only send measurement data to a single Webhook](/hwi-api/webhooks/device-properties-with-webhooks/) (specified by that Webhook’s ID). |
## Downloads & Device Support
[Section titled “Downloads & Device Support”](#downloads--device-support)
| Device | Resources |
| ------------ | --------------------------------------------------------------------------------------------------------------------------------------------------------------------------------------------------------------------------------------------------------- |
| Tenovi Scale | [Quick Start Guide](https://www.tenovi.com/support-download/tenovi-scale/quick-start-guide/) \| [User Manual](https://www.tenovi.com/support-download/tenovi-scale/user-manual/) \| [Device Support](https://www.tenovi.com/support/tenovi-scale-device/) |
# Tenovi Thermometer
> Thermometer data, metrics, and configuration
[← Back to Device Overview](/devices)
* **Data Transfer:** Via Tenovi Gateway, whenever a reading is taken.
* **Sensor Code:** 14
* **On-Device Measurement Storage:** No– measurements taken outside of range of the Tenovi Gateway will NOT be saved locally.
* **Supports tracking multiple devices per gateway via Sensor IDs:** No – only one device with this Sensor Code can be assigned to a gateway at one time.
Note
The Metrics noted as “Non-Vital” in the tables on each device page are not counted towards the # of days with data in our RPM billing reports (i.e. these Metrics are not considered “physiologic parameters” under current Medicare guidelines).
## Metrics
[Section titled “Metrics”](#metrics)
| Name | API Format | Value 1 | Value 2 | Is Vital?\* |
| ------------- | ------------------- | ------------------- | ------- | ----------- |
| Temperature | temperature | Temperature (in °F) | N/A | ✅ |
| Battery Level | battery\_percentage | Battery Life (%) | N/A | ❌ |
## Additional Parameters That Can be Set Via Device Properties
[Section titled “Additional Parameters That Can be Set Via Device Properties”](#additional-parameters-that-can-be-set-via-device-properties)
| Key | Possible Values | Description |
| ------------------------ | --------------- | --------------------------------------------------------------------------------------------------------------------------------------------------------------------------------- |
| measurement\_webhook\_id | Webhook UUID | Set this property to configure a Device to [only send measurement data to a single Webhook](/hwi-api/webhooks/device-properties-with-webhooks/) (specified by that Webhook’s ID). |
## Downloads & Device Support
[Section titled “Downloads & Device Support”](#downloads--device-support)
| Device | Resources |
| --------------------------- | -------------------------------------------------------------------------------------------------------------------------------------------------------------------------------------------------------------------------------------------------------------------------------------------------------------- |
| Tenovi Infrared Thermometer | [Quick Start Guide](https://www.tenovi.com/support-download/tenovi-infrared-thermometer/quick-start-guide/) \| [User Manual](https://www.tenovi.com/support-download/tenovi-infrared-thermometer/user-manual/) \| [Device Support](https://www.tenovi.com/support/tenovi-infrared-thermometer-device-support/) |
# Tenovi Watch
> Activity watch data, metrics, and configuration
[← Back to Device Overview](/devices)
* **Data Transfer:** Via Tenovi Gateway, once per day.
* **Sensor Code:** 15
* **On-Device Measurement Storage:** Yes – data is stored locally on the Tenovi Watch and uploaded once per day when the Tenovi Gateway is in range.
* **Supports tracking multiple devices per gateway via Sensor IDs:** No – only one device with this Sensor Code can be assigned to a gateway at one time.
Note
The Metrics noted as “Non-Vital” in the tables on each device page are not counted towards the # of days with data in our RPM billing reports (i.e. these Metrics are not considered “physiologic parameters” under current Medicare guidelines).
## Metrics
[Section titled “Metrics”](#metrics)
| Name | API Format | Value 1 | Value 2 | Is Vital?\* |
| --------------------- | ----------------------- | ---------------------- | ------------------- | ----------- |
| Steps | steps | Hourly Steps (steps) | N/A | ❌ |
| Heart Rate Statistics | heart\_rate\_statistics | Average Pulse (bpm) | Maximum Pulse (bpm) | ❌ |
| Sleep | sleep | Hours of Sleep (hours) | N/A | ❌ |
| Battery Level | battery\_percentage | Battery Life (%) | N/A | ❌ |
Note
Steps and Heart Rate Statistics are logged in hourly bins. The measurement timestamp will indicate the start of the relevant logging period (i.e. the 9:00am measurement indicates the total steps taken between 9am and 10am).
## Additional Data Included in Filter Params
[Section titled “Additional Data Included in Filter Params”](#additional-data-included-in-filter-params)
| Key | Possible Values | Description |
| ---------------------- | ---------------- | -------------------------------------------------------------------------------- |
| average\_heart\_rate\* | Positive Integer | The average heart rate (in bpm) during the relevant hour (equivalent to Value 1) |
| max\_heart\_rate\* | Positive Integer | The maximum heart rate (in bpm) during the relevant hour (equivalent to Value 2) |
| min\_heart\_rate\* | Positive Integer | The minimum heart rate (in bpm) during the relevant hour |
Note
These key-value pairs are only included in Heart Rate Statistics measurements.
## Additional Parameters That Can be Set Via Device Properties
[Section titled “Additional Parameters That Can be Set Via Device Properties”](#additional-parameters-that-can-be-set-via-device-properties)
| Key | Possible Values | Description |
| ------------------------ | ---------------- | --------------------------------------------------------------------------------------------------------------------------------------------------------------------------------- |
| step\_goal | Positive Integer | The daily step goal that will be indicated to users on their watch screen. |
| measurement\_webhook\_id | Webhook UUID | Set this property to configure a Device to [only send measurement data to a single Webhook](/hwi-api/webhooks/device-properties-with-webhooks/) (specified by that Webhook’s ID). |
## Downloads & Device Support
[Section titled “Downloads & Device Support”](#downloads--device-support)
| Device | Resources |
| ------------ | ------------------------------------------------------------------------------------------------------------------------------------------------------------------------------------------------------ |
| Tenovi Watch | [Quick Start Guide](https://www.tenovi.com/support-download/tenovi-watch/quick-start-guide/) \| [User Manual](https://www.tenovi.com/support-download/tenovi-watch/user-manual/) \| [Device Support]() |
# Trividia Glucometer
> Trividia blood glucose meter data, metrics, and configuration
[← Back to Device Overview](/devices)
* **Data Transfer:** Via Tenovi Gateway, whenever a reading is taken.
* **Sensor Code:** 12
* **On-Device Measurement Storage:** Yes – measurements taken outside of range of the Tenovi Gateway will be saved locally and uploaded the next time the Gateway is in range.
* **Supports tracking multiple devices per gateway via Sensor IDs:** No – only one device with this Sensor Code can be assigned to a gateway at one time.
* **Other Notes:** This device must be bonded to the Tenovi Gateway. To do this, you must set the Bluetooth Passkey property, either via API (see below), or via the [Client Devices dashboard](https://app.tenovi.com).
Note
Only Trividia models v5 or newer are supported.
Note
The Metrics noted as “Non-Vital” in the tables on each device page are not counted towards the # of days with data in our RPM billing reports (i.e. these Metrics are not considered “physiologic parameters” under current Medicare guidelines).
## Metrics
[Section titled “Metrics”](#metrics)
| Name | API Format | Value 1 | Value 2 | Is Vital?\* |
| ------------- | ------------------- | ------------------------ | ------- | ----------- |
| Blood Glucose | glucose | Glucose Level (in mg/dL) | N/A | ✅ |
| Battery Level | battery\_percentage | Battery Life (%) | N/A | ❌ |
## Additional Data Included in Filter Params
[Section titled “Additional Data Included in Filter Params”](#additional-data-included-in-filter-params)
| Key | Possible Values | Description |
| --------------------- | -------------------------------------------------------------- | --------------------------------------------------------------------------------------------------------------------------- |
| alert | `sensor_result_above_range` | An alert flag that is only included if an out-of-range reading is detected. |
| meal\_context | `pre-prandial`, `post-prandial`, `fasting` | Contextual data entered by the end user to indicate if the reading was taken before a meal, after a meal, or while fasting. |
| measurement\_location | `finger`,`alternative site`,`earlobe`,`control solution`,`N/A` | Contextual data entered by the end user to indicate where the blood sample used for this measurement was collected from. |
## Additional Parameters That Can be Set Via Device Properties
[Section titled “Additional Parameters That Can be Set Via Device Properties”](#additional-parameters-that-can-be-set-via-device-properties)
| Key | Possible Values | Description |
| ------------------------ | --------------------------- | -------------------------------------------------------------------------------------------------------------------------------------------------------------------------------------------------------------------------------------------------------------------------------------------------------------------------------- |
| bluetooth\_passkey | Numerical Bluetooth Passkey | Set this property to allow the Gateway to automatically bond to a specific Trividia Glucometer. For these devices, the Bluetooth Passkey is the last 6 digits of the Serial Number printed on the label. More information can be found in our [Bring Your Own Device Guide](/guides/bring-your-own-device/#trividia-glucometer). |
| measurement\_webhook\_id | Webhook UUID | Set this property to configure a Device to [only send measurement data to a single Webhook](/hwi-api/webhooks/device-properties-with-webhooks/) (specified by that Webhook’s ID). |
## Downloads & Device Support
[Section titled “Downloads & Device Support”](#downloads--device-support)
| Device | Resources |
| ---------------------------- | ---------------------------------------------------------------------------------------------------------------------------------------------------------------------------------------------------------------------------------------------------------------------- |
| Trividia Blood Glucose Meter | [Quick Start Guide](https://www.tenovi.com/support-download/trividia-bgm/quick-start-guide/) \| [User Manual](https://www.tenovi.com/support-download/trividia-bgm/user-manual/) \| [Device Support](https://www.tenovi.com/support/trividia-blood-glucose-meter-bgm/) |
# Welch Allyn 1500 Series BPM
> Welch Allyn 1500 Series blood pressure monitor data, metrics, and configuration
[← Back to Device Overview](/devices)
Visualization Guidance
For guidance on visualizing data from this device, see [Blood Pressure Monitors](/visualization-guides/blood-pressure-monitors).
* **Data Transfer:** Via Tenovi Gateway, whenever a reading is taken
* **Sensor Code:** 29
* **On-Device Measurement Storage:** Yes – measurements taken outside of range of the Tenovi Gateway will be saved locally and uploaded the next time the Gateway is in range.
* **Supports tracking multiple devices per gateway via Sensor IDs:** No – only one device with this Sensor Code can be assigned to a gateway at one time.
Note
The Metrics noted as “Non-Vital” in the tables on each device page are not counted towards the # of days with data in our RPM billing reports (i.e. these Metrics are not considered “physiologic parameters” under current Medicare guidelines).
## Metrics
[Section titled “Metrics”](#metrics)
| Name | API Format | Value 1 | Value 2 | Vital |
| ------------------- | -------------------- | ------------------------------------------------------------------ | -------------------- | ----- |
| Blood Pressure | blood\_pressure | Systolic BP (mmHG) | Diastolic BPM (mmHG) | ✅ |
| Heart Rate | pulse | Pulse (beats/minute) | N/A | ✅ |
| Irregular Heartbeat | irregular\_heartbeat | 1 (measurement is only sent if an irregular heartbeat is detected) | N/A | ✅ |
| Battery Level | battery\_percentage | Battery Life (%) | N/A | ❌ |
## Additional Data Included in Filter Params
[Section titled “Additional Data Included in Filter Params”](#additional-data-included-in-filter-params)
| Key | Possible Values | Description |
| ------------------ | -------------------- | ---------------------------------------------------------------------------------------------------------------------------------------------------------------------------------- |
| measurement\_index | Any Positive Integer | An index value that can be used to identify if a measurement with the same timestamp were captured in the same physical reading. Not globally unique across all physical readings. |
## Additional Parameters That Can be Set Via Device Properties
[Section titled “Additional Parameters That Can be Set Via Device Properties”](#additional-parameters-that-can-be-set-via-device-properties)
| Key | Possible Values | Description |
| ------------------------ | --------------- | --------------------------------------------------------------------------------------------------------------------------------------------------------------------------------- |
| measurement\_webhook\_id | Webhook UUID | Set this property to configure a Device to [only send measurement data to a single Webhook](/hwi-api/webhooks/device-properties-with-webhooks/) (specified by that Webhook’s ID). |
## Downloads & Device Support
[Section titled “Downloads & Device Support”](#downloads--device-support)
| Device | Resources |
| --------------------------- | ------------------------------------------------------------------------------------------------------------------------------------------------------------------------------------------------ |
| Welch Allyn 1500 Series BPM | [Quick Start Guide](https://www.tenovi.com/support-download/welch-allyn-bpm-1500/quick-start-guide/) \| [User Manual](https://www.tenovi.com/support-download/welch-allyn-bpm-1500/user-manual/) |
# Welch Allyn 1700 Series BPM
> Welch Allyn 1700 Series blood pressure monitor data, metrics, and configuration
[← Back to Device Overview](/devices)
Visualization Guidance
For guidance on visualizing data from this device, see [Blood Pressure Monitors](/visualization-guides/blood-pressure-monitors).
* **Data Transfer:** Via Tenovi Gateway, whenever a reading is taken
* **Sensor Code:** 29
* **On-Device Measurement Storage:** Yes – measurements taken outside of range of the Tenovi Gateway will be saved locally and uploaded the next time the Gateway is in range.
* **Supports tracking multiple devices per gateway via Sensor IDs:** No – only one device with this Sensor Code can be assigned to a gateway at one time.
Note
The Metrics noted as “Non-Vital” in the tables on each device page are not counted towards the # of days with data in our RPM billing reports (i.e. these Metrics are not considered “physiologic parameters” under current Medicare guidelines).
## Metrics
[Section titled “Metrics”](#metrics)
| Name | API Format | Value 1 | Value 2 | Vital |
| ------------------- | -------------------- | ------------------------------------------------------------------ | -------------------- | ----- |
| Blood Pressure | blood\_pressure | Systolic BP (mmHG) | Diastolic BPM (mmHG) | ✅ |
| Heart Rate | pulse | Pulse (beats/minute) | N/A | ✅ |
| Irregular Heartbeat | irregular\_heartbeat | 1 (measurement is only sent if an irregular heartbeat is detected) | N/A | ✅ |
| Battery Level | battery\_percentage | Battery Life (%) | N/A | ❌ |
## Additional Data Included in Filter Params
[Section titled “Additional Data Included in Filter Params”](#additional-data-included-in-filter-params)
| Key | Possible Values | Description |
| ------------------ | -------------------- | ---------------------------------------------------------------------------------------------------------------------------------------------------------------------------------- |
| measurement\_index | Any Positive Integer | An index value that can be used to identify if a measurement with the same timestamp were captured in the same physical reading. Not globally unique across all physical readings. |
## Additional Parameters That Can be Set Via Device Properties
[Section titled “Additional Parameters That Can be Set Via Device Properties”](#additional-parameters-that-can-be-set-via-device-properties)
| Key | Possible Values | Description |
| ------------------------ | --------------- | --------------------------------------------------------------------------------------------------------------------------------------------------------------------------------- |
| measurement\_webhook\_id | Webhook UUID | Set this property to configure a Device to [only send measurement data to a single Webhook](/hwi-api/webhooks/device-properties-with-webhooks/) (specified by that Webhook’s ID). |
## Downloads & Device Support
[Section titled “Downloads & Device Support”](#downloads--device-support)
| Device | Resources |
| --------------------------- | ------------------------------------------------------------------------------------------------------------------------------------------------------------------------------------------------ |
| Welch Allyn 1700 Series BPM | [Quick Start Guide](https://www.tenovi.com/support-download/welch-allyn-bpm-1700/quick-start-guide/) \| [User Manual](https://www.tenovi.com/support-download/welch-allyn-bpm-1700/user-manual/) |
# Welch Allyn Scale
> Welch Allyn scale data, metrics, and configuration
[← Back to Device Overview](/devices)
* **Data Transfer:** Via Tenovi Gateway, whenever a reading is taken.
* **Sensor Code:** 30
* **On-Device Measurement Storage:** Yes – measurements taken outside of range of the Tenovi Gateway will be saved locally and uploaded the next time the Gateway is in range.
* **Supports tracking multiple devices per gateway via Sensor IDs:** No – only one device with this Sensor Code can be assigned to a gateway at one time.
Note
The Metrics noted as “Non-Vital” in the tables on each device page are not counted towards the # of days with data in our RPM billing reports (i.e. these Metrics are not considered “physiologic parameters” under current Medicare guidelines).
## Metrics
[Section titled “Metrics”](#metrics)
| Name | API Format | Value 1 | Value 2 | Is Vital?\* |
| ------------- | ------------------- | --------------------- | ------- | ----------- |
| Weight | weight | Weight (in US pounds) | N/A | ✅ |
| Battery Level | battery\_percentage | Battery Life (%) | N/A | ❌ |
## Additional Parameters That Can be Set Via Device Properties
[Section titled “Additional Parameters That Can be Set Via Device Properties”](#additional-parameters-that-can-be-set-via-device-properties)
| Key | Possible Values | Description |
| ------------------------ | --------------- | --------------------------------------------------------------------------------------------------------------------------------------------------------------------------------- |
| measurement\_webhook\_id | Webhook UUID | Set this property to configure a Device to [only send measurement data to a single Webhook](/hwi-api/webhooks/device-properties-with-webhooks/) (specified by that Webhook’s ID). |
## Downloads & Device Support
[Section titled “Downloads & Device Support”](#downloads--device-support)
| Device | Resources |
| ----------------- | ----------------------------------------------------------------------------------------------------------------------------------------------------------------------------------------------------------------------------------------------------------------------------- |
| Welch Allyn Scale | [Quick Start Guide](https://www.tenovi.com/support-download/welch-allyn-scale/quick-start-guide/) \| [User Manual](https://www.tenovi.com/support-download/welch-allyn-scale/user-manual/) \| [Device Support](https://www.tenovi.com/support/welch-allyn-home-scale-device/) |
# XK Essence
> Xandar Kardian contactless vital signs monitor data, metrics, and configuration
[← Back to Device Overview](/devices)
Visualization Guidance
For guidance on visualizing data from this device, see [XK300 Essence](/visualization-guides/xk300-essence).
* **Data Transfer:** Via Tenovi Gateway
* **Sensor Code:** 39
* **On-Device Measurement Storage:** Yes – measurements taken outside of range of the Tenovi Gateway will be saved locally and uploaded the next time the Gateway is in range, as long as the device is not unplugged.
* **Supports tracking multiple devices per gateway via Sensor IDs:** No – only one device with this Sensor Code can be assigned to a gateway at one time.
Note
The XK Essence offloads data to the Gateway every 6hrs. This data is grouped into 1hr intervals with the following metrics.
Note
The Metrics noted as “Non-Vital” in the tables on each device page are not counted towards the # of days with data in our RPM billing reports (i.e. these Metrics are not considered “physiologic parameters” under current Medicare guidelines).
## Metrics
[Section titled “Metrics”](#metrics)
| Name | API Format | Value 1 | Value 2 | Is Vital?\* |
| ------------------------------------------------------------------------- | --------------------------------- | --------------------------------------------------------- | ---------------------------------- | ----------- |
| XK Heart Rate Statistics Measurement | xk\_heart\_rate\_statistics | Median Heart Rate (BPM) | Heart Rate POBC Score | ✅ |
| XK Respiratory Rate Statistics Measurement | xk\_respiratory\_rate\_statistics | Median Respiratory Rate (Breaths per Minute) | Respiratory Rate POBC Score | ✅ |
| XK Sleep Measurement | xk\_sleep\_data | Sleep Duration (minutes) | In-Bed Duration (minutes) | ✅ |
| XK Hardware Status Data **Hardware debugging only, not for clinical use** | xk\_hardware\_status\_data | Hardware Sensitivity Index | Hardware Vacancy Count | ❌ |
| XK Discovery Log **Hardware debugging only, not for clinical use** | xk\_discovery\_log | Serial number of the XK unit discovered in discovery mode | The current RSSI of the connection | ❌ |
## Additional Data Included in Filter Params
[Section titled “Additional Data Included in Filter Params”](#additional-data-included-in-filter-params)
### xk\_heart\_rate\_statistics
[Section titled “xk\_heart\_rate\_statistics”](#xk_heart_rate_statistics)
| Key | Possible Values | Description |
| ------------------------------- | --------------------- | --------------------------------------------------------------------------------------------------------- |
| heart\_rate\_mean | 40 to 130 0 = invalid | Mean heart rate (BPM) |
| heart\_rate\_variance | 0 to 2025 | Variance of heart (BPM^2) |
| heart\_rate\_measurement\_count | 0 to 1530 | Number of heart rate measurements (count 3 seconds) |
| heart\_rate\_integrity\_score | N/A | Average high-reliability heart rate measurements over the sampling time (count) |
| heart\_rate\_deviations | 0 to 75 | Count of high-reliability heart rate data points exceeding 2σ from the mean within the specified interval |
| measurement\_index | 0 to 9999 | Gateway internal message counter, this provides a way to correlate measurements together |
### xk\_respiratory\_rate\_statistics
[Section titled “xk\_respiratory\_rate\_statistics”](#xk_respiratory_rate_statistics)
| Key | Possible Values | Description |
| ------------------------------------- | --------------------- | --------------------------------------------------------------------------------------------------------------- |
| respiratory\_rate\_mean | 40 to 130 0 = invalid | Mean respiratory rate (RPM) |
| respiratory\_rate\_variance | 0 to 2025 | Variance of respiratory (RPM^2) |
| respiratory\_rate\_measurement\_count | 0 to 1530 | Number of respiratory rate measurements (count 3 seconds) |
| respiratory\_rate\_integrity\_score | N/A | Average high-reliability respiratory rate measurements over the sampling time (count) |
| respiratory\_rate\_deviations | 0 to 75 | Count of high-reliability respiratory rate data points exceeding 2σ from the mean within the specified interval |
| measurement\_index | 0 to 9999 | Gateway internal message counter, this provides a way to correlate measurements together |
### xk\_sleep\_data
[Section titled “xk\_sleep\_data”](#xk_sleep_data)
| Key | Possible Values | Description |
| ------------------ | --------------- | ---------------------------------------------------------------------------------------- |
| measurement\_index | 0 to 9999 | Gateway internal message counter, this provides a way to correlate measurements together |
### xk\_hardware\_status\_data
[Section titled “xk\_hardware\_status\_data”](#xk_hardware_status_data)
**Hardware debugging only, not for clinical use**
| Key | Possible Values | Description |
| ------------------ | --------------- | ---------------------------------------------------------------------------------------------------------- |
| distance\_median | N/A | Median distance calculated from high-reliability respiratory rate over the specified interval (meters) |
| distance\_mean | N/A | Mean distance calculated from high-reliability respiratory rate over the specified interval (meters) |
| distance\_variance | N/A | Distance variance calculated from high-reliability respiratory rate over the specified interval (meters^2) |
| pobc\_time | 0 to 144000 | Minutes of the data collected for the POBC calculation |
| movement\_average | N/A | Average relative movement measured over the specified interval (unitless) |
| data\_cursor | N/A | The latest data index within the specified interval (unitless) |
| measurement\_index | 0 to 9999 | Gateway internal message counter, this provides a way to correlate measurements together |
### xk\_discovery\_log
[Section titled “xk\_discovery\_log”](#xk_discovery_log)
**Hardware debugging only, not for clinical use**
| Key | Possible Values | Description |
| ---------- | --------------- | ------------------------------------------------------------- |
| serial\_no | N/A | The serial number of the XK unit discovered in discovery mode |
| rssi | -127 to 10 | The current RSSI of the connection |
## Additional Parameters That Can be Set Via Device Properties
[Section titled “Additional Parameters That Can be Set Via Device Properties”](#additional-parameters-that-can-be-set-via-device-properties)
| Key | Possible Values | Description |
| ------------------------ | --------------- | --------------------------------------------------------------------------------------------------------------------------------------------------------------------------------- |
| measurement\_webhook\_id | Webhook UUID | Set this property to configure a Device to [only send measurement data to a single Webhook](/hwi-api/webhooks/device-properties-with-webhooks/) (specified by that Webhook’s ID). |
## Downloads & Device Support
[Section titled “Downloads & Device Support”](#downloads--device-support)
| Device | Resources |
| -------------------------- | ---------------------------------------------------------------------------------------------------------------------------------------------------------------------------------------------------------------------------------------------------------------------------------------------- |
| Xandar Kardian 300 Essence | [Quick Start Guide](https://www.tenovi.com/support-download/xandar-kardian-300-essence/quick-start-guide/) \| [User Manual](https://www.tenovi.com/support-download/xandar-kardian-300-essence/user-manual/) \| [Device Support](https://www.tenovi.com/support/xk300-essence-device-support/) |
## What is the POBC Score?
[Section titled “What is the POBC Score?”](#what-is-the-pobc-score)
The **Probability of Change in Condition (POBC)** score quantifies how unusual a patient’s most recent readings are compared to their own baseline. It enables early detection of health deterioration by notifying clinicians when there is a significant change that may require attention.
### Clinical Value
[Section titled “Clinical Value”](#clinical-value)
* Identify patients with significant changes from their personal norm
* Prioritize care based on quantified deviation severity
* Triage patients needing closer clinical assessment
The POBC score answers one question
“What are the odds my patient’s vital signs have changed over their normal?”
### How It Works
[Section titled “How It Works”](#how-it-works)
Scoring is based on the previous 7 days of measurements. At least seven days of data must be collected by the XK Essence before a POBC score can be calculated. The score compares the most recent readings against the individual’s established baseline — not population averages.
#### Score Range
[Section titled “Score Range”](#score-range)
| Score | Meaning | Action |
| ---------------- | ------------------------------------------------------- | ------------------------------- |
| **-100 to -80** | High probability vital signs are *lower* than baseline | Clinical assessment recommended |
| **-80 to +80** | Within expected variation for this patient | No action required |
| **+80 to +100** | High probability vital signs are *higher* than baseline | Clinical assessment recommended |
| **Blank or 123** | Insufficient data to calculate score | Continue collecting data |
#### Direction of Change
[Section titled “Direction of Change”](#direction-of-change)
Positive or negative POBC values describe the *direction* of the change:
* **Respiratory POBC: -85** — 85% probability that the resting respiratory rate is **lower** than baseline.
* **Heart rate POBC: +95** — 95% probability that the resting heart rate is **higher** than baseline.
POBC scores for heart rate and respiratory rate are independent and calculated separately.
#### Independent Validation
[Section titled “Independent Validation”](#independent-validation)
Clinical evidence
Xandar Kardian’s POBC Score System is independently validated to detect early clinical changes, predicting 75.6% of hospital transfers up to 7 days prior, in a validation study with 201 patients.
### When the POBC Score Will Not Change
[Section titled “When the POBC Score Will Not Change”](#when-the-pobc-score-will-not-change)
* The patient’s range of normal vital signs is already high (wide baseline)
* Insufficient data samples have been collected
* Vital signs are stable and not changing
* No clear baseline has been established (fewer than 7 days of data)
* The onset of change is very acute/sudden (e.g., pulmonary embolism, drug overdose, sudden cardiac arrest)
# Bring Your Own Device
> How to setup devices already in possession of a patient that Tenovi supports
There may be instances where a patient already has one of the devices [supported by the Tenovi Gateway](/guides/device-overview/). In most of these cases, you can activate these devices the same as you would a device purchased from Tenovi (i.e. by using our [device activation/ordering endpoint](/hwi-api/devices/activating-devices)). If the patient already has a Gateway as well, simply activate the device with that Gateway ID. If you need Tenovi to dropship a Gateway only, set the `ship_gateway_only` field to `true` when submitting your dropshipment request.
However, for some devices (glucometers in particular) some extra integration is required to ensure data can flow from the device to the Gateway and ultimately to your systems. These additional steps are described below for all corresponding devices.
## Trividia Glucometer
[Section titled “Trividia Glucometer”](#trividia-glucometer)
Trividia Glucometers must be **bonded** with a Tenovi Gateway (a Bluetooth-specific connection step that is separate from activating the device with Tenovi). In order to bond a Trividia Glucometer via API, you need to make two API requests: our standard API request to first activate the device, and then a second API request to set the Bluetooth passkey for the Trividia Glucometer on our Gateway, which will initiate the bonding process.
Specific steps on how to perform these steps for two real-world use cases are outlined below.
### Step #1 (If Patient Has Gateway Already)
[Section titled “Step #1 (If Patient Has Gateway Already)”](#step-1-if-patient-has-gateway-already)
For this use case, the [initial device activation API request](/hwi-api/devices/activating-devices/) is the same as any of our other devices. For BYOD scenarios where the patient already has both the Trividia Glucometer and a Tenovi Gateway, the `device->fulfillment_request` object should *not* be included and the Gateway ID needs to be provided in the `device->hardware_uuid` field. This ensures Tenovi won’t ship out a new device and the glucometer is mapped to the patient’s existing gateway.
Example of the JSON sent with this device activation POST request:
```json
{
"device": {
"name": "Trividia Glucometer",
"hardware_uuid": "123412341234",
},
"patient_id": "123456789abcde"
}
```
### Step #1 (If Patient Does NOT Have Gateway)
[Section titled “Step #1 (If Patient Does NOT Have Gateway)”](#step-1-if-patient-does-not-have-gateway)
For BYOD scenarios where the patient ONLY has the Trividia Glucometer and a Tenovi Gateway still needs to be dropshipped to the patient, the `device->fulfillment_request` object must be included, the ‘device->fulfillment\_request->ship\_gateway\_only’ flag should be set to ‘true’, and the `device->hardware_uuid` field should be set to ‘null’.
This ensures Tenovi will only ship out a gateway; in this scenario Tenovi will automatically map the Gateway ID to the Trividia Glucometer at shipment time.
Example of the JSON sent with this device activation POST request:
```json
{
"device": {
"name": "Trividia Glucometer",
"hardware_uuid": null,
"fulfillment_request": {
"shipping_name": "Ian Russell",
"shipping_address": "18023 Sky Park Circle",
"shipping_city": "Irvine",
"shipping_state": "CA",
"shipping_zip_code": "92614",
"ship_gateway_only": true
}
},
"patient_id": "12345"
}
```
### Step #2 - Assigning Bluetooth Passkey
[Section titled “Step #2 - Assigning Bluetooth Passkey”](#step-2---assigning-bluetooth-passkey)
Once you activate the device, you will receive back a response like the one below.
```json
{
"id": "497f6eca-6276-4993-bfeb-53cbbbba6f08",
"status": "Delivered",
"device": {
"id": "11111111-abcd-1234-bcde-222211113333",
"created": "2019-08-24T14:15:22Z",
"name": "Trividia Glucometer",
"hardware_uuid": "123412341234"
},
"patient_id": "123456789abcdef",
"patient_phone_number": "123-123-1234",
"patient": {
"external_id": "",
"name": "Patient One",
"phone_number": "123-123-1234",
"email": "user@example.com",
"physician": "Dr. Russell",
"clinic_name": "",
"care_manager": "",
"sms_opt_in": false
}
}
```
Using the root HWI Device ID (`497f6eca-6276-4993-bfeb-53cbbbba6f08`in the example above), you can assign the Bluetooth passkey via a second API request to [create a device property](/hwi-api/devices/device-properties/).
Device properties are key value pairs that can be assigned to any HWI Device object.
The Bluetooth Passkey is the last 6 digits of the Serial Number printed on the Trividia Glucometer label. For example, if the Serial Number printed on the label for the device is `TA2910173`, the bluetooth passkey will be `910173`.
An example of the JSON sent with the POST request for [setting a device property](https://api2.tenovi.com/hwi-redoc/#operation/hwi-devices_properties_create).
URL `https://api2.tenovi.com/clients/CLIENT_DOMAIN/hwi/hwi-devices/{hwi_device_id}/properties/`
```json
{
"key": "bluetooth_passkey",
"value": "910173",
}
```
Upon success, you will receive a response back with all the supplied information along with an ID for the device’s new device property. The `synced` field will be updated to `true` once the Bluetooth passkey has been communicated to the corresponding Gateway. Once the Gateway has received this passkey, it will automatically bond itself to the Trividia Glucometer, completing the setup process.
```json
{
"id": "497f6eca-6276-4993-bfeb-53cbbbba6f08",
"key": "bluetooth_passkey",
"value": "910173",
"synced": false
}
```
# HWI Common Error Messages
> Commonly encountered error messages when working with the HWI API
## Authorization Failed (403 Error)
[Section titled “Authorization Failed (403 Error)”](#authorization-failed-403-error)
This error occurs if the API keys supplied are invalid. Please double check your API keys or create a new one via the [Client Dashboard](https://app.tenovi.com/client) in the Tenovi web app.
## Endpoint Does Not Exist (404 Error)
[Section titled “Endpoint Does Not Exist (404 Error)”](#endpoint-does-not-exist-404-error)
This error occurs if the endpoint you are requesting does not exist within the Tenovi API.
Please verify the endpoint from our detailed [API Reference](https://api2.tenovi.com/hwi-redoc) and ensure you are using the appropriate [`CLIENT_DOMAIN`](/hwi-api/api-url-config/) value in your URL.
You can obtain the correct `CLIENT_DOMAIN` value from the [Client Dashboard](https://app.tenovi.com/client) in the Tenovi web app.
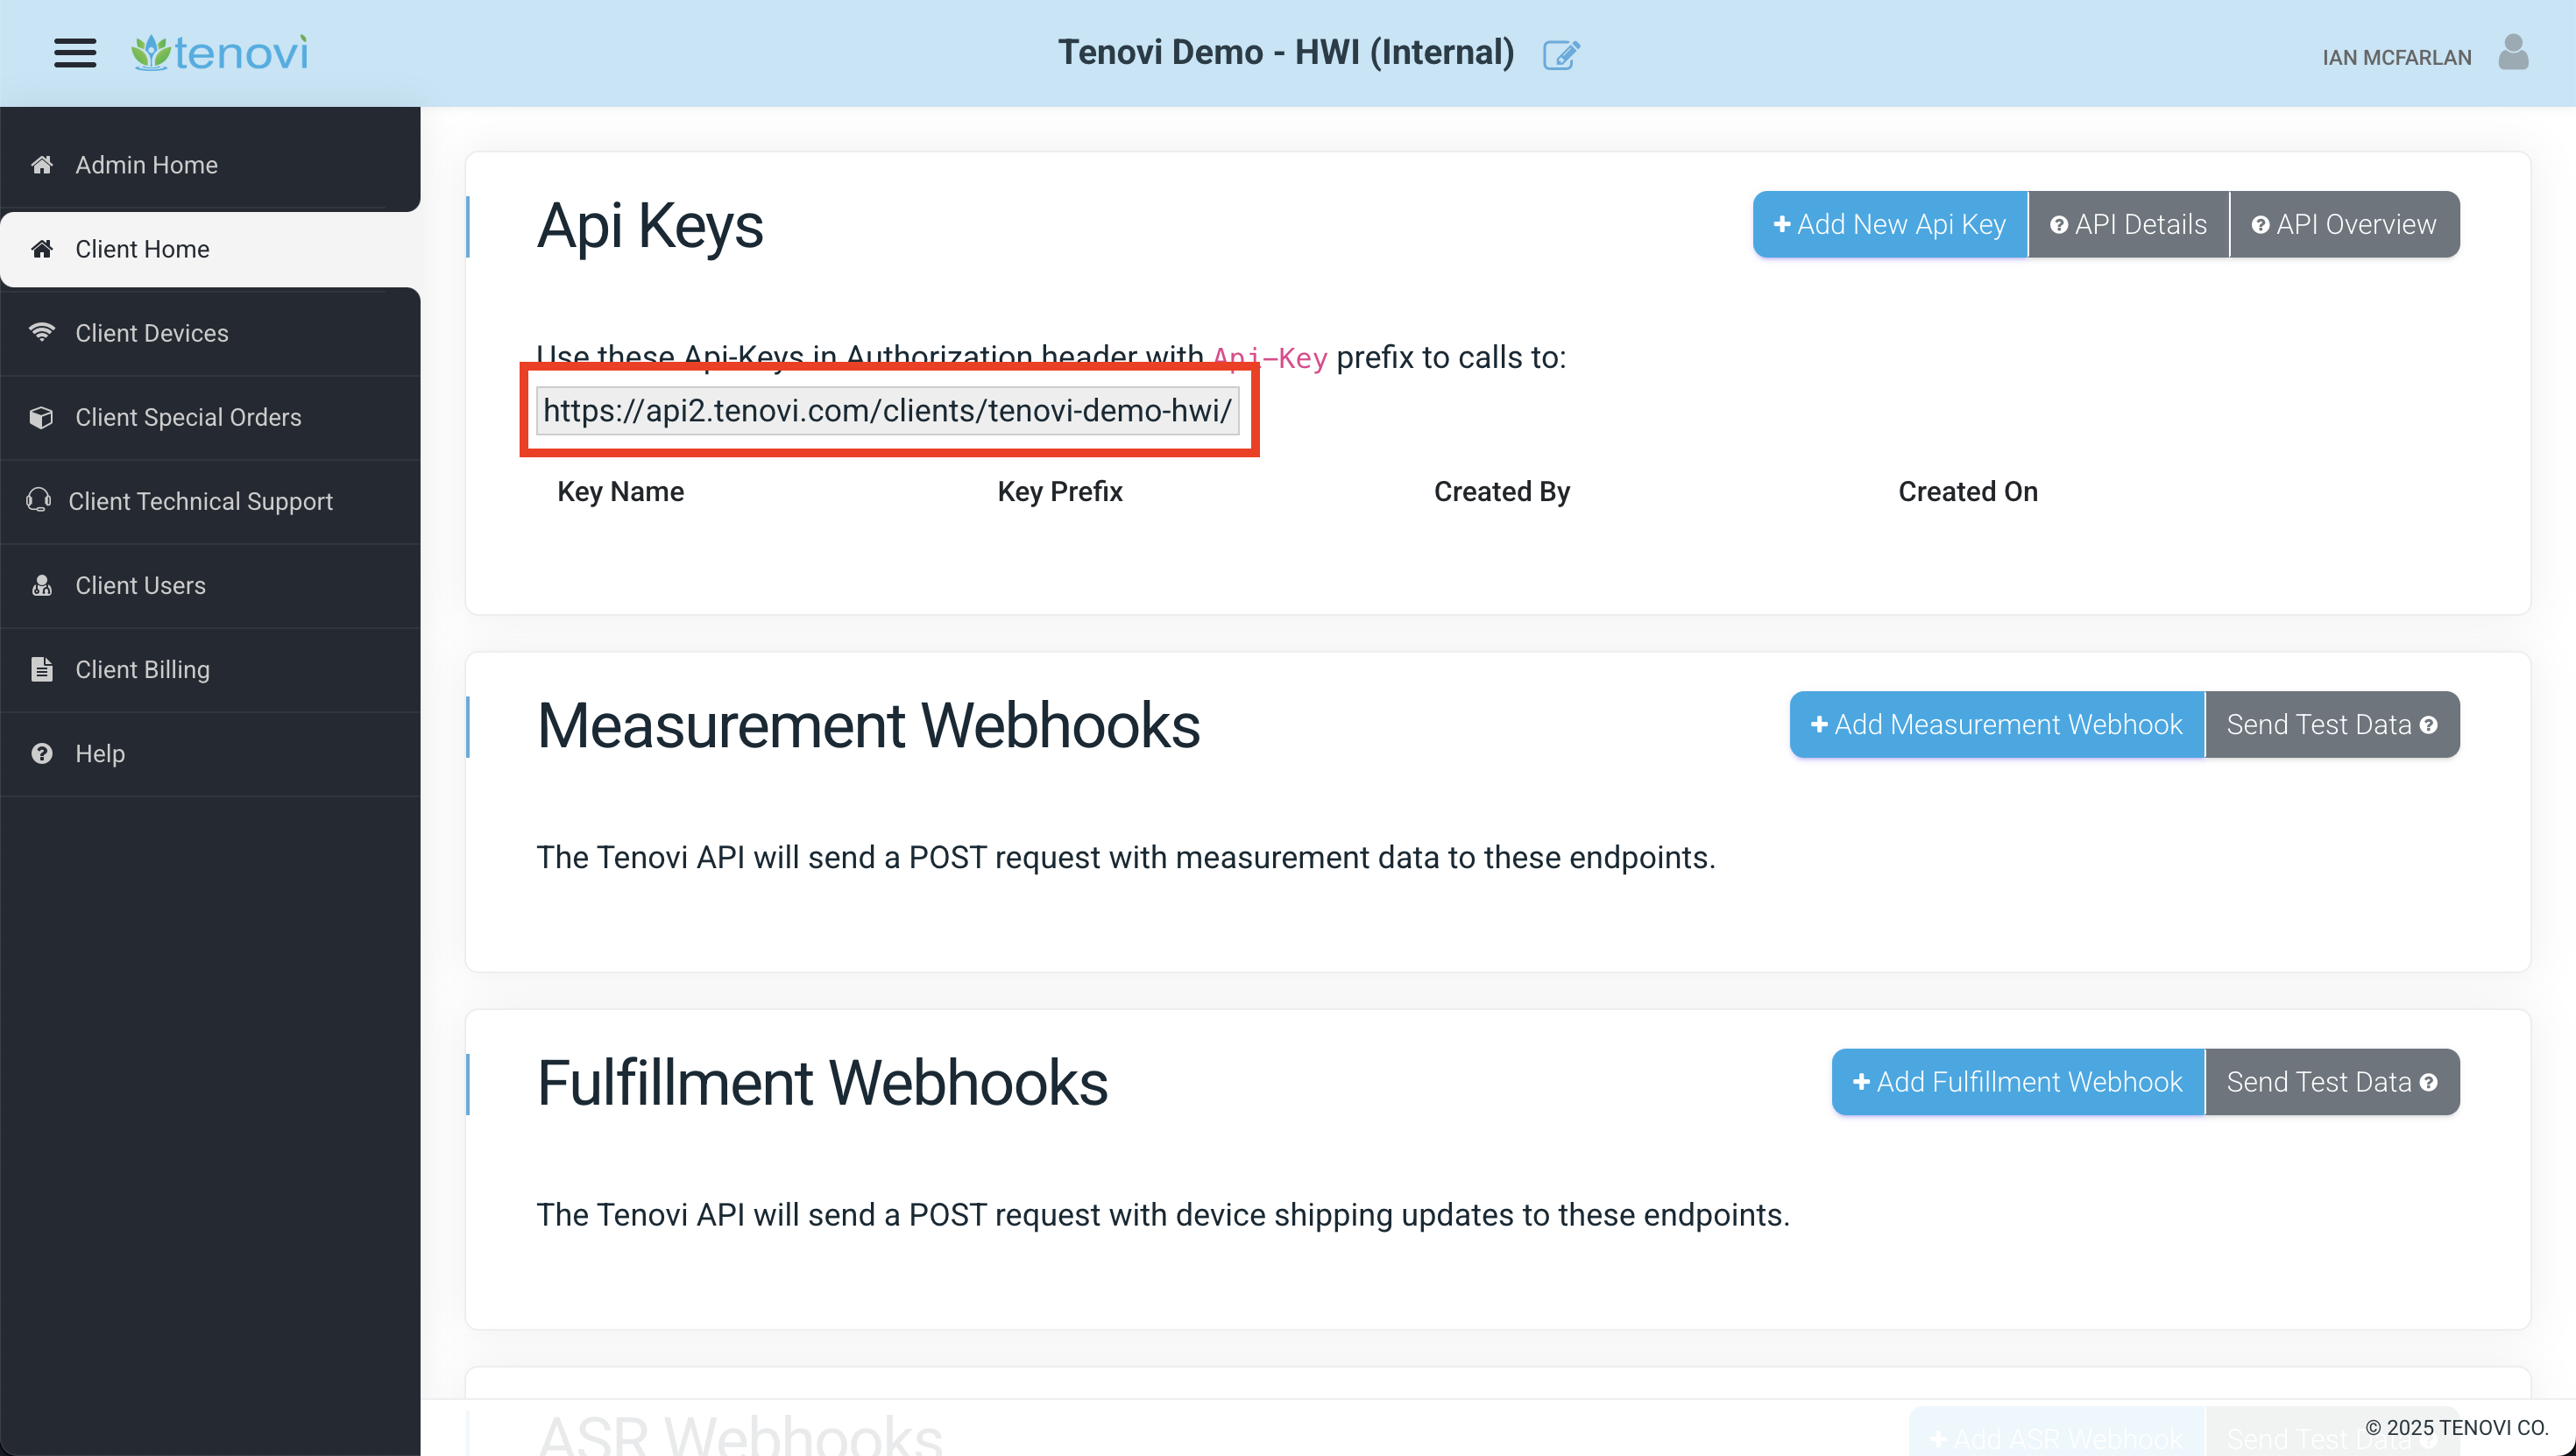
## Authorization/API Key Errors (401 Error)
[Section titled “Authorization/API Key Errors (401 Error)”](#authorizationapi-key-errors-401-error)
This usually points to misconfiguration of your [Api-Key placed in your API calls header](/hwi-api/api-url-config/). Tenovi Api-Keys require that you pass them in your authorization header.
Note
‘Api-Key’ in the header is case-sensitive.
If you are making use of development and production Tenovi logins, ensure you are using the correct Api-Key for your relevant environment.
This could also be caused by not having a trailing slash on the end of the URL for the endpoint, causing the request to redirect and drop the authorization headers.
Below is an example of a successful authorization setup using cURL.
```bash
curl --location --request GET ‘https://api2.tenovi.com/clients/test-client/hwi/hwi-devices/’ \
-header ‘Authorization: Api-Key xxxxxxxxxxxxx’ \
–data-raw
```
## Device With This Gateway ID/Sensor Code Already Exists
[Section titled “Device With This Gateway ID/Sensor Code Already Exists”](#device-with-this-gateway-idsensor-code-already-exists)
This error occurs when [Activating/Requesting a new Device](/hwi-api/devices/activating-devices/), and the type of device being activated/requested (e.g., scale, BPM, etc.) is already connected to a Gateway with the supplied Gateway ID. Gateways can only have one device of each type (scale, BPM, etc.) connected to them.
Please ensure the Gateway ID supplied is correct and verify there are no other Devices of the same type connected to that Gateway on the [Client Devices Dashboard](https://app.tenovi.com/client).
# Common Interfaces & Best Practices
> A list of common interfaces and best practices when working with the Tenovi HWI API.
Tenovi’s APIs provide core interfaces for [managing devices](/hwi-api/devices/activating-devices), [retrieving patient measurements](/hwi-api/measurement-data), and [accessing Gateway metadata](/hwi-api/gateways). This guide outlines the essential endpoints you’ll need for most integrations, along with tips and best practices to avoid common pitfalls.
Note
Details of all the JSON schemas used and API endpoints available in Tenovi’s HWI API are available in our [API Reference](https://api2.tenovi.com/hwi-redoc/).
## Core Endpoints
[Section titled “Core Endpoints”](#core-endpoints)
### 1. Add a New Device
[Section titled “1. Add a New Device”](#1-add-a-new-device)
**Endpoint:** `POST /hwi/hwi-devices/`
**Purpose:** Creates a new device record for a patient.
* Include correct device metadata and the patient identifier at creation.
* Validate that the device type is supported using the device catalogue endpoint (see #4).
* See our [Activating/Requesting Devices](/hwi-api/devices/activating-devices) doc for more information.
### 2. Unlink a Gateway or Remove a Device
[Section titled “2. Unlink a Gateway or Remove a Device”](#2-unlink-a-gateway-or-remove-a-device)
**Endpoint:** `POST /hwi/unlink-gateway/{hwi_device_id}/`
**Purpose:** Unlinks devices associated with a specific Gateway.
Your application should support removing patient devices in the UI to ensure you can unenroll patients from your program and no longer be billed for inactive devices. You must call this API endpoint when a user removes a device, disassociates a patient from a Gateway, or unenrolls from your program.
* Ensure you handle confirmation states in your frontend (e.g., success/failure messages).
* Verify that the HWI Device ID exists in your Tenovi account before attempting unlinking.
* See our [Removing/Unlinking Devices](/hwi-api/devices/unlinking-devices) doc for more information.
* See our Recipe for [Bulk Unlinking Devices](/recipes/bulk-unlinking/) if you need to unlink many devices.
### 3. Retrieve Patient Measurements
[Section titled “3. Retrieve Patient Measurements”](#3-retrieve-patient-measurements)
**Endpoint:** `GET /hwi/patients/{patient_external_id}/measurements/`
**Purpose:** Retrieves a patient’s measurement history (e.g., weight, blood pressure, pulse ox).
* Ensure the `patient_external_id` in your system matches the Tenovi patient record exactly.
* Use date filters via query parameters where possible to minimize payload size.
* See our [API Reference Doc](https://api2.tenovi.com/hwi-redoc/#tag/hwi-patient-measurements/operation/patients_measurements_list) for more information.
Note
As of April 2026, this endpoint supports pagination via `?page=` and `?page_size=` parameters. As of May 5, 2026, non-paginated responses will be truncated at 1,000 results. See the [Pagination Guide](/hwi-api/pagination/) for details.
### 4. Get Device & Gateway Information
[Section titled “4. Get Device & Gateway Information”](#4-get-device--gateway-information)
**Endpoint:** `GET /hwi/gateway-info/{gateway_uuid__iexact}/`
**Purpose:** Retrieves device and Gateway metadata, including firmware versions, last connected date, last cellular signal strength, and whitelisted devices.
* Confirm firmware version for troubleshooting and device support.
* View cellular signal strength.
* Review devices whitelisted to the Gateway.
* See our [Gateways](/hwi-api/gateways) doc for more information.
## Best Practices & Common Pitfalls
[Section titled “Best Practices & Common Pitfalls”](#best-practices--common-pitfalls)
### Patient ID Synchronization
[Section titled “Patient ID Synchronization”](#patient-id-synchronization)
* **Key Rule:** The `patient.external_id` you use for Tenovi API calls must match your frontend or EHR system exactly.
* Mismatched IDs result in failed measurement queries or orphaned device records.
### Handling Measurements
[Section titled “Handling Measurements”](#handling-measurements)
* Store timestamps from the measurement payload (`timestamp` or `measurement_time`) in UTC for consistency. These values include timezone offsets to allow you to calculate local time.
* If multiple device types report for the same patient, filter by measurement type to avoid confusion.
### Error Handling
[Section titled “Error Handling”](#error-handling)
* Always check for `2xx` responses before confirming any action to users, along with any response message for more detail.
* For `4xx` responses, ensure your API keys and client domains are valid.
# HWI Developer FAQs
> Frequently asked questions for developers when working with the Hardware Integration (HWI) API.
## Accounts, Users, Logins
[Section titled “Accounts, Users, Logins”](#accounts-users-logins)
### I haven’t received my activation email to log into the Tenovi web app.
[Section titled “I haven’t received my activation email to log into the Tenovi web app.”](#i-havent-received-my-activation-email-to-log-into-the-tenovi-web-app)
In some cases, this email is held up in spam/quarantine mail filters. For quicker access, you can make use of the ‘[forgot my password](https://app.tenovi.com/authentication/login?forgot-password=show)’ feature on the [Tenovi login page](https://app.tenovi.com/authentication/login) to send a password reset email. If this second email doesn’t arrive in your inbox (should arrive very quickly), contact us and we can see what the issue could be.
## API Calls
[Section titled “API Calls”](#api-calls)
### The docs reference a client domain, where can I find the client domain for my account?
[Section titled “The docs reference a client domain, where can I find the client domain for my account?”](#the-docs-reference-a-client-domain-where-can-i-find-the-client-domain-for-my-account)
You can find your client domain on your HWI Settings when logged into the [Tenovi web app](https://app.tenovi.com/) in the card that is used to create API keys.

This URL will be your prefix for all your Tenovi API calls to make requests. It looks something like this:
```bash
https://api2.tenovi.com/clients/test-client/
```
An example of making an API call to list all your client devices looks something like this:
```bash
https://api2.tenovi.com/clients/test-client/hwi/hwi-devices/
```
More on the client domain can be found in our [API URL Configuration documentation](/hwi-api/api-url-config/).
### I don’t have my API Key after I generated it. Can you send it to me?
[Section titled “I don’t have my API Key after I generated it. Can you send it to me?”](#i-dont-have-my-api-key-after-i-generated-it-can-you-send-it-to-me)
All our API keys are hashed and encrypted for security purposes. Once you generate an API key you will be shown the full API key once. After the modal is closed, the API key will only be displayed by its prefix within the Tenovi web app. If you do not have your API key on file after this creation, you will need to create a new API key.
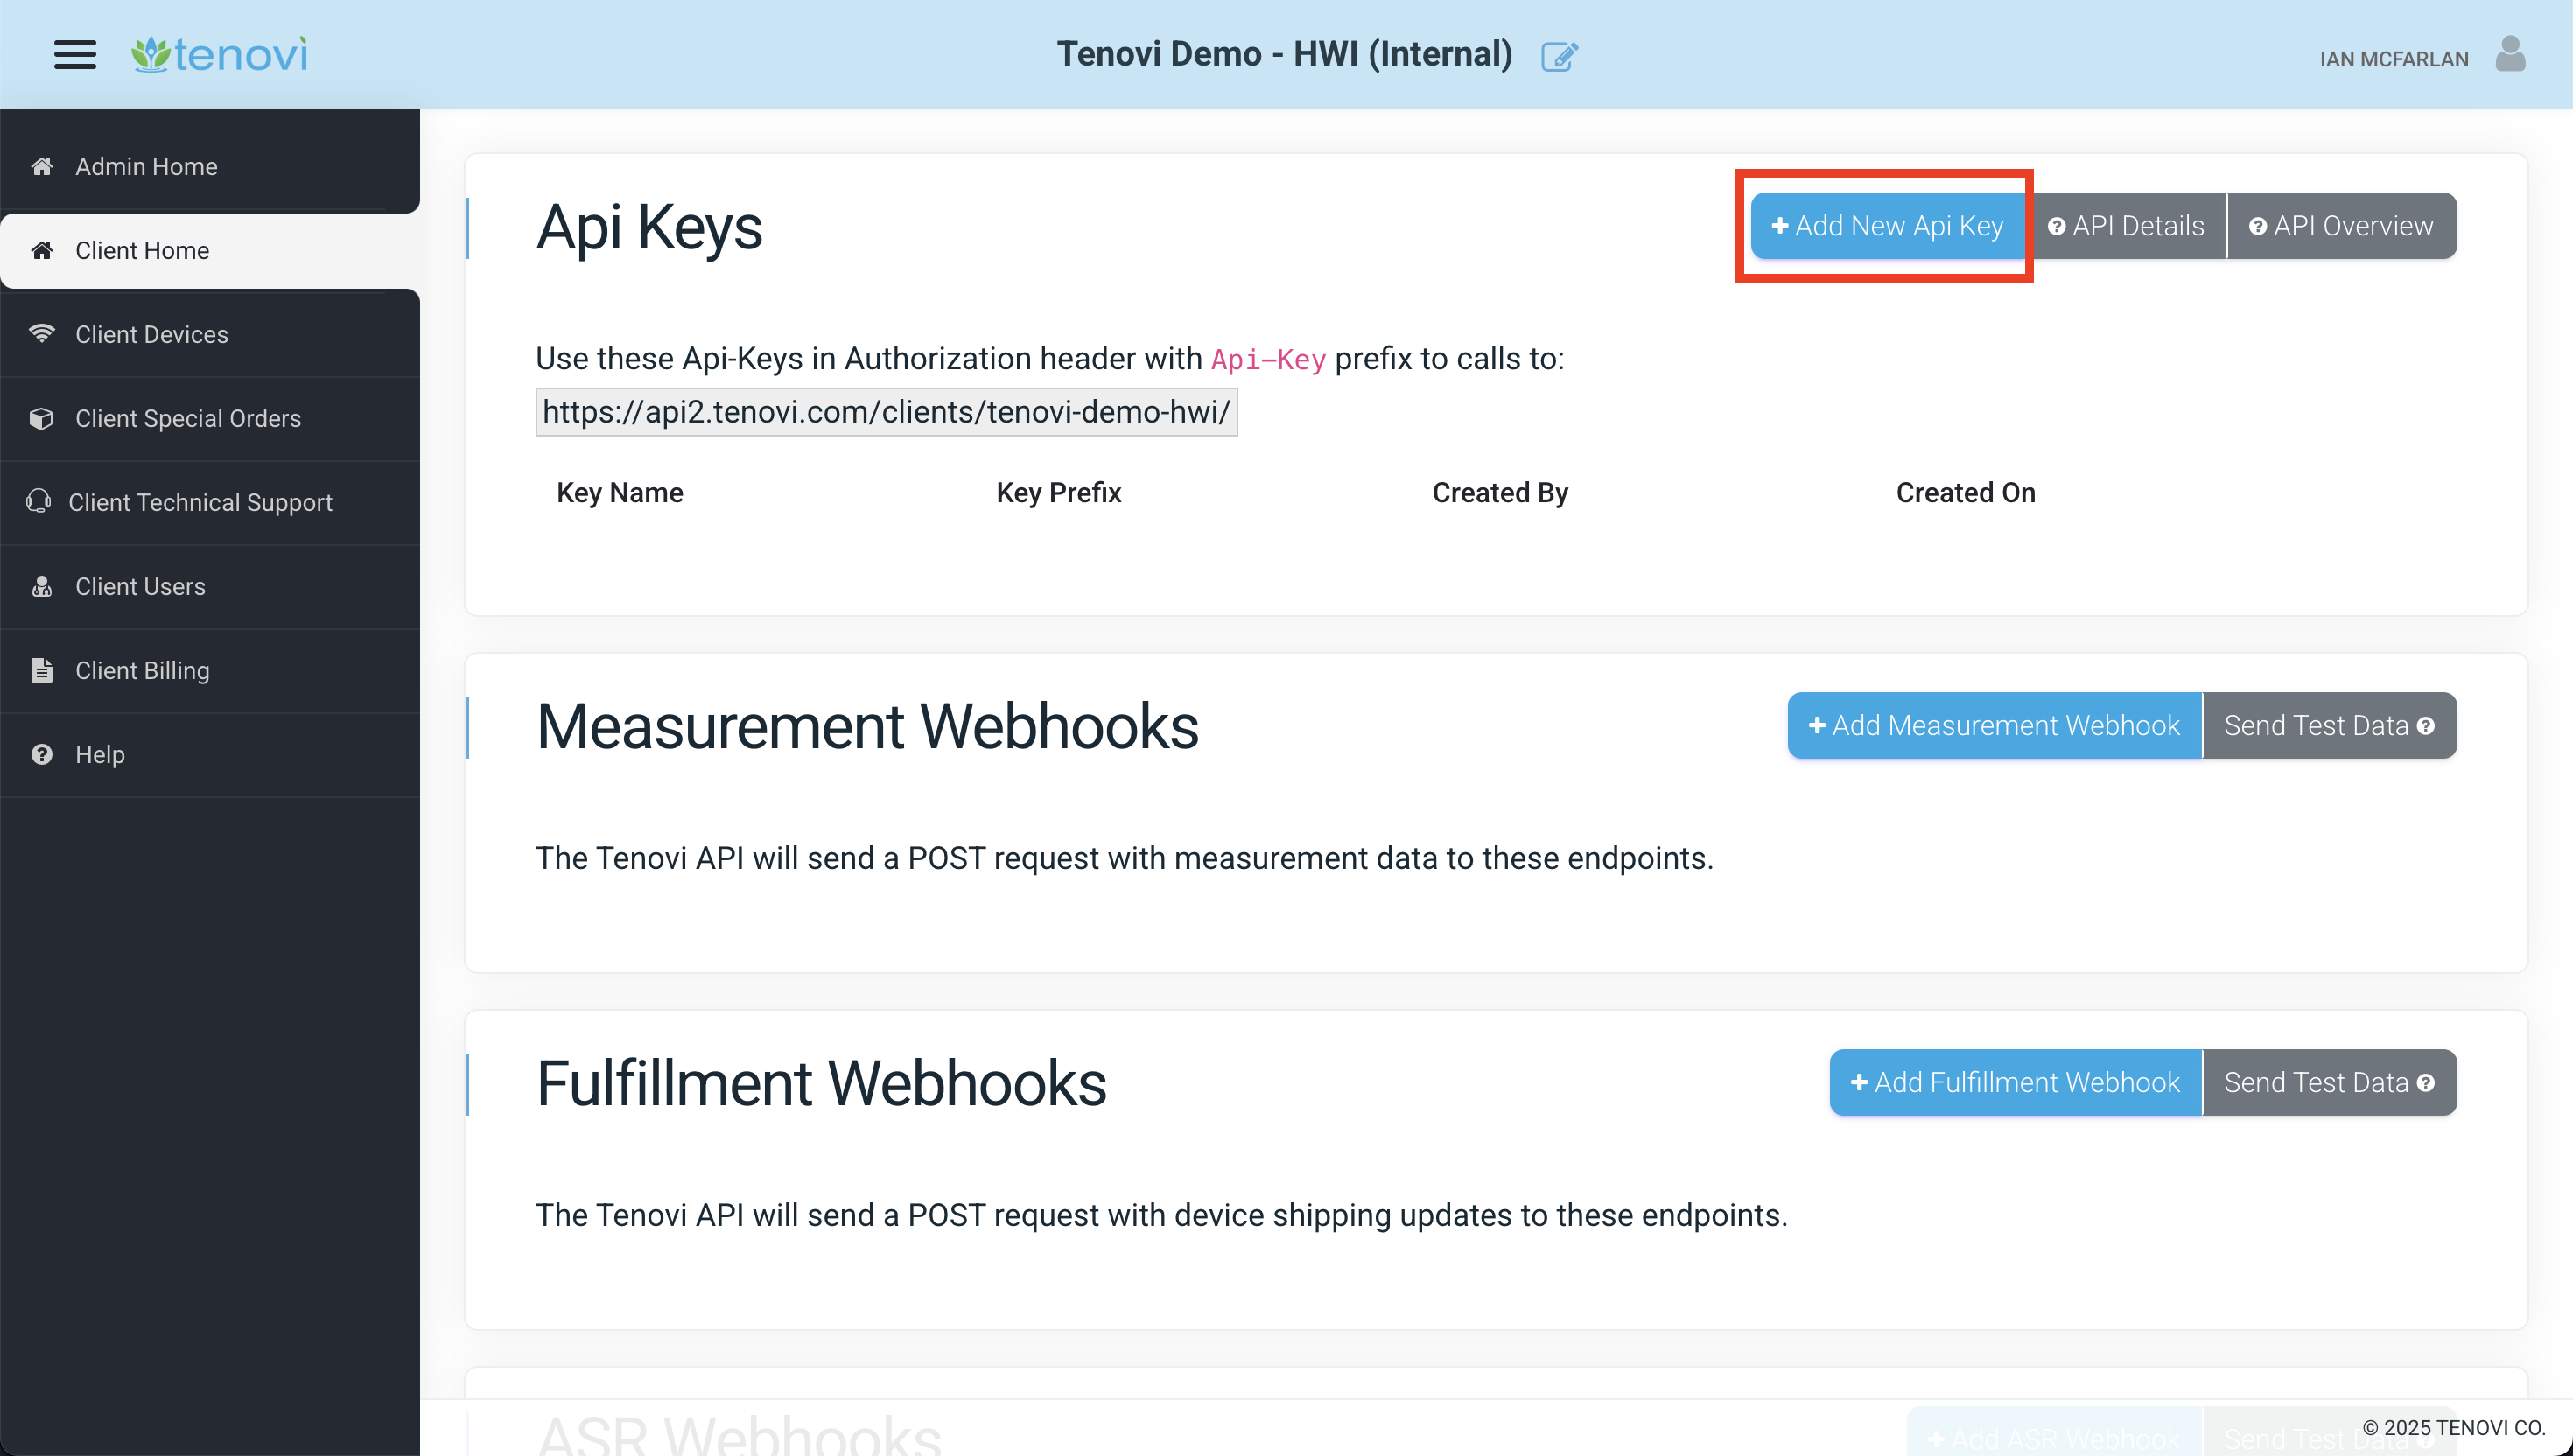
## Webhooks
[Section titled “Webhooks”](#webhooks)
### How many Measurement and/or Fulfillment Webhooks can I setup for my account? How many API Keys?
[Section titled “How many Measurement and/or Fulfillment Webhooks can I setup for my account? How many API Keys?”](#how-many-measurement-andor-fulfillment-webhooks-can-i-setup-for-my-account-how-many-api-keys)
You can create as many webhooks for [measurements](/hwi-api/webhooks/measurement-webhooks/) and [fulfillment updates](/hwi-api/webhooks/fulfillment-webhooks/) as needed for your setup. We recommend trying to keep this list smaller rather than larger for maintainability but you can send data to multiple endpoints in your own infrastructure. Likewise, you can generate many API keys in a single account.
### How quickly can I expect webhook notifications?
[Section titled “How quickly can I expect webhook notifications?”](#how-quickly-can-i-expect-webhook-notifications)
[Webhook](/hwi-api/webhooks/webhooks-overview/) payloads are delivered nearly instantly from Tenovi’s servers. In some cases they can take up to 2min to fully resolve.
Note
[Fulfillment webhooks](/hwi-api/webhooks/fulfillment-webhooks/) only send responses when a fulfillment order is updated (i.e. when shipment tracking information is added by Tenovi fulfillment).
### I didn’t receive my webhook notifications for fulfillment or measurements, how can I debug/verify my setup?
[Section titled “I didn’t receive my webhook notifications for fulfillment or measurements, how can I debug/verify my setup?”](#i-didnt-receive-my-webhook-notifications-for-fulfillment-or-measurements-how-can-i-debugverify-my-setup)
First, ensure you have the correct URL endpoints pointing to your infrastructure on your within the [Tenovi web app](https://app.tenovi.com/client). In addition, ensure these endpoints have any applicable authorization headers configured correctly to authenticate with your infrastructure.
If your URL endpoints look to be configured correctly, ensure error handling is setup within your infrastructure and the appropriate JSON schemas are in use. Refer to [our online documentation for detailed information on these schemas](https://api2.tenovi.com/hwi-redoc/).
You can quickly test fulfillment webhook responses by including the ‘client\_will\_fulfill’ flag in your [initial fulfillment API request](https://api2.tenovi.com/hwi-redoc/#operation/hwi-devices_create). This flag is in the device > fulfillment object sent in the initial API request.
This enables you to update the fulfillment request within the Tenovi web app (ie. updating shipping information) that will force a fulfillment payload to be sent to your infrastructure.
### How can we track device kits (collections of devices) for a specific patient?
[Section titled “How can we track device kits (collections of devices) for a specific patient?”](#how-can-we-track-device-kits-collections-of-devices-for-a-specific-patient)
In some cases, you will want to be able to track which devices a patient has within your system. [Tenovi webhook](/hwi-api/webhooks/webhooks-overview/) payloads don’t include this information in a single field but some fields can be concatenated and saved within your system to save/read this information.
You can make use of the `hardware_uuid` and the sensor codes to create a string that contains this information. This can be useful if your organization needs to keep track of which devices a patient uses in a single field.
### What does the “Post as Array” option in the HWI Webhook configuration do?
[Section titled “What does the “Post as Array” option in the HWI Webhook configuration do?”](#what-does-the-post-as-array-option-in-the-hwi-webhook-configuration-do)
For devices that measure multiple metrics simultaneously (e.g. BPMs that measure both `blood_pressure` and `pulse` metrics in a single physical reading), the HWI Webhooks can be configured to either send two separate POST requests for each metric, or a single POST request with the measurement data for each metric included in an array.
Post as array settings can be configured for each webhook on the HWI Settings screen of the [Tenovi web app](https://app.tenovi.com/client).
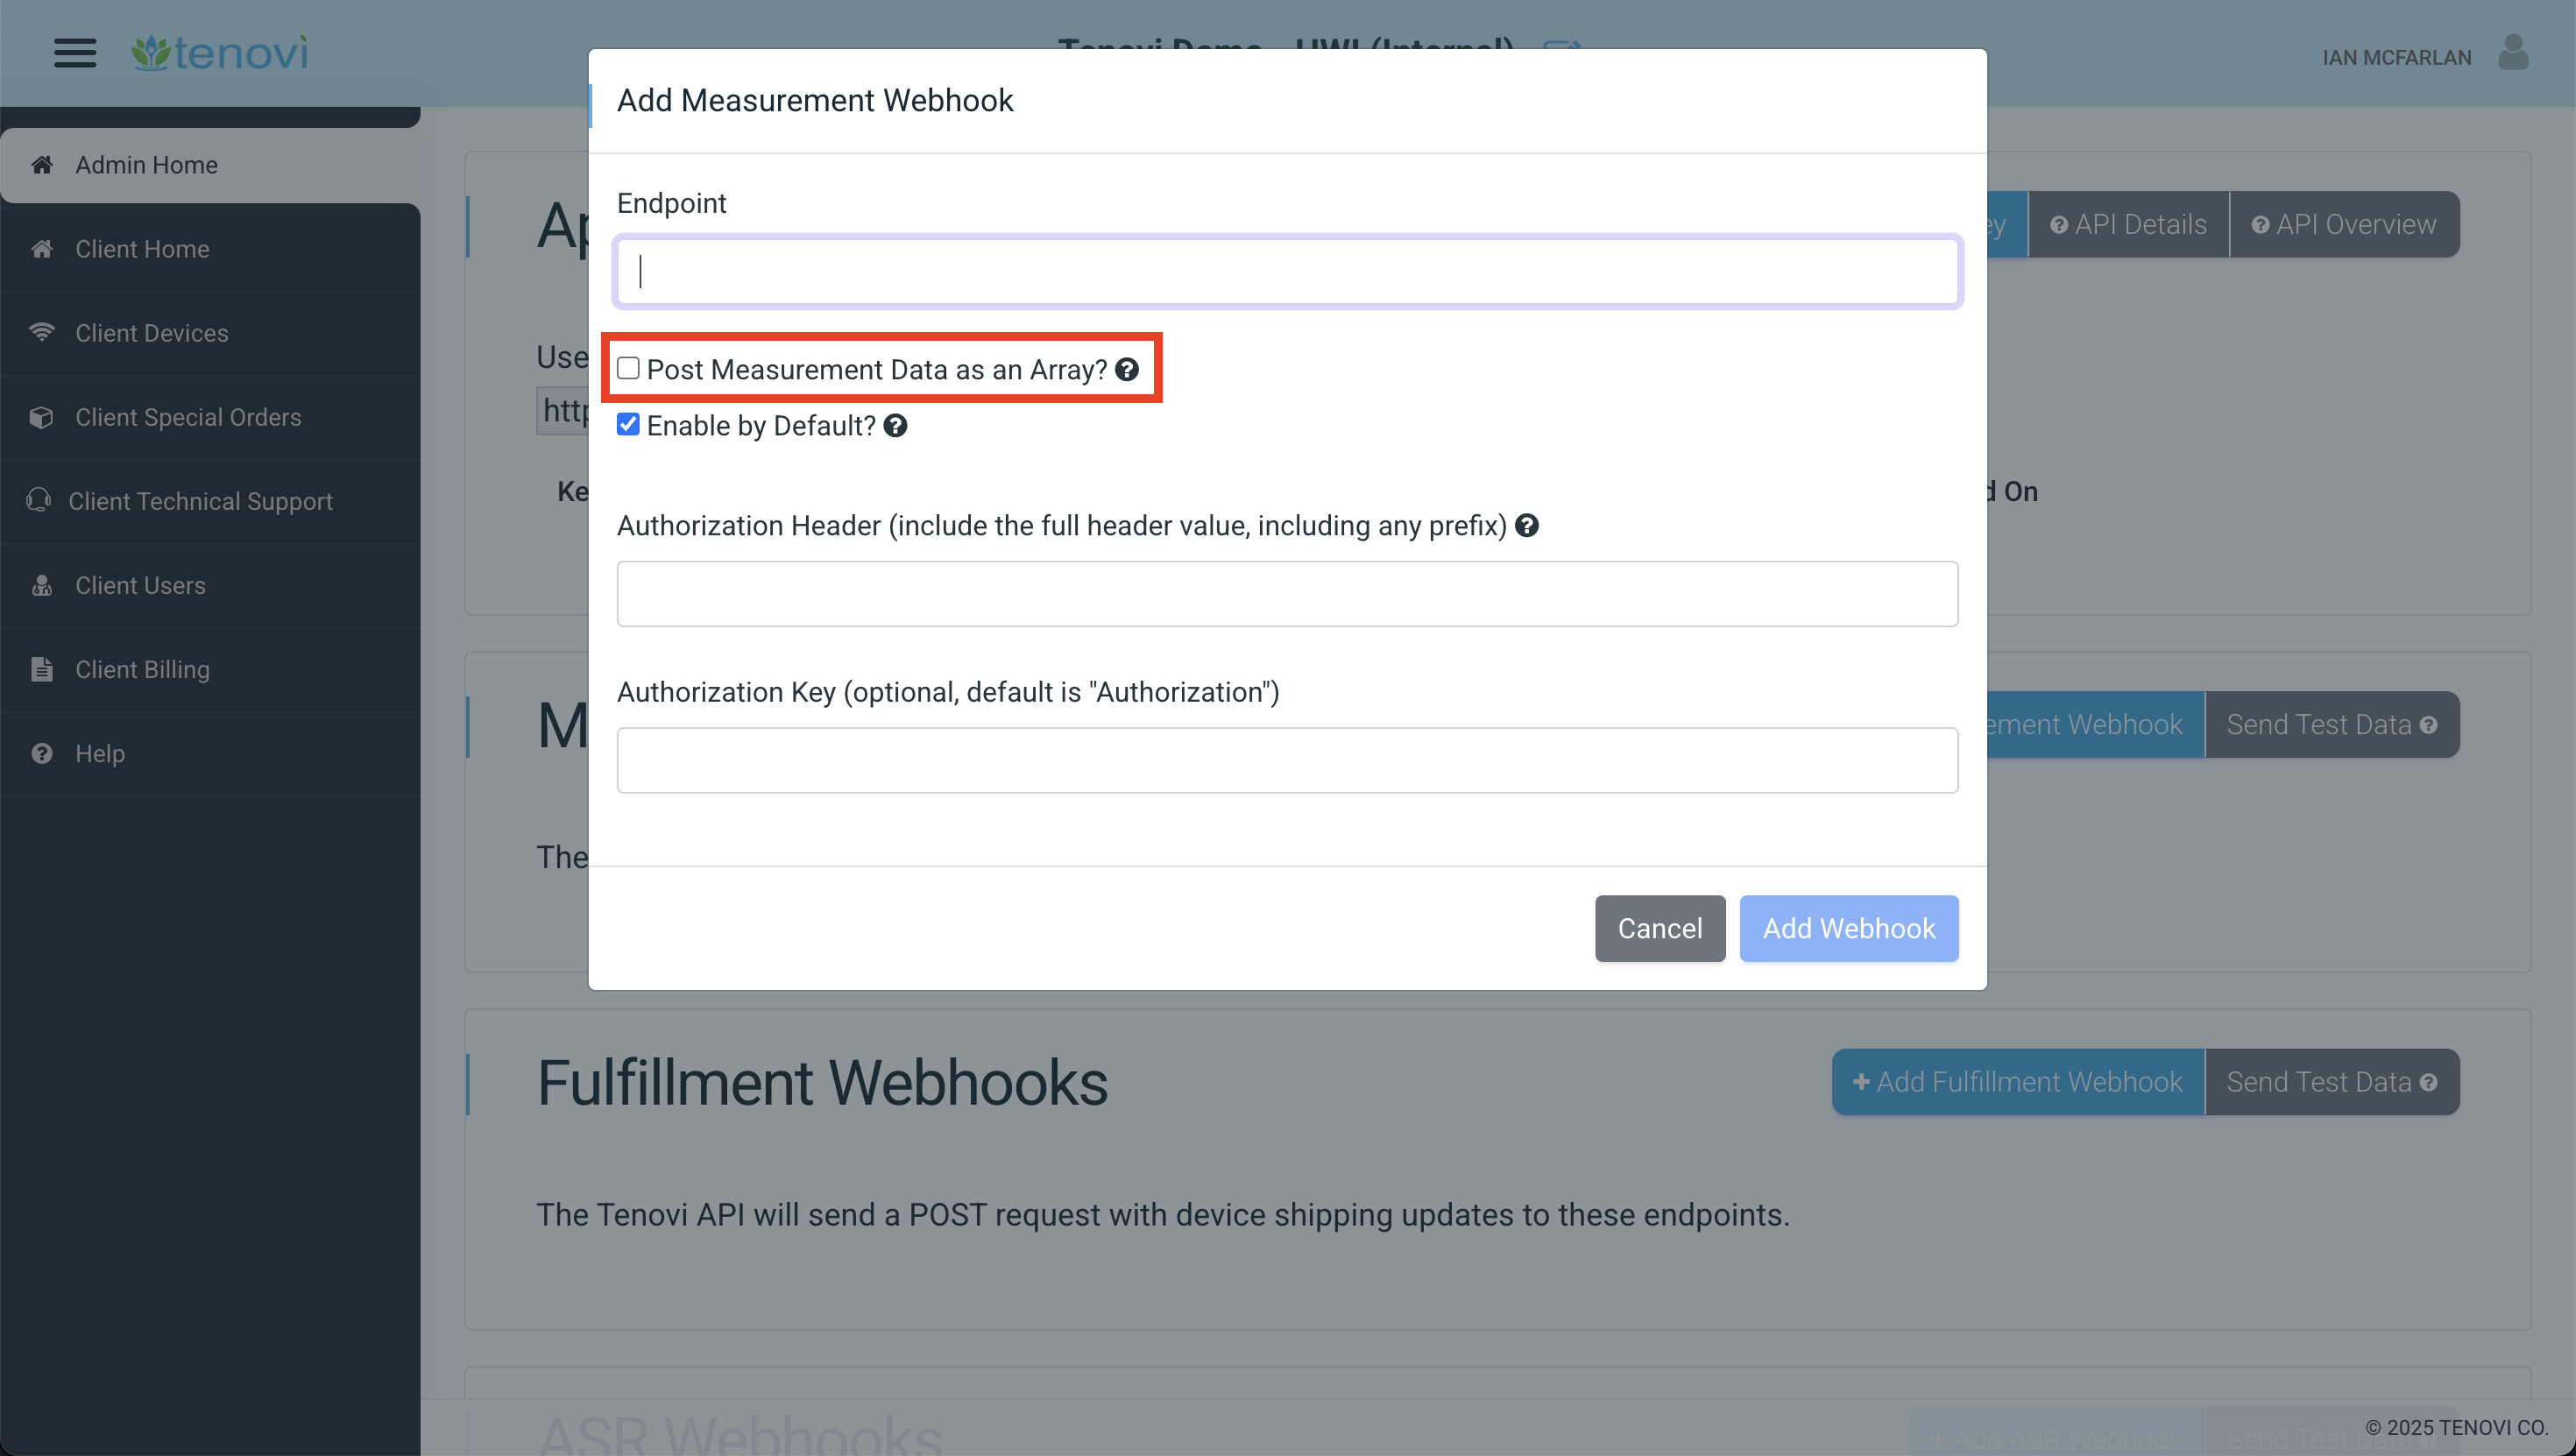
#### Default Measurement JSON Payloads
[Section titled “Default Measurement JSON Payloads”](#default-measurement-json-payloads)
For example, here is how data would be received from a single physical measurement from a BPM if `post_as_array == False`:
POST Request #1:
```json
{
"metric": "blood_pressure",
"device_name": "Tenovi BPM – L",
"hwi_device_id": "12345678-abcd-1234-abcd-1234567890ab",
"patient_id": "12345678-1234-12345678",
"hardware_uuid": "fed091a643ff",
"sensor_code": "10",
"value_1": 120.00,
"value_2": 80.00,
"created": "2021-01-15T12:15:20.123597Z",
"timestamp": "2021-01-15T12:14:49.000000Z",
"timezone_offset": -7,
"estimated_timestamp": false,
"filter_params": {
"measurement_index": 15
}
}
```
POST Request #2:
```json
{
"metric": "pulse",
"device_name": "Tenovi BPM – L",
"hwi_device_id": "12345678-abcd-1234-abcd-1234567890ab",
"patient_id": "12345678-1234-12345678",
"hardware_uuid": "fed091a643ff",
"sensor_code": "10",
"value_1": 88.00,
"value_2": 0.00,
"created": "2021-01-15T12:15:45.123597Z",
"timestamp": "2021-01-15T12:14:49.000000Z",
"timezone_offset": -7,
"estimated_timestamp": false,
"filter_params": {
"measurement_index": 15
}
}
```
#### Post as Array Measurement JSON Payloads
[Section titled “Post as Array Measurement JSON Payloads”](#post-as-array-measurement-json-payloads)
Here is how that same data would be received from a single physical measurement from a BPM if `post_as_array == True`:
POST Request #1:
```json
[
{
"metric": "blood_pressure",
"device_name": "Tenovi BPM – L",
"hwi_device_id": "12345678-abcd-1234-abcd-1234567890ab",
"patient_id": "12345678-1234-12345678",
"hardware_uuid": "fed091a643ff",
"sensor_code": "10",
"value_1": 120.00,
"value_2": 80.00,
"created": "2021-01-15T12:15:20.123597Z",
"timestamp": "2021-01-15T12:14:49.000000Z",
"timezone_offset": -7,
"estimated_timestamp": false,
"filter_params": {
"measurement_index": 15
}
},
{
"metric": "pulse",
"device_name": "Tenovi BPM – L",
"hwi_device_id": "12345678-abcd-1234-abcd-1234567890ab",
"patient_id": "12345678-1234-12345678",
"hardware_uuid": "fed091a643ff",
"sensor_code": "10",
"value_1": 88.00,
"value_2": 0.00,
"created": "2021-01-15T12:15:45.123597Z",
"timestamp": "2021-01-15T12:14:49.000000Z",
"timezone_offset": -7,
"estimated_timestamp": false,
"filter_params": {
"measurement_index": 15
}
}
]
```
## Devices & Gateways
[Section titled “Devices & Gateways”](#devices--gateways)
### How can I map a patient to a specific device/gateway?
[Section titled “How can I map a patient to a specific device/gateway?”](#how-can-i-map-a-patient-to-a-specific-devicegateway)
When you are making a [fulfillment request](/hwi-api/devices/activating-devices/), you can pass an optional `patient_id` parameter in your JSON payload. This ID will be included in all webhook responses and will enable Tenovi and your system to map devices/gateway to a specific patient.
### What if there are multiple Gateways in one area? How do I associate them with specific devices?
[Section titled “What if there are multiple Gateways in one area? How do I associate them with specific devices?”](#what-if-there-are-multiple-gateways-in-one-area-how-do-i-associate-them-with-specific-devices)
If there are multiple gateways in the area, they must be placed in a Whitelist Mode to ensure they only transmit readings from the specified devices. You can view the Whitelist status of a Gateway using the `hwi-gateway-info` [endpoint](/hwi-api/gateways/).
If Tenovi is dropshipping devices, our Fulfillment Team will automatically place them in Whitelist Mode at shipping time. If you bulk ordered Gateways, you can place them in Whitelist Mode manually by following these step:
1. Unplug all gateways except for the one you would like to put into Whitelist mode.
2. Press and hold the button on the gateway until you see a pulsing white light.
3. Place the devices that you want to whitelist within 1 foot of the gateway (as close as possible) and take a measurement.
4. The pulsing light should go away. Take another measurement. Confirm the LED light turns green.
5. Repeat these steps for any other gateway in the area. All Tenovi gateways in the area must be in whitelist mode to operate correctly.
## Date & Timestamps
[Section titled “Date & Timestamps”](#date--timestamps)
### The measurement webhooks include both a `created` datetime field and a `timestamp` field. What is the difference?
[Section titled “The measurement webhooks include both a created datetime field and a timestamp field. What is the difference?”](#the-measurement-webhooks-include-both-a-created-datetime-field-and-a-timestamp-field-what-is-the-difference)
The `created` field indicates when a Measurement was received by our system (i.e., when the record was created in our database).
The `timestamp` field indicates when a Measurement was taken (see below for more details).
Some of our devices can store measurements on-device if readings are taken when they are outside of our Gateway’s range (see devices with “On-Device Measurement Storage” on our [Device Overview page](/guides/device-overview/)). When this happens, these devices save the time the measurements were taken in the `timestamp` field and transmit the measurements with this timestamp the next time our Gateway is in range. Our Gateway sets the time on these devices every time they connect, so usually, these timestamps are very accurate.
Our system uses two datetime fields (`timestamp` and `created`) to distinguish between when the measurement was taken and stored on the device (`timestamp`), and when the measurement was received by our servers (`created`).
If a user often takes readings out of range of the Gateway, it is not uncommon for there to be a several days difference between these two datetime fields. Often, you will see devices with different `timestamp` values and very similar `created` values, indicating times when the Gateway uploaded a batch of historical readings all at once.
### What is an `estimated timestamp`?
[Section titled “What is an estimated timestamp?”](#what-is-an-estimated-timestamp)
Our system tracks both the date and time when a measurement is taken and when it is received by our servers. For devices with On-Device Measurement Storage (see our [Device Overview](/guides/device-overview/) for a full list), our Gateway sets the time on these devices every time they connect, so usually, these timestamps are very accurate.
However, sometimes the time on a device is not correct (for example, if measurements are taken right out of the box or after the user replaces the batteries, before a device has had a chance to connect to our Gateway). Our system detects this by looking for measurements in an invalid time range. When this happens, our system will replace the invalid timestamp with an estimated timestamp based on the last valid timestamp received, when the device was delivered, and other factors.
If multiple invalid timestamps are received, our estimation algorithm will preserve the time between subsequent measurements to ensure billing is not affected (as some billing codes depend on the collection of measurements across a specific number of days).
Our system uses a flag in our API to indicate which timestamps are estimates. We also always include the time at which the measurement was received by our system (the `created` field) in case you would prefer to use this value instead.
When an estimated timestamp is used, the original time on the device is included in the `filter_params` using the key `original_timestamp`. Example:
```plaintext
{
"metric": "blood_pressure",
"device_name": "Tenovi BPM – L",
"hwi_device_id": "12345678-abcd-1234-abcd-1234567890ab",
"patient_id": "12345678-1234-12345678",
"hardware_uuid": "fed091a643ff",
"sensor_code": "10",
"value_1": "120.00",
"value_2": "80.00",
"created": "2021-01-15T12:15:20.123597Z",
"timestamp": "2021-01-15T12:14:49.000000Z",
"timezone_offset": -7,
"estimated_timestamp": false,
"filter_params": {
"measurement_index": 15,
"original_timestamp": "2021-01-01T12:05:00.123597Z"
}
}
```
# Tenovi Device Overview
> A list of available devices and the metrics they measure
This page has moved. If you are not redirected automatically, [click here](/devices).
# Estimated Timestamps
> A guide about what estimated timestamps are and how to work with them
Some [devices](/guides/device-overview/), most commonly blood pressure monitors and glucometers, rely on internal power to maintain their date and time. Under certain conditions, the device clock can be temporarily reset.
When this happens, the device may still capture a valid [measurement](/hwi-api/measurement-data), but the recorded time on the device may not accurately reflect when the reading was taken. Passing that incorrect time through unchanged would create misleading datapoint since the timestsamp would be incorrect.
To prevent this, Tenovi applies timestamp estimation when it detects that a device’s internal time cannot be trusted.
Timestamp estimation is a data quality safeguard
It ensures that clearly incorrect device times are not passed through as real, while preserving transparency and allowing customers to make informed decisions about how to handle the data.
## What Triggers Timestamp Estimation?
[Section titled “What Triggers Timestamp Estimation?”](#what-triggers-timestamp-estimation)
A common trigger is temporary loss of power, such as when batteries are removed from a device. When batteries are taken out:
* The device may lose its internal clock
* The next reading may be taken before the device has reconnected to the gateway
* Until that reconnection happens, the device does not yet have a reliable real-world time reference
In these cases, readings are still captured correctly, but their timestamps must be estimated. Once the device reconnects to the gateway, accurate time is restored automatically and subsequent readings use normal timestamps.
## Common Patient Use Patterns
[Section titled “Common Patient Use Patterns”](#common-patient-use-patterns)
These are patterns we commonly see in everyday use. They are not errors, and they do not indicate anything wrong with the device or the reading itself.
### Battery removal between uses
[Section titled “Battery removal between uses”](#battery-removal-between-uses)
Some users remove batteries between readings, often as part of their routine. If a reading is taken after the batteries are reinserted but before the device reconnects to the gateway, that reading will receive an estimated timestamp.
### Readings Taken Away From The Gateway
[Section titled “Readings Taken Away From The Gateway”](#readings-taken-away-from-the-gateway)
Readings may be taken in another room, while traveling, or while the gateway is unplugged or temporarily offline. In these situations:
* The device stores the reading
* Time synchronization cannot occur immediately
* When the reading is later uploaded, Tenovi estimates the timestamp
### Repeated Power Resets
[Section titled “Repeated Power Resets”](#repeated-power-resets)
If batteries are removed and reinserted frequently, and readings are taken before reconnection each time, multiple readings in a row may be flagged as estimated.
### Combined Behaviors Over Time
[Section titled “Combined Behaviors Over Time”](#combined-behaviors-over-time)
When temporary power loss and offline readings happen together over a period of time, all readings during that window may require timestamp estimation until a successful gateway connection re-establishes accurate time.
## How The Estimation Works
[Section titled “How The Estimation Works”](#how-the-estimation-works)
When a timestamp needs to be estimated, Tenovi looks for a reliable reference point in the following order:
1. The last valid measurement timestamp
2. The delivery date
3. The shipped date plus estimated transit time
4. The date the device was first registered in Tenovi
Using that reference, Tenovi calculates elapsed time and applies it to produce the most accurate estimate possible.
| Estimated timestamps mean: | Estimated timestamps ***do not*** mean: |
| ------------------------------------------------- | --------------------------------------- |
| ✅ Tenovi detected a loss of reliable device time | ❌ The measurement value is incorrect |
| ✅ A protective correction was applied | ❌ The device malfunctioned |
| ✅ The reading remains valid and clinically useful | ❌ Data integrity was compromised |
## How Estimated Readings Are Identified
[Section titled “How Estimated Readings Are Identified”](#how-estimated-readings-are-identified)
Each reading that has an estimated timestamp includes a flag:
`"estimated_timestamp": true`
This provides transparency and allows downstream systems to handle these readings intentionally.
```json
[
{
"metric": "string",
"device_name": "string",
"hwi_device_id": "string",
"patient_id": "string",
"hardware_uuid": "string",
"sensor_code": "string",
"value_1": "string",
"value_2": "string",
"created": "2019-08-24T14:16:18Z",
"timestamp": "2019-08-24T14:15:22Z",
"timezone_offset": -2147483648,
"estimated_timestamp": true, // denotes an estimated timestamp
"filter_params": {}
}
]
```
## Recommendations When Working With Estimated Timestamps
[Section titled “Recommendations When Working With Estimated Timestamps”](#recommendations-when-working-with-estimated-timestamps)
* Use the `estimated_timestamp` field on metrics to branch logic
* Consider falling back to `created` timestamp (the time the metric was saved on Tenovi servers) for estimated readings
* Avoid automatically excluding estimated data, as this can unintentionally remove valid measurements
* Treat metrics with estimated timestamps visually different to help clinicians and care managers know they are working with a metric that has an estimated timestamp
# HWI Quick Start Guide
> A guide to get setup with HWI API Integration quickly
Below is a brief overview of how to get started with our standard API integration. This section is intended to provide a high-level description of how our API integration is intended to work. After familiarizing yourself with the basics, please review our full [API documentation](/hwi-api/overview/) for more details.
Tenovi Developer Support & API Specialists
Throughout your API integration, Tenovi has support and API specialists available to assist you in answering any questions that may arise. Contact your Tenovi Business Development Rep or your Customer Success Manager for more information.
## Generating API Keys
[Section titled “Generating API Keys”](#generating-api-keys)
Working with an AI coding assistant?
Point it at [docs.tenovi.com/llms-full.txt](https://docs.tenovi.com/llms-full.txt) for our complete documentation in a single, LLM-friendly file.
[Login to the Tenovi WebApp](https://app.tenovi.com) to generate API key(s) for your various environments. Be sure to copy/paste these API keys to a secure location as they are only fully displayed once upon generation.

Within the Tenovi WebApp, you can also add [Webhooks](/hwi-api/webhooks/webhooks-overview/) that will receive data from Tenovi’s systems for all [device measurements](/hwi-api/webhooks/measurement-webhooks/), [fulfillment updates](/hwi-api/webhooks/fulfillment-webhooks/) for dropshipped orders, and [special/bulk order updates](/hwi-api/webhooks/special-order-webhooks/). If you don’t have these endpoints setup on your server yet, you can always come back to add them later.
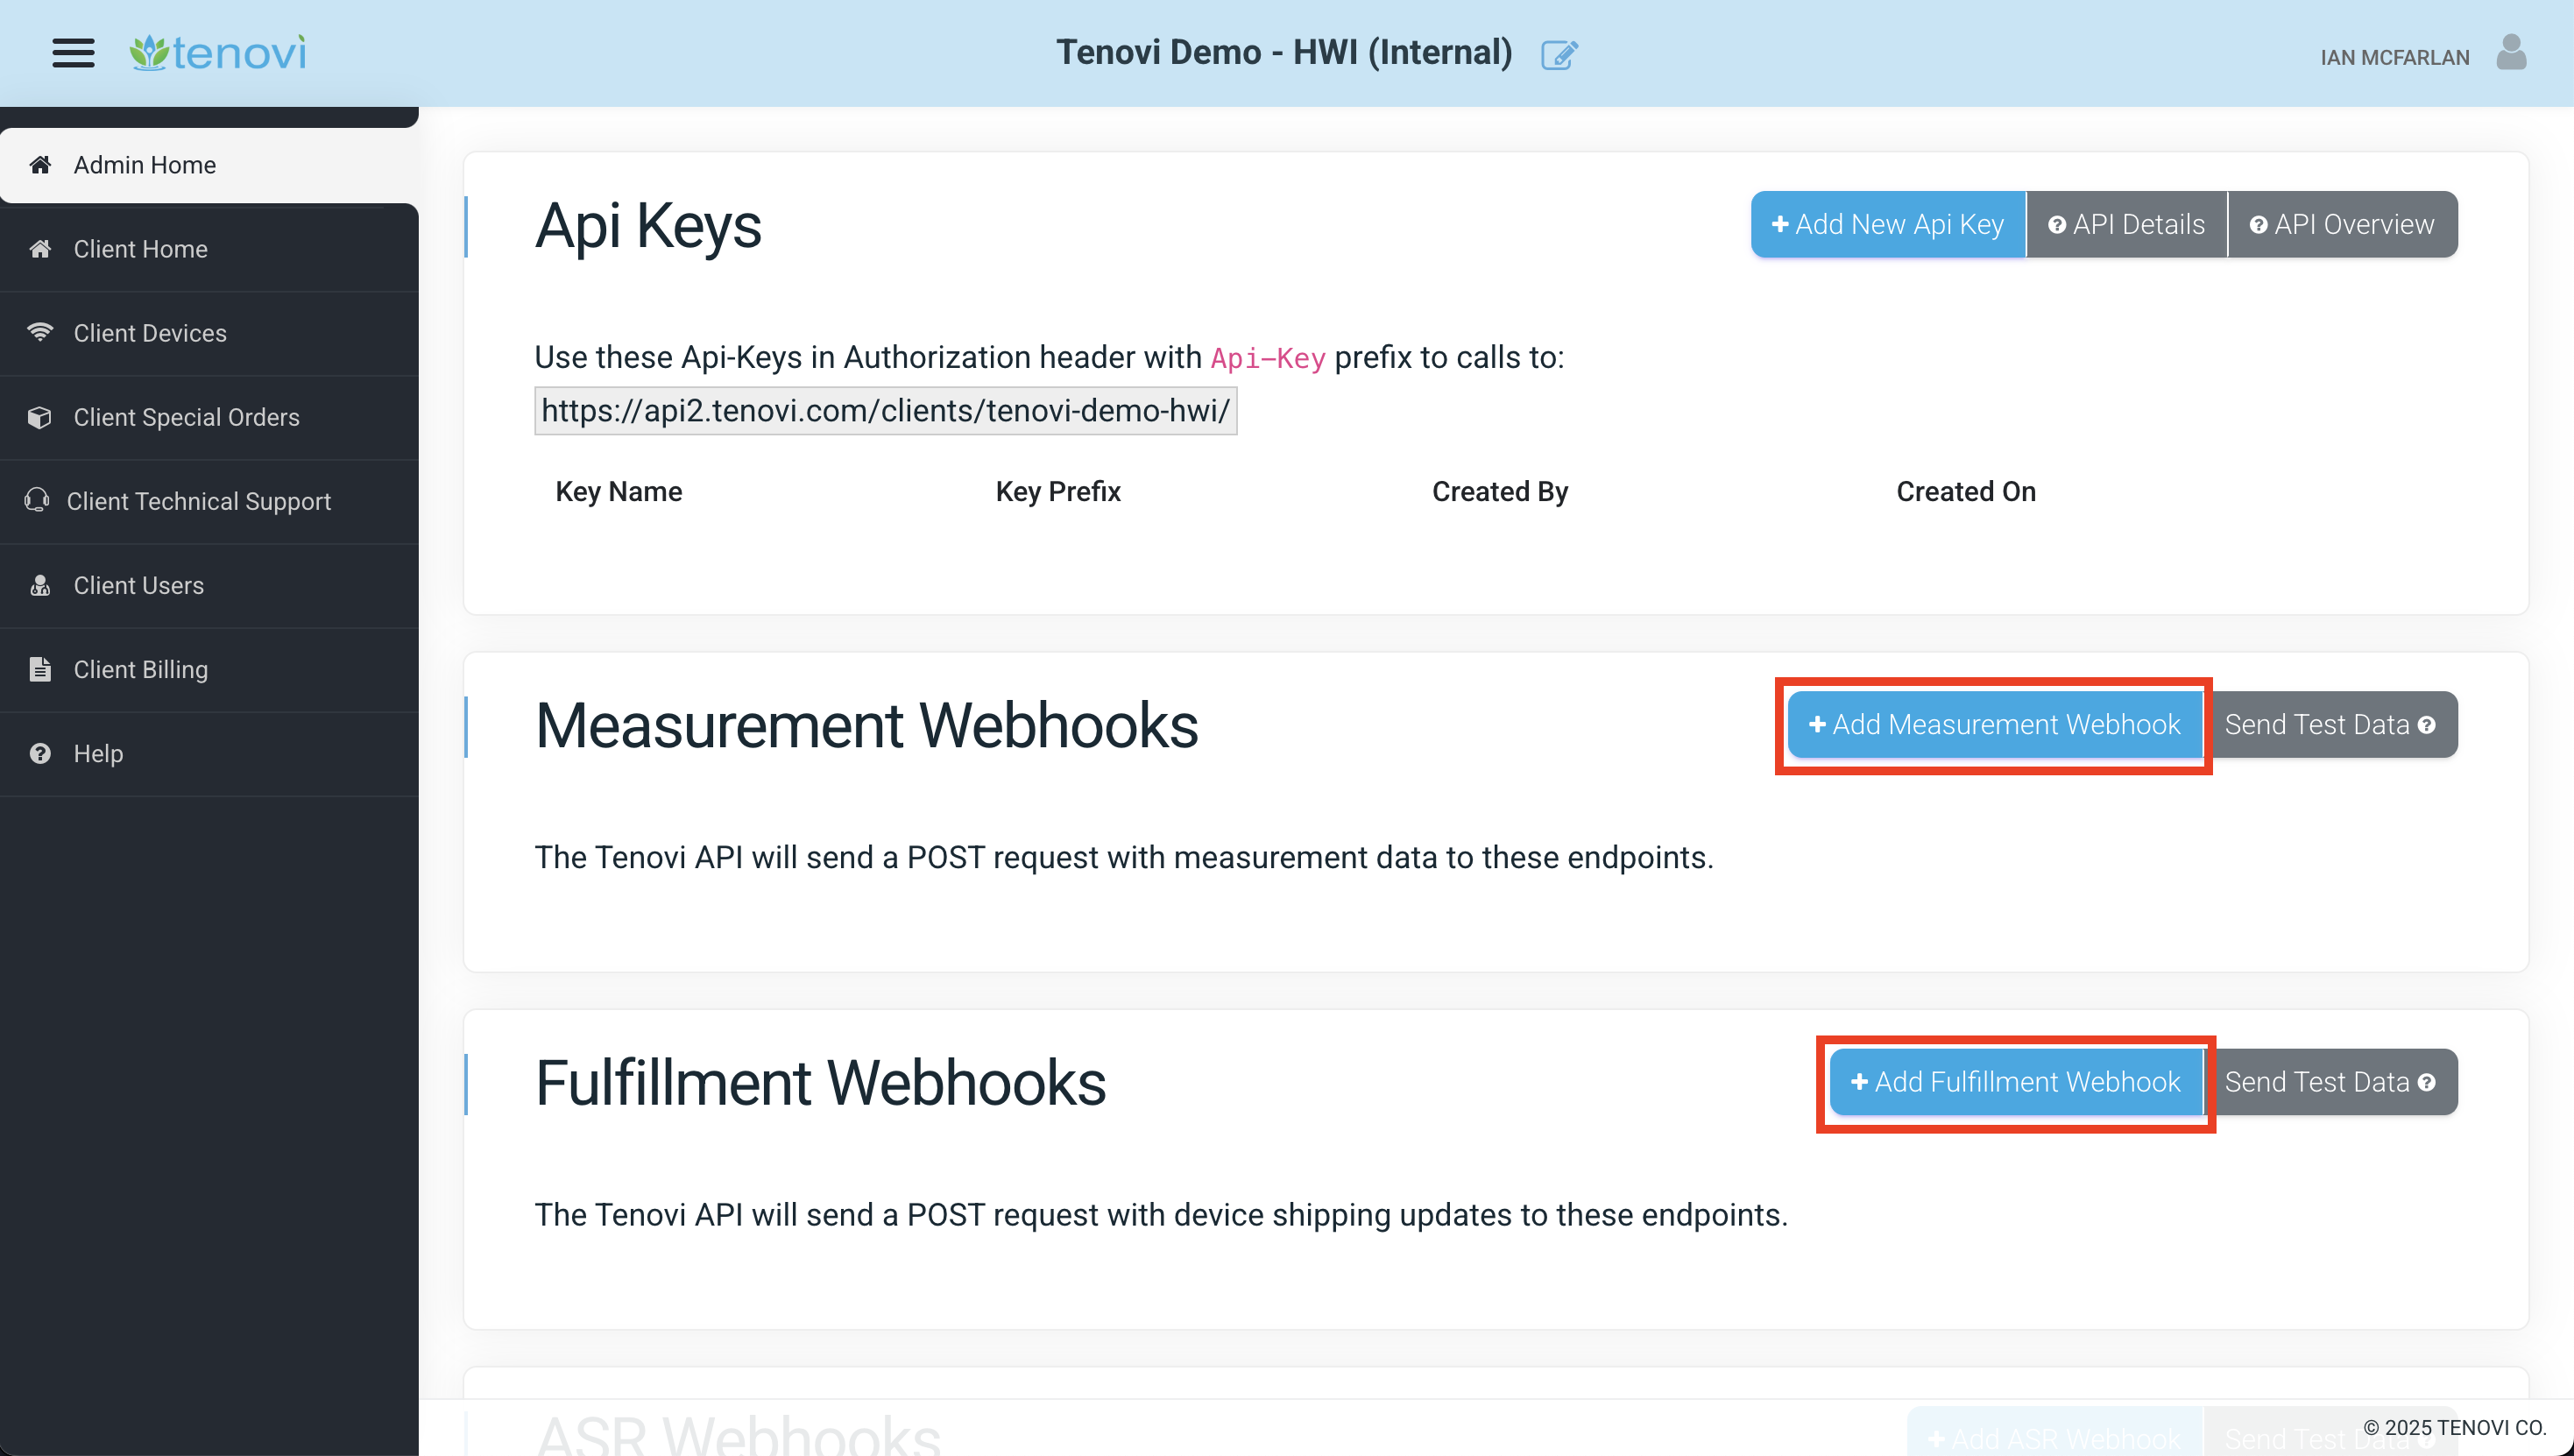
## Authenticating Your Requests
[Section titled “Authenticating Your Requests”](#authenticating-your-requests)
Now that you have an API key, you can start making requests. Every call is made over HTTPS to a client-specific base URL:
```bash
https://api2.tenovi.com/clients/CLIENT_DOMAIN
```
Replace `CLIENT_DOMAIN` with your account’s client domain, found alongside your API keys on the HWI Settings screen. See [API URL Configuration & Client Domain](/hwi-api/api-url-config/) for the full details.
Pass your API key in an HTTP `Authorization` header, prefixed with the string literal `Api-Key` and a space (note that `Api-Key` is case-sensitive):
```bash
Authorization: Api-Key TENOVI_API_KEY
```
Putting it together, here is a complete request that lists the devices on your account:
```bash
curl --request GET 'https://api2.tenovi.com/clients/CLIENT_DOMAIN/hwi/hwi-devices/' \
--header 'Authorization: Api-Key TENOVI_API_KEY'
```
Caution
Always include the trailing slash on endpoint URLs. A missing trailing slash triggers a redirect that drops your `Authorization` header, resulting in a `401` error.
## Activating/Ordering Devices
[Section titled “Activating/Ordering Devices”](#activatingordering-devices)
Tenovi offers two main options for delivering our [devices](/devices/) to customers: bulk ordering and dropshipping. For bulk ordered devices, an individual device must be “activated” by the customer before data from that device will flow into their account (this can be done manually via an API call or automatically, if pre-activation is enabled for your account). For dropshipped devices, Tenovi will automatically activate your devices at shipment time.
In order to activate or order a dropshipped Tenovi device, you will need to make an API call to our servers with the relevant device information and (if applicable) shipping information. These API calls are outlined in detail in our [API documentation](/hwi-api/devices/activating-devices/) and our [JSON schema reference](https://api2.tenovi.com/hwi-redoc/#operation/hwi-devices_create).
Once a dropshipped order is placed, Tenovi will push data to the Fulfillment Webhooks you configured above as the device is shipped, delivered, or replaced. The data sent in our Fulfillment Webhooks is outlined in the [Fulfillment Webhooks section of our documentation](/hwi-api/webhooks/fulfillment-webhooks/).
## Receiving Measurement Data
[Section titled “Receiving Measurement Data”](#receiving-measurement-data)
Once a Tenovi device is activated, data from that device will be routed to your account in our system. If you do not have your Measurement Webhooks configured, data will still be stored on Tenovi’s system for later retrieval via our [measurement retrieval endpoints](/hwi-api/measurement-data/). Once your Measurement Webhook is set up, Tenovi will push data to that Webhook in real time, as it is received.
```
flowchart
MD["Device\nBPM · Scale · Glucometer\nPulse Ox · Thermometer"]
GW["Tenovi Gateway\nCellular-connected hub"]
TC["Tenovi Cloud\nData ingestion & storage"]
WH["Webhook / API\nHTTPS POST · REST"]
YA["Your Application\nEHR · RPM Platform · Custom App"]
MD -->|" Bluetooth "| GW
GW -->|" Cellular / LTE "| TC
TC -->|" Near Real-time push "| WH
WH -->|" JSON payload "| YA
style MD fill:#cdeaf5,stroke:#29ade3,color:#000
style GW fill:#cdeaf5,stroke:#29ade3,color:#000
style TC fill:#cdeaf5,stroke:#29ade3,color:#000
style WH fill:#cdeaf5,stroke:#29ade3,color:#000
style YA fill:#cdeaf5,stroke:#29ade3,color:#000
```
The JSON schema used in our Measurement Webhooks is standardized across all device and measurement types and is outlined in detail in the [Measurement Webhooks section of our documentation](/hwi-api/webhooks/measurement-webhooks/) and the [Device Overview documentation](/devices/).
Below is an example of the standardized JSON schema used for device measurements:
```json
{
"metric": "blood_pressure",
"device_name": "Tenovi BPM - Wide Range",
"hwi_device_id": "12345678-abcd-1234-abcd-1234567890ab",
"patient_id": "98765",
"hardware_uuid": "1234ABCD5678",
"sensor_code": "10",
"value_1": "120.00",
"value_2": "80.00",
"created": "2024-08-24T14:15:35Z",
"timestamp": "2024-08-24T14:15:22Z",
"timezone_offset": -7,
"estimated_timestamp": false,
"filter_params": {}
}
```
## Testing Webhooks
[Section titled “Testing Webhooks”](#testing-webhooks)
The Tenovi WebApp offers convenient testing tools to verify your [Measurement, Fulfillment, and Special Order Webhooks](/hwi-api/webhooks/webhooks-overview) are configured properly.
Simply click the “Send Test Data” button for each of the types of webhooks to configure and push sample data to your servers on-demand. This will speed up your development as you can send test data to your systems without the need of ordering new devices or taking many measurements.
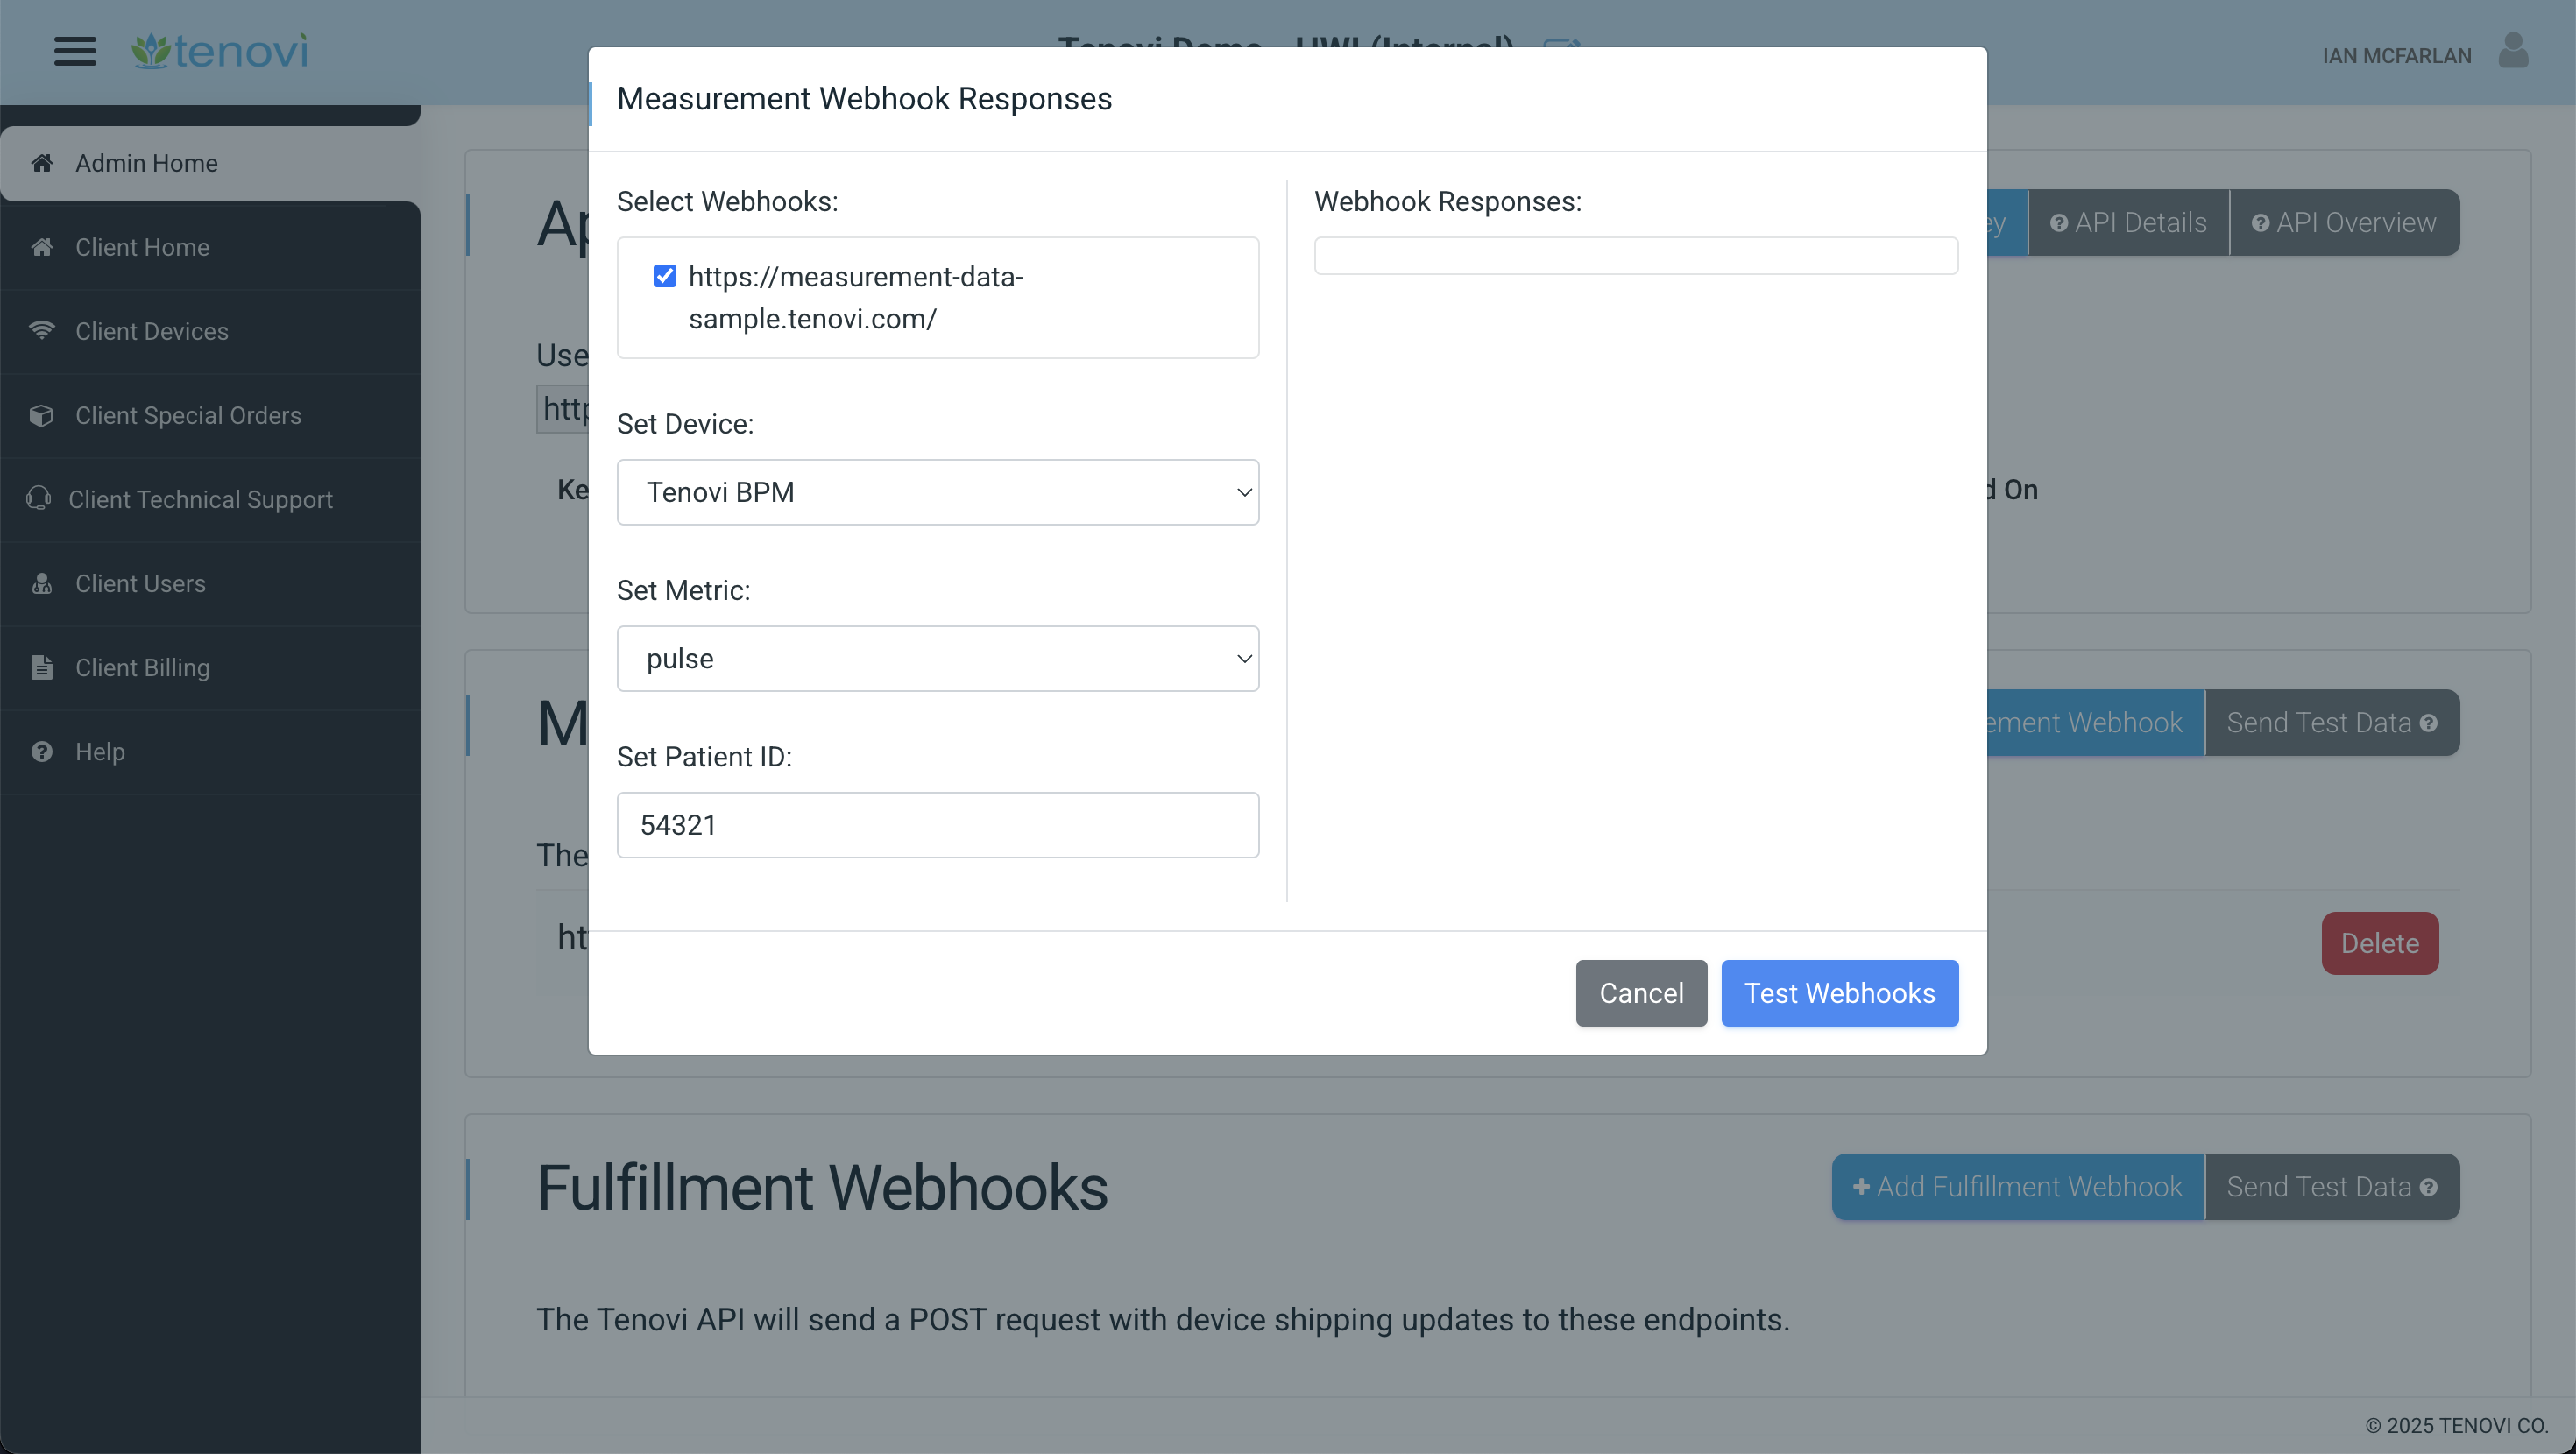
You can also use [API calls to send test JSON payloads to your webhook endpoints](/hwi-api/webhooks/testing-webhooks/).
## Test Orders
[Section titled “Test Orders”](#test-orders)
Once you have your webhooks set up, your fulfillment process/logistics in place, and you are able to properly process test measurement data, Tenovi highly encourages you to test your workflows using real devices (example: shipping, receiving, and connecting new devices; taking measurements from connected devices).
In order to help facilitate this the Customer Success Team can assist in getting this setup before your account goes live.
# UDI and Device Identification
> How to read the UDI barcode on Tenovi devices and extract the MAC address for device lookups
Universal Device Identification, or UDI, is a standardized barcode system that uniquely identifies medical devices. Tenovi devices carry UDI barcodes on packaging and the device itself. The primary value for integrations is extracting the MAC address embedded in the UDI string, which you can use to look up complete device records, verify inventory, and manage device lifecycle operations.
## How UDI Works
[Section titled “How UDI Works”](#how-udi-works)
A UDI is composed of segments called Application Identifiers. Each Application Identifier is a two- or three-digit code that tells you what type of data follows. The Application Identifier you care most about is `240`, which always contains the device MAC address or IMEI. Because the `240` Application Identifier is intentionally placed last in the UDI sequence, you can parse the MAC by counting backward from the end of the string, regardless of how your scanner is configured.
### GS1 Standard
[Section titled “GS1 Standard”](#gs1-standard)
Tenovi UDIs follow the GS1 standard, which the FDA recognizes as a valid UDI encoding method. Common Application Identifiers in a Tenovi UDI string include:
| Application Identifier Code | Description |
| --------------------------- | ------------------------------- |
| `01` | GTIN (Global Trade Item Number) |
| `10` | Lot number |
| `17` | Expiration date |
| `21` | Serial number |
| `240` | MAC address or IMEI |
| `243` | Carton identifier |
### Scanner Output Formats
[Section titled “Scanner Output Formats”](#scanner-output-formats)
Different barcode scanners output UDI data in different formats. You may encounter:
* **Raw string output** with no delimiters between Application Identifier segments.
* **Function character substitution** where forward slashes are used as separators between Application Identifier segments.
* **Parenthetical formatting** where parentheses surround each Application Identifier code.
All three formats contain the same underlying data. Your parsing logic should account for these variations.
## Extracting the MAC Address
[Section titled “Extracting the MAC Address”](#extracting-the-mac-address)
The `240` Application Identifier always contains your device’s MAC address. Because it is positioned last, extract it by:
1. Locating the `240` identifier in the UDI string.
2. Reading all characters immediately following `240` until the end of the string.
3. That value is your MAC address.
This approach works regardless of scanner configuration or output format.
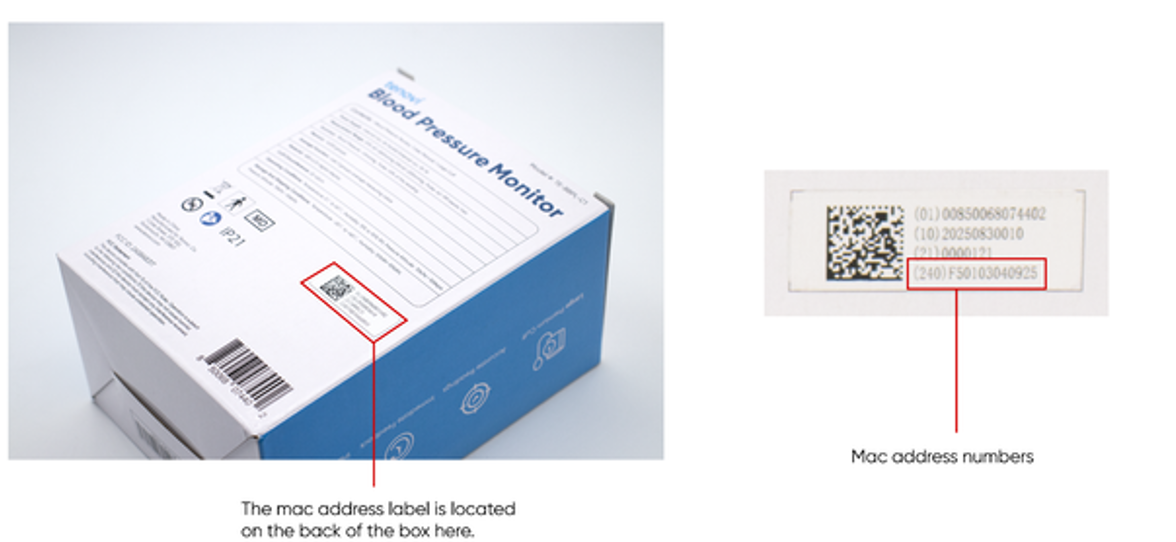
Legacy Devices
Tenovi devices manufactured before 2024 may use the HIBC standard with a `G004` prefix instead of GS1 UDI. These devices are out of warranty and you should not encounter them in active operations. If you do, escalate to support.
## Looking Up Device Data
[Section titled “Looking Up Device Data”](#looking-up-device-data)
Once you have extracted the MAC address from the `240` Application Identifier, you can use the [`hwi-devices`](/hwi-api/devices/device-types/) endpoint to retrieve complete device records, including activation status, assigned patient, and current gateway association. To find a specific device by MAC address, you can append the `search` query parameter:
```http
GET https://api2.tenovi.com/clients/CLIENT_DOMAIN/hwi/hwi-devices/?search=123412341234
```
# API URL Configuration & Client Domain
> A high-level overview of our Hardware Integration (HWI) API
A client domain is specific to a Tenovi account and enables you to make API calls to that specific account. The Tenovi backend separates all client data in our database to ensure security & HIPAA compliance.
## Using Your Client Domain
[Section titled “Using Your Client Domain”](#using-your-client-domain)
For each client, a client-specific URL must be used when communicating with our API. Simply replace the `CLIENT_DOMAIN` field in the URL below with your custom domain when making calls to our API.
Note
You can find your custom domain in the [Tenovi web app](https://app.tenovi.com/) on the HWI Settings screen where you generate API Keys

## Example of a Client Domain
[Section titled “Example of a Client Domain”](#example-of-a-client-domain)
All API calls will use the following root URL:
```bash
https://api2.tenovi.com/clients/CLIENT_DOMAIN
```
# Bulk Orders
> Retrieving information on bulk orders
You can retrieve information for bulk orders that includes shipping information, shipping status, and a complete manifest of the devices/Gateways included in a bulk order. The schema used in the return for this endpoint mimics the same schema used in the [Special/Bulk Order Webhook](/hwi-api/webhooks/special-order-webhooks/) with additional information on shipping address, name, etc.
For detailed information on this API endpoint and it’s schema, please see our [API Reference](https://api2.tenovi.com/hwi-redoc/#tag/hwi-bulk-orders/operation/hwi-bulk-orders_list) documentation.
Note
Bulk orders can only be placed via the [Tenovi Web App](https://app.tenovi.com/). The following information describes how to work with bulk orders that have already been placed in the web app.
## Retrieve Multiple Bulk Orders
[Section titled “Retrieve Multiple Bulk Orders”](#retrieve-multiple-bulk-orders)
Using the GET `hwi-bulk-orders` endpoint, you can retrieve information for all your bulk orders.
```js
/hwi/hwi-bulk-orders/
```
Using query parameters you can narrow your scope to show only fulfilled bulk orders or orders yet to be fulfilled.
```js
/hwi/hwi-bulk-orders/?fulfilled=true
```
All returns from this endpoint are paginated and you can control the page size using a query parameter.
```js
/hwi/hwi-bulk-orders/?fulfilled=true&page_size=50
```
## Retrieve Single Bulk Order
[Section titled “Retrieve Single Bulk Order”](#retrieve-single-bulk-order)
You can also use this API endpoint to fetch information on a single bulk order by passing the bulk order ID in the URL path.
```js
/hwi/hwi-bulk-orders/{id}/
```
## Example JSON Returns
[Section titled “Example JSON Returns”](#example-json-returns)
### Multiple Bulk Orders
[Section titled “Multiple Bulk Orders”](#multiple-bulk-orders)
```json
{
"count": 1,
"next": null,
"previous": null,
"results": [
{
"id": "e48235ab-0358-4b03-bf4a-f69222cbc854",
"created": "2025-08-26T07:10:29.171784Z",
"modified": "2025-08-26T07:14:30.299655Z",
"order_number": "SO-25020",
"shipping_name": "Dr. Ian Russell",
"shipping_address": "1 Cate St #100",
"shipping_city": "Portsmouth",
"shipping_state": "NH",
"shipping_zip_code": "03801",
"shipping_status": "SH",
"shipping_tracking_link": "https://tenovi.com",
"fulfilled": true,
"requested_by": "no-reply@tenovi.com",
"shipped_on": "2025-08-26T07:14:29.498353Z",
"delivered_on": null,
"notify_emails": null,
"contents": [
{
"name": "Gateway",
"quantity": 10,
"kit_id": 0
}
],
"manifest": [
{
"loose_items": [
{
"imei": null,
"gateway_id": "000011113333",
"device_type": "Gateway",
"mac_address": "",
"model_number": null
},
{
"imei": null,
"gateway_id": "000011113332",
"device_type": "Gateway",
"mac_address": "",
"model_number": null
},
{
"imei": null,
"gateway_id": "000011113331",
"device_type": "Gateway",
"mac_address": "",
"model_number": null
},
{
"imei": null,
"gateway_id": "000011113334",
"device_type": "Gateway",
"mac_address": "",
"model_number": null
},
{
"imei": null,
"gateway_id": "000011113335",
"device_type": "Gateway",
"mac_address": "",
"model_number": null
},
{
"imei": null,
"gateway_id": "000011113336",
"device_type": "Gateway",
"mac_address": "",
"model_number": null
},
{
"imei": null,
"gateway_id": "000011113337",
"device_type": "Gateway",
"mac_address": "",
"model_number": null
},
{
"imei": null,
"gateway_id": "000011113338",
"device_type": "Gateway",
"mac_address": "",
"model_number": null
},
{
"imei": null,
"gateway_id": "000011113339",
"device_type": "Gateway",
"mac_address": "",
"model_number": null
},
{
"imei": null,
"gateway_id": "000011113323",
"device_type": "Gateway",
"mac_address": "",
"model_number": null
}
],
"kitted_items": [],
"order_section": "Loose Items"
}
]
}
]
}
```
### Single Bulk Orders
[Section titled “Single Bulk Orders”](#single-bulk-orders)
```json
{
"id": "e48235ab-0358-4b03-bf4a-f69222cbc854",
"created": "2025-08-26T07:10:29.171784Z",
"modified": "2025-08-26T07:14:30.299655Z",
"order_number": "SO-25020",
"shipping_name": "Dr. Ian Russell",
"shipping_address": "1 Cate St #100",
"shipping_city": "Portsmouth",
"shipping_state": "NH",
"shipping_zip_code": "03801",
"shipping_status": "SH",
"shipping_tracking_link": "https://tenovi.com",
"fulfilled": true,
"requested_by": "no-reply@tenovi.com",
"shipped_on": "2025-08-26T07:14:29.498353Z",
"delivered_on": null,
"notify_emails": null,
"contents": [
{
"name": "Gateway",
"quantity": 10,
"kit_id": 0
}
],
"manifest": [
{
"loose_items": [
{
"imei": null,
"gateway_id": "000011113333",
"device_type": "Gateway",
"mac_address": "",
"model_number": null
},
{
"imei": null,
"gateway_id": "000011113332",
"device_type": "Gateway",
"mac_address": "",
"model_number": null
},
{
"imei": null,
"gateway_id": "000011113331",
"device_type": "Gateway",
"mac_address": "",
"model_number": null
},
{
"imei": null,
"gateway_id": "000011113334",
"device_type": "Gateway",
"mac_address": "",
"model_number": null
},
{
"imei": null,
"gateway_id": "000011113335",
"device_type": "Gateway",
"mac_address": "",
"model_number": null
},
{
"imei": null,
"gateway_id": "000011113336",
"device_type": "Gateway",
"mac_address": "",
"model_number": null
},
{
"imei": null,
"gateway_id": "000011113337",
"device_type": "Gateway",
"mac_address": "",
"model_number": null
},
{
"imei": null,
"gateway_id": "000011113338",
"device_type": "Gateway",
"mac_address": "",
"model_number": null
},
{
"imei": null,
"gateway_id": "000011113339",
"device_type": "Gateway",
"mac_address": "",
"model_number": null
},
{
"imei": null,
"gateway_id": "000011113323",
"device_type": "Gateway",
"mac_address": "",
"model_number": null
}
],
"kitted_items": [],
"order_section": "Loose Items"
}
]
}
```
# Activating/Requesting Devices
> Activating and ordering devices
Devices are activated/requested, as well as listed, read, and deactivated, through HTTP requests to the following endpoint:
```js
/hwi/hwi-devices/
```
## Workflow for New HWI Devices
[Section titled “Workflow for New HWI Devices”](#workflow-for-new-hwi-devices)
To Activate a new HWI Device, you must make a POST request to this endpoint using the appropriate JSON data in the payload (see our [API Reference](https://api2.tenovi.com/hwi-redoc/#operation/hwi-devices_create) for specific details).
Note
Only one device with a given Sensor Code can be associated with a Tenovi Gateway at one time (see Sensor Codes on our [Device Overview](/guides/device-overview/) page.
If successful, the HWI Device Activation Request will return a HWI Device object with an `id` parameter in the root object. This id must be saved and used as a unique identifier for this specific device.
This id is included in the `hwi_device_id` field in the [Webhook callbacks](/hwi-api/webhooks/measurement-webhooks#measurement-webhook-structure) to allow data from a specific HWI Device to be associated with a particular patient in the Client’s software.
This id is also required to delete this specific HWI Device to [remove it from your account, or Unlink the associated Gateway](/hwi-api/devices/unlinking-devices) if the HWI Device cannot be deleted (HWI Devices cannot be deleted if they are attached to a Fulfillment Request that has been fulfilled).
Charges may occur for devices that are not deleted/unlinked from a Gateway when no longer in use. If you forget to save the HWI Device id, you can retrieve it using the [GET method on the hwi-devices endpoint](https://api2.tenovi.com/hwi-redoc/#operation/hwi-devices_list).
## How the Patient Receives a Device
[Section titled “How the Patient Receives a Device”](#how-the-patient-receives-a-device)
HWI Device Activation Requests must reflect one of three possible real-world Use Cases:
1. Devices are given to patients on-site (so the Gateway ID or IMEI is known)
2. Devices need to be shipped to the patient by a client’s internal staff
3. Devices need to be shipped to the patient from Tenovi (additional charges may apply for this service).
### Devices Given to Patient On-Site
[Section titled “Devices Given to Patient On-Site”](#devices-given-to-patient-on-site)
For Use Case #1: The nested Device object in the [Activation Request](/hwi-api/devices/activating-devices) must include the Gateway ID (for Gateway-Connected devices) or the IMEI (for Direct-Cellular devices) in the `hardware_uuid` field.
In this case, the `status` field of the returned HWI Device object will either be set to `Delivered` or `Unknown Gateway ID` if an invalid Gateway ID is used.
### Devices Shipped to Patient
[Section titled “Devices Shipped to Patient”](#devices-shipped-to-patient)
For Use Cases #2 and #3: The `hardware_uuid` field must be set to null, and the shipping information must be included in the nested `fulfillment_request` object. The `notify_emails` field of the `fulfillment_request` object is optional, but it can be used to pass in a list of comma-separated email addresses, which will be sent shipping update emails as updates occur for the newly requested Device.
The `require_signature` field of the `fulfillment_request` object can be used to request signature confirmation of delivery; additional charges may apply.
For Use Case #2: The `client_will_fulfill` field of the `fulfillment_request` object must be set to true. In this case, the `status` field will be set to `Pending Shipment`.
For Use Case #3: The `client_will_fulfill` field should be set to false. In this case, the `status` field will be set to `Dropship Requested`. If only the Tenovi Gateway needs to be shipped to the patient (for example, because they already have a Gateway-compatible device on hand), the `ship_gateway_only` flag of the `fulfillment_request` object should be set to true.
### Multiple Devices for a Single Patient
[Section titled “Multiple Devices for a Single Patient”](#multiple-devices-for-a-single-patient)
If you are requesting shipment of an additional device for a patient that already has a gateway at home (e.g. the prior device was ordered one month before), include both a `fulfillment_request` object and the Gateway Id for the existing Gateway in the `hardware_uuid` field.
This will let our fulfillment team know they should NOT send another gateway with the second device shipment.
Note
If multiple devices are requested simultaneously, our fulfillment team will automatically link all requested devices to the same Gateway at the time of shipment.
## Device Names & Sensor Codes
[Section titled “Device Names & Sensor Codes”](#device-names--sensor-codes)
For all requests, the Device Name must exactly match the name of a [Device Type](/guides/device-overview/) associated with your account. You can get a list of valid Device Names from the hwi-device-types endpoint (see our [API Reference](https://api2.tenovi.com/hwi-redoc/#operation/hwi-devices_create) for specific details).
For reference, a complete list of Devices are available on our [Device Overview](/devices/) section of the docs site. Below is an overview of our more popular devices though not all may be associated with a given account:
| Device Name | Sensor Code | Hardware UUID (if included) |
| --------------------------- | ----------- | --------------------------- |
| Tenovi BPM – S | 10 | Gateway ID |
| Tenovi BPM – L | 10 | Gateway ID |
| Tenovi BPM – XL | 10 | Gateway ID |
| Omron BPM | 10 | Gateway ID |
| Omron Wrist BPM | 10 | Gateway ID |
| Tenovi Pulse Ox | 11 | Gateway ID |
| Tenovi Glucometer | 12 | Gateway ID |
| Trividia Glucometer | 12 | Gateway ID |
| Tenovi Scale | 13 | Gateway ID |
| Tenovi Bariatric Scale | 13 | Gateway ID |
| Tenovi Thermometer | 14 | Gateway ID |
| Tenovi Watch | 15 | Gateway ID |
| Tenovi Peak Flow Meter | 17 | Gateway ID |
| Tenovi Pillbox | 21 | Gateway ID |
| Nonin Pulse Ox | 24 | Gateway ID |
| Hailie Sensor | 25 | Gateway ID |
| PatchRx PatchCap | 27 | Gateway ID |
| Welch Allyn 1500 Series BPM | 29 | Gateway ID |
| Welch Allyn 1700 Series BPM | 29 | Gateway ID |
| Welch Allyn Scale | 30 | Gateway ID |
| A\&D XL Scale | 33 | Gateway ID |
| A\&D Scale | 34 | Gateway ID |
| A\&D BPM | 35 | Gateway ID |
| A\&D Pulse Ox | 36 | Gateway ID |
| Tenovi Fetal Doppler | 37 | Gateway ID |
| XK Essence | 39 | Gateway ID |
| Tenovi ID Band | 44 | Gateway ID |
| Tenovi Cellular BPM – S | N/A | IMEI |
| Tenovi Cellular BPM – L | N/A | IMEI |
| Tenovi Cellular Glucometer | N/A | IMEI |
| Tenovi Cellular Scale | N/A | IMEI |
| Tenovi Cellular Pulse Ox | N/A | IMEI |
## The Patient Object
[Section titled “The Patient Object”](#the-patient-object)
Note
As of October 2025, patient records can be created and managed independently via the [`hwi-patients` endpoint](/hwi-api/patients/). Using that endpoint is the recommended approach for managing patient data at scale. The `patient` object documented here remains supported for inline patient creation during device activation.
The `patient` object in the Activation Request is optional. If included, the `external_id` field is required and will be present in all webhook callbacks associated with this HWI Device.
Use a unique identifier from your own system for `external_id` — this is the stable key that links measurement and fulfillment webhook data back to a specific patient in your records.
Note
Patient data is shared across all HWI Devices linked to the same `external_id`. Updating any patient field — whether via `hwi-patients` or `hwi-devices` — will update that data for every linked device.
For full details on patient fields, address verification, and managing patient records independently of device activation, see the [Patients reference page](/hwi-api/patients/).
## Example JSON Payloads
[Section titled “Example JSON Payloads”](#example-json-payloads)
### Without a Fulfillment Request with Linked Patient Object
[Section titled “Without a Fulfillment Request with Linked Patient Object”](#without-a-fulfillment-request-with-linked-patient-object)
```json
{
"device": {
"name": "Tenovi BPM",
"hardware_uuid": "123456789100"
},
"patient": {
"external_id": "12345678-1234-12345678"
}
}
```
### With a Fulfillment Request with Inline Patient Object
[Section titled “With a Fulfillment Request with Inline Patient Object”](#with-a-fulfillment-request-with-inline-patient-object)
```json
{
"device": {
"fulfillment_request": {
"client_will_fulfill": false,
"notify_emails": "test@email.com",
"require_signature": false
},
"name": "Tenovi BPM",
"hardware_uuid": null
},
"patient": {
"external_id": "12345678-1234-12345678"
}
}
```
### Without a Fulfillment Request with Inline Patient Object
[Section titled “Without a Fulfillment Request with Inline Patient Object”](#without-a-fulfillment-request-with-inline-patient-object)
```json
{
"device": {
"name": "Tenovi BPM",
"hardware_uuid": "123456789100"
},
"patient": {
"external_id": "12345678-1234-12345678",
"phone_number": "123-456-7890",
"physician": "Dr. Russell"
}
}
```
### With a Fulfillment Request with Inline Patient Object
[Section titled “With a Fulfillment Request with Inline Patient Object”](#with-a-fulfillment-request-with-inline-patient-object-1)
```json
{
"device": {
"fulfillment_request": {
"shipping_name": "Patient One",
"shipping_address": "123 Street",
"shipping_city": "Townsville",
"shipping_state": "CA",
"shipping_zip_code": "12345",
"client_will_fulfill": false,
"notify_emails": "test@email.com",
"require_signature": false,
},
"name": "Tenovi BPM",
"hardware_uuid": null
},
"patient": {
"external_id": "12345678-1234-12345678",
"phone_number": "123-456-7890",
"physician": "Dr. Russell"
}
}
```
### Example Response for a Device Request
[Section titled “Example Response for a Device Request”](#example-response-for-a-device-request)
```json
[
{
"id": "497f6eca-6276-4993-bfeb-53cbbbba6f08",
"status": "Connected",
"connected_on": "2024-08-24T14:15:22Z",
"unlinked_on": "",
"last_measurement": "2024-12-24T14:15:22Z",
"device": {
"id": "497f6eca-6276-4993-bfeb-53cbbbba6f08",
"fulfillment_request": {
"created": "2024-08-24T14:15:22Z",
"shipping_status": "DE",
"shipping_name": "Patient One",
"shipping_address": "123 Street",
"shipping_city": "Townsville",
"shipping_state": "CA",
"shipping_zip_code": "12345",
"shipped_on_behalf_of": "",
"shipping_tracking_link": "http://example.com/tracking_url/",
"ship_gateway_only": false,
"require_signature": true,
"shipped_on": "2024-08-24T14:15:22Z",
"delivered_on": "2025-08-24T14:15:22Z",
"requested_by": "",
"client_notes": "",
"notify_emails": "",
"fulfilled": true,
"client_will_fulfill": false,
"flagged_by_client": false
},
"created": "2024-08-24T14:15:22Z",
"name": "Tenovi BPM - Wide Range",
"hardware_uuid": "123412341234",
"sensor_code": "10",
"sensor_id": "",
"shared_hardware_uuid": false
},
"patient_id": "12345678-1234-12345678",
"patient_phone_number": "123-456-7890",
"patient": {
"external_id": "12345678-1234-12345678",
"name": "Patient One",
"phone_number": "123-456-7890",
"email": "user@example.com",
"physician": "Dr. Russell",
"clinic_name": "",
"care_manager": "",
"sms_opt_in": true
}
}
]
```
# Setting Up Device Properties
> Using key/value storage on a per device basis
There are instances where you will want to add custom key/value properties to devices that don’t fit within the standard HWI device object. These types of data points can be saved on an individual device basis using Device Properties.
## Adding Device Properties
[Section titled “Adding Device Properties”](#adding-device-properties)
For all devices, you may add user-defined key-value properties to individual devices using the following endpoint:
```js
/hwi/hwi-devices/{hwi_device_id}/properties/
```
## Special/Pre-Defined Device Properties
[Section titled “Special/Pre-Defined Device Properties”](#specialpre-defined-device-properties)
Some devices have special, Tenovi-defined properties that you can use to control certain device parameters. For example, the Step Goal value displayed on the Tenovi Watch can be modified by setting the value of the `step_goal` property. The full list of these Tenovi-defined properties can be found on our [Device Overview](/guides/device-overview) page.
Another example, is the `bluetooth_passkey` property that is reserved for glucometer pairing. You can learn more about this device property in our [Bring Your Own Device Guide](/guides/bring-your-own-device#trividia-glucometer).
Note
For these special, Tenovi-defined properties, the `synced` field (returned on GET requests to the above update) can be used to identify when the property value has been synchronized onto the physical device.
## Finding Devices Using Device Properties
[Section titled “Finding Devices Using Device Properties”](#finding-devices-using-device-properties)
You can search for device properties using the [GET HWI devices endpoint](https://api2.tenovi.com/hwi-redoc/#operation/hwi-devices_list). This endpoint accepts query parameters that enable you to seach by key or values.
* `properties__key` - searches for devices with a specific `key` of a device property
* `properties__value` - searches for devices with a specific `value` of device property
These query parameters can be used in conjunction with one another to narrow down your device search results, and is covered in more detail in our [API Reference](https://api2.tenovi.com/hwi-redoc/#operation/hwi-devices_list).
# HWI Device Types
> Retrieving a list of available HWI Device Types
Each client domain in the Tenovi platform has the ability to [activate/request devices](/hwi-api/devices/activating-devices/) but are limited to the types of devices that are assigned to the client domain. You are able to get a complete listing of the devices available on your client domain using a GET request.
## GET Device Types
[Section titled “GET Device Types”](#get-device-types)
Using the [`hwi-device-types` API endpoint](https://api2.tenovi.com/hwi-redoc/#operation/hwi-device-types_list), you can make a GET request that will return an array of objects that outline the types of devices you are able to request. An example of this array:
```json
[
{
"id": "497f6eca-6276-4993-bfeb-53cbbbba6f08",
"name": "string",
"metrics": [
{
"id": "497f6eca-6276-4993-bfeb-53cbbbba6f08",
"created": "2019-08-24T14:15:22Z",
"modified": "2019-08-24T14:15:22Z",
"name": "string",
"primary_units": "string",
"primary_display_name": "string",
"secondary_units": "string",
"secondary_display_name": "string",
"unified_display_name": "string",
"default_y_axis_max": 0,
"default_y_axis_min": 0,
"is_vital": true,
"time_series_data": true
}
],
"sensor_code": "str",
"image": "http://example.com",
"up_front_cost": "string",
"shipping_cost": "string",
"monthly_cost": "string",
"sensor_id_required": true,
"in_stock": true,
"virtual": true,
"deprecated": true
}
]
```
These data points can be useful if you are creating ordering/assignment screens in your platform as it not only returns information such as device name but also cost, an image of the device, and the types of metrics it collects.
## All Device Types Offered by Tenovi
[Section titled “All Device Types Offered by Tenovi”](#all-device-types-offered-by-tenovi)
For a complete list of all available devices on the Tenovi platform, please see our [Device Overview](/guides/device-overview/) page.
Note
If you would like to add more device types to your account, please contact your Business Development representative.
# Viewing Hardware UUID Logs
> View a device's history with logs
Devices can be [link/activated](/hwi-api/devices/activating-devices/) on one gateway, then [unlinked](/hwi-api/devices/unlinking-devices/) and repurposed on a new gateway. Keeping track of these changes can be useful for debugging and audits of devices and gateways.
## GET Hardware UUID Logs
[Section titled “GET Hardware UUID Logs”](#get-hardware-uuid-logs)
To view change logs for the `hardware_uuid` field (gateway ID) of the nested device object in an hwi-device, you may use a GET request on the following endpoint:
```js
GET /hwi/hardware-uuid-logs/
```
Note
As of April 2026, this endpoint supports pagination via `?page=` and `?page_size=` parameters. As of May 5, 2026, non-paginated responses will be truncated at 1,000 results. See the [Pagination Guide](/hwi-api/pagination/) for details.
## Optional Query Parameters
[Section titled “Optional Query Parameters”](#optional-query-parameters)
* `object_id`: string
* `search`: string
The query parameters shown above will allow you to filter by the hwi-device-id (using the object\_id parameter) or search by a given hardware\_uuid (using the search parameter). This can be useful for customer service or system auditing.
## Further Reading
[Section titled “Further Reading”](#further-reading)
More information on this endpoint can be found in our [API Reference](https://api2.tenovi.com/hwi-redoc/#tag/hwi-hardware-uuid-logs).
# Replacing Devices & Gateways
> Request replacement devices/Gateways via API call
You can request replacements for devices and Gateways, get a list of all replacements (both requested and issued/shipped), and remove pending replacement requests using these series of endpoints.
Note
All replacements requested via API will be charged to your Tenovi account and device warranties will not apply. If you want to request a replacement under our standard device warranties, please request a replacement via the [Tenovi web app](https://app.tenovi.com).
Please see our [API Reference documentation](https://api2.tenovi.com/hwi-redoc/#tag/hwi-replacements) for more information on these API endpoints.
## Requesting a Replacement
[Section titled “Requesting a Replacement”](#requesting-a-replacement)
When you request a replacement device and/or Gateway, you can use the `/hwi/hwi-replacements/` endpoint to POST your request. Using this endpoint, you can request a replacement device, Gateway, or both by providing an array of the replacements you require.
Shipping information and the device’s HWI Device ID is required for all replacement requests when done via API.
If you are requesting a replacement Gateway, Tenovi will automatically update the hardware\_uuid of any HWI Devices linked to the same Gateway as the referenced HWI Device. Our system will send a [Fulfillment Webhook](/hwi-api/webhooks/fulfillment-webhooks) with the updated Gateway ID when the replacement is shipped.
Note
**Fulfillment Webhooks** – If multiple HWI Devices were linked to the original Gateway, each will generate a [fulfillment webhook](/hwi-api/webhooks/fulfillment-webhooks/#replacement-devices--gateways) with the status set to `Replaced`.
Ideally, if you are mapping patient data by HWI Device ID (`hwi_device_id`) or Patient ID (`patient.external_id`) the webhooks are informative only and no action is required on your part to ensure patient data flows correctly. However, if you are leaning on the IMEI/Gateway ID (`hardware_uuid`) you will need to ensure you update your records with the new `hardware_uuid`. The fields in a fulfillment webhook for a replacement contain:
* `hardware_uuid`: The new Gateway ID or IMEI sent as a replacement
* `device_id`: The old Gateway ID or IMEI that was replaced
* `status`: Always “Replaced” in this context
Tenovi updates the `hardware_uuid` when a new Gateway is shipped, not when it is delivered. We do the update at time of shipment as it is our understanding the original Gateway is not functioning and cannot send data. If you require `hardware_uuid` updates to occur when the new Gateway arrives, you will have to lean upon logic in your system to temporarily save the replacement webhook (sent when the device is shipped), but not update your records until your receive the delivered webhook.
If you do not include a `device_type` of `Gateway` in the replacement order, no Gateway will be included in the replacement order.
### Example JSON for Replacements
[Section titled “Example JSON for Replacements”](#example-json-for-replacements)
```json
{
"device_types": [
{
"name": "Tenovi BPM - Wide Range"
},
{
"name": "Gateway"
}
],
"shipping_name": "Dr. Ian Russell",
"shipping_address": "18023 Sky Park Circle",
"shipping_city": "Irvine",
"shipping_state": "CA",
"shipping_zip_code": "92614",
"notify_emails": "user@tenovi.com, anotheruser@tenovi.com",
"hwi_device_id": "497f6eca-6276-4993-bfeb-53cbbbba6f08"
}
```
## Get a List of All Replacements
[Section titled “Get a List of All Replacements”](#get-a-list-of-all-replacements)
You can fetch a list of all replacements (those that are both already fulfilled and those that are pending fulfillment) using the GET method on `/hwi/hwi-replacements/` endpoint. This returns an array of replacement requests that include information on shipping, status of the replacement, device types requested, and shipping tracking URLs.
Note
The response from the `/hwi/hwi-replacements/` endpoint is subject to [pagination](/hwi-api/pagination/). If no page is specified via a URL parameter, the return is truncated to 1000 replacement orders.
## Delete a Pending Replacement Request
[Section titled “Delete a Pending Replacement Request”](#delete-a-pending-replacement-request)
You can use the DEL method on the `/hwi/hwi-replacements/{id}` endpoint to cancel/delete a pending replacement request, passing in the ID of the request (found using the GET method). Please note that only replacement requests that haven’t been fulfilled yet can be deleted. Once a replacement shipment leaves our warehouse we are unable to cancel/delete the request.
# Unlinking Gateways from Devices
> Removing gateways from devices workflow
In order to deactivate a HWI device or re-use the attached Gateway with another HWI Device, you must first either delete the HWI device or Unlink the Gateway. When a Gateway is unlinked, this will stop data transmission as well as data fees.
```js
/hwi/unlink-gateway/{hwi_device_id}/
```
To use this endpoint, you must perform a GET request with the HWI Device id included in the URL. If it is successful, the HWI Device object will be returned with the `hardware_uuid` field of the nested Device object set to null.
See our [API Reference](https://api2.tenovi.com/hwi-redoc/#operation/unlink-gateway_read) for more information on this API endpoint.
## Deleting a Device vs Unlinking
[Section titled “Deleting a Device vs Unlinking”](#deleting-a-device-vs-unlinking)
As HWI Devices with a [Fulfillment Request](/hwi-api/devices/activating-devices/) cannot be deleted once that Request has been fulfilled, it is recommended to use the [unlink-gateways endpoint](https://api2.tenovi.com/hwi-redoc/#operation/unlink-gateway_read) to deactivate devices, as it is guaranteed to always succeed.
A common scenario as to why a device cannot be deleted is that it has already left our fulfillment facility and has been collecting measurements from a patient already. In this instance you can unlink the device but not delete it.
# Gateways
> Retrieving gateway information including firmware, last check-in date, white listed devices, and more.
The [Tenovi Cellular Gateway](https://www.tenovi.com/tenovi-gateway/) connects to a growing list of Tenovi and 3rd party FDA-cleared Bluetooth devices and securely transmits incoming data to our Tenovi servers through most cellular towers in North America.
See our [Device Overview](/guides/device-overview/) page for details on the devices our gateway supports.
## Retrieving information on an active Gateway
[Section titled “Retrieving information on an active Gateway”](#retrieving-information-on-an-active-gateway)
Once a HWI device is activated, you may retrieve useful information for the linked Gateway, such as the firmware version, the last time the Gateway connected to our servers, and the cellular signal strength of the Gateway (a signal strength value of 30 is excellent, while a signal strength value of 10 is poor), and more.
Simply issue a GET request to the following endpoint:
```js
/hwi/gateway-info/{gateway_id}/
```
The Gateway ID is the `hardware_uuid` value returned in the `device` object for a [HWI Device](/guides/device-overview), and it should be a 12-digit hexadecimal string with no hyphens or separating characters (e.g. 1234ABCD5678).
More information on this API endpoint can be found in our [API Reference](https://api2.tenovi.com/hwi-redoc/#tag/hwi-gateway-info).
## Example JSON Payload
[Section titled “Example JSON Payload”](#example-json-payload)
```json
{
"gateway_uuid": "123412341234",
"firmware_version": "2.169.38",
"bootloader_version": "1.1",
"provisioned": true,
"last_signal_strength": 30,
"last_checkin_time": "2019-08-24T14:15:22Z",
"assigned_on": "2019-08-24T14:15:22Z",
"shipped_on": "2019-08-24T14:15:22Z",
"whitelisted_devices": [
{
"sensor_code": "10",
"mac_address": "123213123123123",
"whitelist_status": "RE",
"created": "2019-08-24T14:15:22Z",
"modified": "2019-08-24T14:15:22Z"
}
],
"properties": [
{
"id": "497f6eca-6276-4993-bfeb-53cbbbba6f08",
"key": "custom_property_key",
"value": "custom_property_value"
}
]
}
```
# Measurement Data
> Retrieving measurement data on a per device or patient basis
It is **highly recommended** to make use of measurement webhooks for near real-time transmission from devices. GET requests described on this page should only be used for backfilling data or verifying data.
## Retrieving Measurements
[Section titled “Retrieving Measurements”](#retrieving-measurements)
If data is either missed or improperly handled by the [Measurement Webhook](/hwi-api/webhooks/measurement-webhooks), or a client simply wants to validate the data in their system with the data stored by Tenovi, two Measurement endpoints are available to fetch measurement data on request.
Note
As of April 2026, these endpoints support pagination via `?page=` and`?page_size=` parameters. See the [Pagination Guide](/hwi-api/pagination/) for usage and migration notes. **Pagination will be the default behaviour on May 5, 2026.**
### Device Specific Measurement Data Queries
[Section titled “Device Specific Measurement Data Queries”](#device-specific-measurement-data-queries)
All measurements for a given HWI Device are returned. The `hwi_device_id` must be included in the URL.
```js
GET /clients/{client_domain}/hwi/hwi-devices/{hwi_device_id}/measurements/
```
Details of this API endpoint can be found in our [API Reference](https://api2.tenovi.com/hwi-redoc/#tag/hwi-device-measurements).
### Patient Specific Measurement Data Queries
[Section titled “Patient Specific Measurement Data Queries”](#patient-specific-measurement-data-queries)
All measurements for a given Patient ID (optionally set during Device Activation) are returned. The `patient_external_id` must be included in the URL.
```js
GET /clients/{client_domain}/hwi/patients/{patient_external_id}/measurements/
```
Note
Uniqueness is not enforced for this field. All measurements from all devices associated with a patient with the given External ID will be returned.
Details of this API endpoint can be found in our [API Reference](https://api2.tenovi.com/hwi-redoc/#tag/hwi-patient-measurements).
## Optional Query Parameters
[Section titled “Optional Query Parameters”](#optional-query-parameters)
The optional query parameters allow the request to be filtered by `metric__name` (Examples include `blood_pressure`, `temperature`, `perfusion_index`, `weight`, `pulse`, `glucose`, `spO2`) or timestamp date greater than or equal to (`timestamp__gte`) or less than (`timestamp__lt`) a given timestamp in UTC.
* `metric__name`: string
* `created__gte`: ISO 8601 timestamp in UTC (i.e. YYYY–MM–DDTHH:MM:SSZ)
* `created__lt`: ISO 8601 timestamp in UTC (i.e. YYYY–MM–DDTHH:MM:SSZ)
* `timestamp__gte`: ISO 8601 timestamp in UTC (i.e. YYYY–MM–DDTHH:MM:SSZ)
* `timestamp__lt`: ISO 8601 timestamp in UTC (i.e. YYYY–MM–DDTHH:MM:SSZ)
Note
Each query parameter includes a double-underscore. This must be included for the filter to function properly. An example URL with a query parameter is:
```js
GET /clients/{client_domain}/hwi/patients/12345/measurements/?metric__name=glucose
```
Caution
As of May 5, 2026, requests with no time range specified will default to the last 30 days of data. Requests spanning more than 30 days without pagination will be truncated at 1,000 results.
Use `timestamp__gte` and `timestamp__lt` to control the window, or adopt pagination to retrieve full result sets. See the [Pagination Guide](/hwi-api/pagination/) for usage and migration notes
## Example Response JSON Schema
[Section titled “Example Response JSON Schema”](#example-response-json-schema)
### Non-Paginated Response
[Section titled “Non-Paginated Response”](#non-paginated-response)
```json
[
{
"metric": "string",
"device_name": "string",
"hwi_device_id": "string",
"patient_id": "string",
"hardware_uuid": "string",
"sensor_code": "string",
"value_1": "string",
"value_2": "string",
"created": "2019-08-24T14:16:18Z",
"timestamp": "2019-08-24T14:15:22Z",
"timezone_offset": -2147483648,
"estimated_timestamp": false,
"filter_params": {}
}
]
```
### Paginated Response
[Section titled “Paginated Response”](#paginated-response)
```plaintext
{
"count": 255,
"next": "https://api.tenovi.com/clients/{client_domain}/hwi/patients/{id}/measurements/?page=2&page_size=100",
"previous": null,
"results": [
{
"metric": "string",
"device_name": "string",
"hwi_device_id": "string",
"patient_id": "string",
"hardware_uuid": "string",
"sensor_code": "string",
"value_1": "string",
"value_2": "string",
"created": "2019-08-24T14:16:18Z",
"timestamp": "2019-08-24T14:15:22Z",
"timezone_offset": -2147483648,
"estimated_timestamp": false,
"filter_params": {}
},
…
]
}
```
# Hardware Integration API Overview
> A high-level overview of the Tenovi Hardware Integration (HWI) API
The Tenovi Hardware Integration (HWI) API allows third-party Clients to interact with devices, gateways, fulfillment workflows, supplies, and more.
## High Level Features
[Section titled “High Level Features”](#high-level-features)
Tenovi’s HWI API allows clients to:
1. **Receive measurement data** from Tenovi Devices at a specified [Measurement Webhook](/hwi-api/webhooks/measurement-webhooks/), or fetch measurement data directly from a specified Endpoint
2. **Receive status updates** (e.g. related to fulfillment) for Tenovi Devices at a specified [Fulfillment Webhook](/hwi-api/webhooks/fulfillment-webhooks/).
3. **Activate/Deactivate Tenovi Devices** Once [activated](/hwi-api/devices/activating-devices/), devices will send measurement & status data; charges may apply when activating new devices.
4. **Optionally include shipping information** when activating a device, so that Tenovi (or the client, via the [Tenovi web app](https://app.tenovi.com/)) can provide fulfillment services (additional charges may apply)
Each of these features is executed/implemented using HTTPS requests to our REST API.
## Focus on Webhooks
[Section titled “Focus on Webhooks”](#focus-on-webhooks)
To receive measurement data and fulfillment updates, the Client must register a [callback Webhook](/hwi-api/webhooks/webhooks-overview/) using the Tenovi dashboard or API. The [Tenovi API](https://api2.tenovi.com/hwi-redoc/) will then send a POST request with measurement data or status updates to these endpoints.
All data sent via the API is in JSON format. Header-based authentication methods (e.g. Basic Auth) can be optionally included in the POST request, if required by the Client.
## GET/POST Requests
[Section titled “GET/POST Requests”](#getpost-requests)
To activate/deactivate devices or include optional shipping inforamtion, you need a valid API Key included in the request header. You can generate your API key using the [Tenovi dashboard](https://app.tenovi.com/).

Note
Each API Key has a rate limit of 1 request per second. All requests to the API must be performed over HTTPS.
To authenticate an API request, the API key must be included in an HTTP Authorization header. The key should be prefixed by the string literal `Api-Key` with whitespace separating the two strings. For example:
```bash
Authorization: Api-Key TENOVI_API_KEY
```
# Pagination
> Retrieving large sets of measurements, devices, and supply orders
Pagination is available on all measurement, device, and supply order endpoints. Use of pagination enables you to fetch large datasets in a performant manner.
Caution
Use pagination to retrieve large datasets in manageable chunks and avoid hitting response limits. This has been enforced as of May 5, 2026.
The following API endpoints will use pagination by default:
* [`hwi/patients/{id}/measurements/`](https://api2.tenovi.com/hwi-redoc/#tag/hwi-patient-measurements/operation/patients_measurements_list)
* [`hwi/hwi-devices/{id}/measurements/`](https://api2.tenovi.com/hwi-redoc/#tag/hwi-device-measurements/operation/hwi-devices_measurements_list)
* [`hwi/hwi-devices/`](https://api2.tenovi.com/hwi-redoc/#tag/hwi-devices/operation/hwi-devices_list)
* [`hwi/hwi-hardware-uuid-logs/`](https://api2.tenovi.com/hwi-redoc/#tag/hwi-hardware-uuid-logs/operation/hardware-uuid-logs_list)
* [`hwi/hwi-replacements/`](https://api2.tenovi.com/hwi-redoc/#tag/hwi-replacements/operation/hwi-replacements_list)
* [`asr/supply-requests/`](https://api2.tenovi.com/supply-redoc/#tag/request-supplies/operation/supply-requests_list)
## How to Use Pagination
[Section titled “How to Use Pagination”](#how-to-use-pagination)
Add `?page=1` to any affected endpoint to enable pagination.
```plaintext
GET /clients/{domain}/hwi/patients/{id}/measurements/?page=1&page_size=100
```
### Parameters
[Section titled “Parameters”](#parameters)
| Parameter | Required | Default | Max | Description |
| ----------- | -------------------------- | ------- | ---- | --------------------------------------------------- |
| `page` | Yes (to enable pagination) | None | None | Page number. Must be passed to activate pagination. |
| `page_size` | No | 100 | 1000 | Number of results per page. |
## Response Formats
[Section titled “Response Formats”](#response-formats)
Adding `?page=` to your request changes the shape of the response. Non-paginated and paginated requests return different formats.
### Non-Paginated (default)
[Section titled “Non-Paginated (default)”](#non-paginated-default)
Without `?page=`, results are returned as a flat JSON array. This behavior is unchanged from today. Starting May 5, 2026, this array will be truncated at 1,000 results (or 30 days for measurement endpoints).
```json
[
{ "id": 1, "metric_type": "blood_pressure", ... },
{ "id": 2, "metric_type": "blood_pressure", ... },
...
]
```
### Paginated
[Section titled “Paginated”](#paginated)
When `?page=` is included, the response is wrapped in a pagination object.
```json
{
"count": 255,
"next": "https://api.tenovi.com/clients/{client_domain}/hwi/patients/{id}/measurements/?page=3&page_size=100",
"previous": "https://api.tenovi.com/clients/{client_domain}/hwi/patients/{id}/measurements/?page=1&page_size=100",
"results": [...]
}
```
Note
These are two distinct response shapes. If your integration currently does not use `?page=`, adopting pagination will require updating how you parse the response body.
### Iterating Through Pages
[Section titled “Iterating Through Pages”](#iterating-through-pages)
Paginated responses include a `next` field. When `next` is not null, use it directly as your next request URL. Continue until `next` returns null.
For measurement endpoints, if no time range or pagination is specified, the response will default to only include measurements from the last 30 days. Requests without pagination that span more than 30 days will be truncated at 1,000 results.
For `hwi-devices`, `hwi-hardware-uuid-logs`, and `hwi-replacements` non-paginated responses will be truncated at 1,000 results.
#### Non-Paginated Requests
[Section titled “Non-Paginated Requests”](#non-paginated-requests)
For non-paginated requests (no `?page=` parameter), the response remains a flat JSON array. However, the following limits apply:
**Measurement Endpoints**
* If no time range is specified, results default to the **last 30 days**.
* If the time range exceeds 30 days, the flat array is **truncated at 1,000 results**.
**Device, Log, and Supply Endpoints**
* The flat array is **truncated at 1,000 results**.
To retrieve complete datasets beyond these limits, adopt pagination (see [How to Use Pagination](#how-to-use-pagination)).
### Impacted API Endpoints & Default Behaviour
[Section titled “Impacted API Endpoints & Default Behaviour”](#impacted-api-endpoints--default-behaviour)
| Endpoint | Default Behavior - May 5, 2026 |
| ----------------------------------------------------------------- | ----------------------------------------------------------------------- |
| `GET /clients/{client_domain}/hwi/patients/{id}/measurements/` | Last 30 days if no time range specified, and truncated at 1,000 results |
| `GET /clients/{client_domain}/hwi/hwi-devices/{id}/measurements/` | Last 30 days if no time range specified, and truncated at 1,000 results |
| `GET /clients/{client_domain}/hwi/hwi-devices/` | Truncated at 1,000 results |
| `GET /clients/{client_domain}/hwi/hwi-hardware-uuid-logs/` | Truncated at 1,000 results |
| `GET /clients/{client_domain}/hwi/hwi-replacements/` | Truncated at 1,000 results |
| `GET /clients/{client_domain}/asr/supply-requests/` | Truncated at 1,000 results |
# Patients
> Create and manage patient records directly via the HWI API using the hwi-patients endpoint.
The [`hwi-patients` endpoint](https://api2.tenovi.com/hwi-redoc/#tag/hwi-patients) allows you to create and manage patient records independently of device activation. Patient records created here are shared across all HWI Devices linked to the same `external_id`, making this the recommended way to manage patient data at scale.
Note
This endpoint was added in October 2025. Prior to this, patient records could only be created as a nested object during device activation via `hwi-devices`. Both methods remain supported.
## The Patient Object
[Section titled “The Patient Object”](#the-patient-object)
| Field | Type | Required | Description |
| --------------------- | ------- | --------- | ----------------------------------------------------------------------------------------------------------------------------------------------------------- |
| `external_id` | string | Yes | Your unique identifier for this patient. Used as the lookup key for all GET, PUT, PATCH, and DELETE requests. |
| `name` | string | No | Patient’s full name. |
| `address` | string | No | Street address. Required for address verification. |
| `city` | string | No | City. Required for address verification. |
| `state` | string | No | State. Required for address verification. |
| `zip_code` | string | No | ZIP code. Required for address verification. |
| `phone_number` | string | No | Used by Tenovi support for service requests and optional SMS notifications. |
| `email` | string | No | Not validated. Used by Tenovi support for service requests. |
| `physician` | string | No | Forwarded to the fulfillment team for per-provider shipping customizations (charges may apply). Contact your Customer Success Manager for more information. |
| `clinic_name` | string | No | Clinic or organization name. |
| `care_manager` | string | No | Name of the assigned care manager. |
| `sms_opt_in` | boolean | No | Set to `false` if the patient has not consented to SMS messages. Defaults to `true`. |
| `confirm_address` | boolean | No | Set to `true` to override Tenovi’s internal address verification. |
| `address_status` | string | Read-only | Returns `Verified` or `Invalid` after address verification. |
| `address_verified_by` | string | Read-only | Indicates the system used to verify the address. |
## Create a Patient
[Section titled “Create a Patient”](#create-a-patient)
```js
POST /clients/{CLIENT_DOMAIN}/hwi/hwi-patients/
```
The `external_id` field is required and must be unique across your account. If you submit a `POST` with an `external_id` that already exists, the request will be rejected.
**Example request:**
```json
{
"external_id": "patient-001",
"name": "Patrick Smith",
"address": "18023 Sky Park Cir Suite H2",
"city": "Irvine",
"state": "CA",
"zip_code": "92614",
"phone_number": "18005935468",
"email": "psmith@example.com",
"physician": "Dr. Ian Russell",
"clinic_name": "Flint Rehab",
"care_manager": "Jordan Benoit",
"sms_opt_in": true
}
```
**Example response:**
```json
{
"external_id": "patient-001",
"name": "Patrick Smith",
"address": "18023 Sky Park Cir Suite H2",
"city": "Irvine",
"state": "CA",
"zip_code": "92614",
"phone_number": "18005935468",
"email": "psmith@example.com",
"physician": "Dr. Ian Russell",
"clinic_name": "Flint Rehab",
"care_manager": "Jordan Benoit",
"sms_opt_in": true,
"address_status": "Verified",
"address_verified_by": "internal",
"confirm_address": false
}
```
## Address Verification
[Section titled “Address Verification”](#address-verification)
When a full address is provided (`address`, `city`, `state`, `zip_code`), Tenovi automatically attempts to verify it immediately when creating or updating a patient record. The result is returned in the `address_status` field.
| `address_status` | Meaning |
| ---------------- | ----------------------------------------------------------------------------------------------------------------------------------------------------------------------------------------------------- |
| `Verified` | Address passed internal validation. |
| `Invalid` | Address could not be verified. Fulfillment requests using this address may [trigger a `Client Action Required` webhook.](/hwi-api/webhooks/fulfillment-webhooks#fulfillmentdevice-status-definitions) |
If you have confirmed the address is correct despite the `Invalid` status (e.g., a rural address that fails automated lookup), set `confirm_address: true` to bypass verification.
```json
{
"external_id": "patient-001",
"address": "18023 Sky Park Cir Suite H2",
"city": "Irvine",
"state": "CA",
"zip_code": "92614",
"confirm_address": true
}
```
## Retrieve a Single Patient Record
[Section titled “Retrieve a Single Patient Record”](#retrieve-a-single-patient-record)
Use the patient’s `external_id` as the lookup key. The lookup is case-insensitive.
```js
GET /clients/{CLIENT_DOMAIN}/hwi/hwi-patients/{external_id}/
```
**List all patients (paginated):**
```js
GET /clients/{CLIENT_DOMAIN}/hwi/hwi-patients/
```
Use `page` and `page_size` to control pagination.
## Update a Patient
[Section titled “Update a Patient”](#update-a-patient)
Use `PUT` for a full update or `PATCH` for a partial update. Both use `external_id` as the lookup key.
```JS
PATCH /clients/{CLIENT_DOMAIN}/hwi/hwi-patients/{external_id}/
```
```json
{
"external_id": "patient-001",
"name": "Patrick Smith",
"phone_number": "7144185658",
"sms_opt_in": false
}
```
Note
Updating a patient record here will update that patient’s data across **all** HWI Devices linked to the same `external_id`. This is the recommended way to keep patient data consistent across multiple devices.
If you update the address, Tenovi will re-run address verification automatically unless `confirm_address: true` is included.
## Delete a Patient
[Section titled “Delete a Patient”](#delete-a-patient)
```js
DELETE /clients/{CLIENT_DOMAIN}/hwi/hwi-patients/{external_id}/
```
Returns `204 No Content` on success.
Caution
Deleting a patient record does not deactivate linked HWI Devices, but those devices will no longer have patient data associated with them.
## Relationship to HWI Devices
[Section titled “Relationship to HWI Devices”](#relationship-to-hwi-devices)
Patient records created via `hwi-patients` are the same records used in the nested `patient` object on `hwi-devices`. The `external_id` is the shared key.
### Activating a Device
[Section titled “Activating a Device”](#activating-a-device)
If a patient record already exists, include the `external_id` in the nested `patient` object when [activating a device](/hwi-api/devices/activating-devices). Tenovi will link the device to the existing patient rather than creating a duplicate.
```json
{
"device": {
"name": "Tenovi BPM - Wide Range"
},
"patient": {
"external_id": "patient-001"
}
}
```
### Patient Data in Webhooks
[Section titled “Patient Data in Webhooks”](#patient-data-in-webhooks)
The `patient_id` field in both [measurement](/hwi-api/webhooks/measurement-webhooks) and [fulfillment](/hwi-api/webhooks/fulfillment-webhooks) webhooks maps to the patient’s `external_id`. This is the stable identifier you should use to link webhook data back to patients in your system - it does not change when a gateway is replaced or unlinked.
```json
{
"hwi_device_id": "12345678-abcd-1234-abcd-1234567890ab",
"patient_id": "patient-001",
"hardware_uuid": "aabbcc001122",
...
}
```
Caution
Do not use `hardware_uuid` to identify patients. This value changes when a Gateway is [replaced](/hwi-api/devices/replacing-devices). Always use `hwi_device_id` or `patient_id` (`external_id`) for stable patient linkage.
## Common Issues
[Section titled “Common Issues”](#common-issues)
**`external_id` already exists** Each `external_id` must be unique. If you receive a conflict error on `POST`, use `PUT` or `PATCH` to update the existing record instead, or use a `GET` request to check whether the patient already exists before creating.
**`address_status: Invalid` blocking fulfillment** Tenovi will flag fulfillment requests with unverified addresses, which triggers a [`Client Action Required` webhook](/hwi-api/webhooks/fulfillment-webhooks#fulfillmentdevice-status-definitions). Resolve this before submitting fulfillment by either correcting the address or setting `confirm_address: true` if you have independently verified it.
**Patient data not appearing on a device** If a patient was created via `hwi-patients` but the device was activated without a patient object, use `PUT /hwi-devices/{id}/` to attach the patient by `external_id`.
**SMS opt-in default** `sms_opt_in` defaults to `true`. If you have not collected explicit patient consent for SMS, set this to `false` at creation time.
# Typical Dataflow
> How data flows from devices to your systems.
The following describes how data typically flows (with measurement metrics and fulfillment updates) when working with the HWI API. It is **highly recommended** to make use of webhooks, however, the API also has a series of GET requests that can also be used to get this data.
## Measurement Data
[Section titled “Measurement Data”](#measurement-data)
Using webhooks, you can receive measurement data in near real-time. When working with Bluetooth enabled devices that connect to the Tenovi Gateway, data typically flows:
### Gateway Enabled Bluetooth Devices
[Section titled “Gateway Enabled Bluetooth Devices”](#gateway-enabled-bluetooth-devices)
1. Measurement is taken on a device and data is transmitted to the Tenovi Gateway
2. The Tenovi Gateway transmits data to Tenovi servers
3. Tenovi servers relay the data out to webhooks you define
```
flowchart
MD["Device\nBPM · Scale · Glucometer\nPulse Ox · Thermometer"]
GW["Tenovi Gateway\nCellular-connected hub"]
TC["Tenovi Cloud\nData ingestion & storage"]
WH["Webhook / API\nHTTPS POST · REST"]
YA["Your Application\nEHR · RPM Platform · Custom App"]
MD -->|" Bluetooth "| GW
GW -->|" Cellular / LTE "| TC
TC -->|" Near Real-time push "| WH
WH -->|" JSON payload "| YA
style MD fill:#cdeaf5,stroke:#29ade3,color:#000
style GW fill:#cdeaf5,stroke:#29ade3,color:#000
style TC fill:#cdeaf5,stroke:#29ade3,color:#000
style WH fill:#cdeaf5,stroke:#29ade3,color:#000
style YA fill:#cdeaf5,stroke:#29ade3,color:#000
```
There are some exceptions to this data flow depending on the device. The Tenovi Watch for example offloads data at set times throughout the day. You can get more information on these exceptions on our [Device Overview](/guides/device-overview/) page.
### Cellular Enabled Devices
[Section titled “Cellular Enabled Devices”](#cellular-enabled-devices)
If you are using a cellular enabled device without the use of a Tenovi Gateway, your data will flow directly from the device and up to Tenovi servers, before being relayed out to your webhooks.
1. Measurement is taken on a device and data is transmitted to the Tenovi Cloud
2. Tenovi servers relay the data out to webhooks you define
```
flowchart
MD["Device\nCellular BPM"]
TC["Tenovi Cloud\nData ingestion & storage"]
WH["Webhook / API\nHTTPS POST · REST"]
YA["Your Application\nEHR · RPM Platform · Custom App"]
MD -->|" Cellular / LTE "| TC
TC -->|" Near Real-time push "| WH
WH -->|" JSON payload "| YA
style MD fill:#cdeaf5,stroke:#29ade3,color:#000
style TC fill:#cdeaf5,stroke:#29ade3,color:#000
style WH fill:#cdeaf5,stroke:#29ade3,color:#000
style YA fill:#cdeaf5,stroke:#29ade3,color:#000
```
## Fulfillment Data
[Section titled “Fulfillment Data”](#fulfillment-data)
When working with devices that are dropshipped from Tenovi, you can expect to get updates on your fulfillment request throughout the device’s journey to the patient. You will receive status updates to your fulfillment webhooks when:
1. `Shipped` - the order is on it’s way through our shipment carriers
2. `Delivered` - the order has arrived with the patient but no measurements have been taken yet
3. `Connected` - the patient has taken their first measurement
4. `Replaced` - the device has been replaced (the new hardware\_uuid will be included, if applicable)
5. `Unlinked` - the device has been unlinked (data will stop flowing and monthly charges will be halted)
Note
More shipping statuses are used for fulfillment workflows and are dependent upon how you activate devices and the logistics of getting devices to patients. More details on our fulfillment process can be found on our [Fulfillment Webhooks](/hwi-api/webhooks/fulfillment-webhooks) document.
## Special/Bulk Order Data
[Section titled “Special/Bulk Order Data”](#specialbulk-order-data)
When working with bulk orders, supplies, replacements, or returns you can expect to get updates on your special order webhooks that you define on the HWI Settings screen. More details on these special orders can be found on our [Special/Bulk Order Webhooks](/hwi-api/webhooks/special-order-webhooks) document.
# Specify Webhooks for Individual Devices
> Sending device specific data through specific webhooks with device properties
By default, all measurements send POST data to all [measurement webhooks](/hwi-api/webhooks/measurement-webhooks/) you have defined in the [Tenovi web app](https://app.tenovi.com/). However, you can set individual devices to only send data to specific webhooks using device properties. This involves
1. Getting the `measurement_webhook_id` of the webhook you wish to send data to
2. Set the device propery on an individual device to send data to only this webhook
## Getting `measurement_webhook_id`
[Section titled “Getting measurement\_webhook\_id”](#getting-measurement_webhook_id)
You can retrieve a list of all your webhooks by using our GET `/webhooks/` endpoint:
```bash
/hwi/webhooks/
```
This will return an object for each of your webhooks you have defined. You will need the `id` of the webhook for the next step (setting up a device property to send data to only this webhook).
```json
[
{
"id": "497f6eca-6276-4993-bfeb-53cbbbba6f08",
"created": "2019-08-24T14:15:22Z",
"modified": "2019-08-24T14:15:22Z",
"endpoint": "http://example.com/measurements",
"auth_header": "string",
"auth_key": "string",
"event": "MEASUREMENT",
"post_as_array": true,
"enabled_by_default": true
}
]
```
## Setting `measurement_webhook_id` Device Property
[Section titled “Setting measurement\_webhook\_id Device Property”](#setting-measurement_webhook_id-device-property)
Using [device properties](/hwi-api/devices/device-properties/), you can set key-value pairs attached to individual devices. A special device property is the `measurement_webhook_id` which accepts the `id` you pulled in the previous step.
Creating this device property involves sending a POST request to this API endpoint which uses the `hwi_device_id` of the specific device.
```bash
/hwi/hwi-devices/{hwi_device_id}/properties/
```
Attaching a JSON object to the body of your request assigns this device to only send data to the specified webhook.
```json
{
"key": "measurement_webhook_id",
"value": "497f6eca-6276-4993-bfeb-53cbbbba6f08"
}
```
# Fulfillment Webhooks
> How data flows when requesting and ordering devices.
If Tenovi will be providing fulfillment services, after a Device has been requested, Tenovi will send a callback HTTPS POST request to a provided endpoint to indicate the device status (e.g. “Shipped” or “Connected”), tracking link, and the unique `hardware_uuid` for the physical device that was shipped to the patient.
## Fulfillment Webhook Structure
[Section titled “Fulfillment Webhook Structure”](#fulfillment-webhook-structure)
The following data is included in each fulfillment webhook POST request:
| Parameter | Description |
| ------------------- | --------------------------------------------------------------------------------------------------------------------------------------------------------------------------------------------------------------------------------------------------------------------------------------------------------------------------------------------------------------------------------- |
| **hwi\_device\_id** | The unique id returned when activating a HWI Device, which should be used to link shipping updates to a particular Patient or HWI Device in the Client’s software. |
| **patient\_id** | The patient ID associated with this device, if it was provided when the device was requested (see [Activating/Requesting Devices](/hwi-api/devices/activating-devices)) |
| **hardware\_uuid** | A unique identifier associated with the Tenovi Gateway. This is primarily useful for troubleshooting, or if a replacement Gateway is needed (Tenovi must be provided with the old ID so they can replace it with the new ID after a replacement unit is shipped out). Do NOT use this field to associate measurements with a patient, as it will change if a Gateway is replaced. |
| **sensor\_code** | The sensor code of the device (see [Activating/Requesting Devices](/hwi-api/devices/activating-devices#device-names--sensor-codes/) for valid sensor codes) |
| **device\_name** | The name of the Device that was shipped (i.e. “Tenovi Scale”, “Tenovi BPM”, “Tenovi Pulse Ox”, or “Tenovi Glucometer”). See our [Device Overview](/guides/device-overview/) page for a complete listing of available device types. |
| **status** | The status of the device. Options are: “Pending Shipment" "Dropship Requested" "Shipped" "Dropshipped" "Delivered" "Available for Pickup" "Returned" "Connected" "Replaced" "Unlinked" "Client Action Required" "On Hold" "Ready to Ship” |
| **tracking\_link** | The tracking link for this device, if it has been shipped |
| **device\_id** | Only used for replacement devices using the [Replacement API calls](/hwi-api/devices/replacing-devices/). The old Gateway ID or IMEI that was replaced. |
## Fulfillment/Device Status Definitions
[Section titled “Fulfillment/Device Status Definitions”](#fulfillmentdevice-status-definitions)
* **Pending Shipment**: A request for a device to be fulfilled by the client hasn’t been fulfilled yet.
* **Dropship Requested**: A request to dropship a device has been made but has yet to leave Tenovi warehouses.
* **Shipped**: A request has been shipped by the client.
* **Dropshipped**: A dropship request has left Tenovi warehouses.
* **Delivered**: The device has been successfully delivered to the patient’s address and is ready to be set up.
* **Available for Pickup**: The device has arrived at a carrier facility (e.g. FedEx OnSite, local Post Office) and is awaiting collection by the patient. See note below.
* **Returned**: A device has been returned to Tenovi’s warehouses.
* **Connected**: A device is connected and has sent measurement data.
* **Replaced**: A device has been replaced with a new device, [see more detailed notes below](#replacement-devices--gateways).
* **Unlinked**: A device has been [unlinked](/hwi-api/devices/unlinking-devices/) and can be re-used or repurposed.
* **Client Action Required**: The client needs to update a request before it can be processed if, for example, the address is invalid or it is flagged as a duplicate request.
* **On Hold**: A request is temporarily on hold at Tenovi (for example, if the requested device is temporarily out of stock).
* **Ready to Ship**: A request has passed our automated internal validation and is now ready for internal processing.
Note
**Delivered** will only fire when a package is dropped off at the patient’s address. It will not fire for packages held at a carrier facility — those trigger **Available for Pickup** instead.
If your integration performs actions on `Delivered` (e.g. enrolling a patient, starting a billing cycle, or sending a welcome message), those actions will not fire for packages held for pickup. We recommend updating your logic to handle both `Delivered` and `Available for Pickup` as actionable events, depending on your workflow requirements.
## Replacement Devices & Gateways
[Section titled “Replacement Devices & Gateways”](#replacement-devices--gateways)
When a replacement Gateway or IMEI is shipped, the fulfillment webhook status will be “Replaced”. This indicates that a new device has been associated with one or more HWI Devices.
If you are requesting a replacement Gateway, Tenovi will automatically update the `hardware_uuid` of any HWI Devices linked to the same Gateway as the referenced HWI Device. Our system will send a Fulfillment Webhook with the updated Gateway ID when the replacement is shipped.
If multiple HWI Devices were linked to the original Gateway, each will generate its own “Replaced” webhook.
The fulfillment webhook payload will have the following for all replacements Tenovi ships.
* `hardware_uuid`: The new Gateway ID or IMEI sent as a replacement
* `device_id`: The old Gateway ID or IMEI that was replaced
* `status`: Always “Replaced” in this context
You can find more detailed information on our [Replacing Devices & Gateways](/hwi-api/devices/replacing-devices/) doc.
## Example JSON Payload
[Section titled “Example JSON Payload”](#example-json-payload)
```json
{
"hwi_device_id": "12345678-abcd-1234-abcd-1234567890ab",
"patient_id": "12345678-1234-12345678",
"hardware_uuid": "fed091a643ff",
"sensor_code": "10",
"device_name": "Tenovi BPM",
"status": "Shipped",
"tracking_link": "https://ups.com/tracking-number"
}
```
# Measurement Webhooks
> How data flows from devices to your systems.
## Multiple Webhooks
[Section titled “Multiple Webhooks”](#multiple-webhooks)
Multiple Webhooks can be added at the same time. The default behavior is for measurements to be sent to all Webhooks.
### Device Specific Webhooks
[Section titled “Device Specific Webhooks”](#device-specific-webhooks)
Users can configure devices to only POST to a single, user-selected Webhook using the `measurement_webhook_id` Device Property. See [Using Device Properties with Webhooks](/hwi-api/webhooks/device-properties-with-webhooks) for more information.
## Multiple Metrics & Post as Array
[Section titled “Multiple Metrics & Post as Array”](#multiple-metrics--post-as-array)
For devices that measure multiple metrics simultaneously (e.g. BPMs measure both `blood_pressure` and `pulse` metrics in a single physical reading), webhooks can be configured to either send two separate POST requests for each measurement, or a single POST request with all simultaneous measurements included in a JSON array.

For either option, the `timestamp` field will be identical for coincident measurements. If multiple measurements of the same type are reported with the same timestamp, clients can use the `measurement_index` value included in the `filter_params` field to identify coincident measurements.
Note
The `measurement_index` value is not guaranteed to be unique over time, so the timestamp field should always be referenced first. See below for more information.
Examples of Posting as an array can be found in our [FAQs](/guides/dev-faqs#what-does-the-post-as-array-option-in-the-hwi-webhook-configuration-do).
## Delivery & Automatic Retries
[Section titled “Delivery & Automatic Retries”](#delivery--automatic-retries)
When Tenovi sends a measurement to your configured Webhook, we expect a successful (`2xx`) response to acknowledge receipt. If your endpoint is unreachable or returns an error, the delivery is recorded as failed and automatically re-attempted using exponential backoff — each retry waits progressively longer than the last. This means a transient outage or brief downtime on your receiving endpoint will no longer drop measurement data; delivery resumes automatically once your endpoint recovers.
Note
Automatic retries currently apply to **measurement webhooks** only. Fulfillment, special/bulk order, and patient webhooks are not yet on the automatic retry path.
### Best Practices
[Section titled “Best Practices”](#best-practices)
* **Acknowledge quickly.** Return a `2xx` status as soon as you have safely received the payload, and defer heavy processing to a background job. A slow endpoint that times out will be treated as a failed delivery and retried unnecessarily.
* **Handle duplicate deliveries.** Because a delivery is re-attempted whenever your acknowledgement is not received, your endpoint should be idempotent. De-duplicate using the `timestamp` together with `hwi_device_id` (and the `measurement_index` from `filter_params` for coincident measurements), as described above.
## Measurement Webhook Structure
[Section titled “Measurement Webhook Structure”](#measurement-webhook-structure)
| **Parameter** | **Description** |
| ------------------------ | -------------------------------------------------------------------------------------------------------------------------------------------------------------------------------------------------------------------------------------------------------------------------------------------------------------------------------------------------------------------------------------------------------------------------------------------------------------------------------------------- |
| **metric** | The type of metric. See the [Device Overview documentation](/guides/device-overview/) for a list of valid metrics for each of our devices. |
| **device\_name** | The name of the device |
| **hwi\_device\_id** | The unique id returned when activating a HWI Device. This can be used to identify measurements by activated HWI Devices |
| **patient\_id** | The internal patient ID associated with this device, if it was provided when the device was requested (see Activating Devices) |
| **hardware\_uuid** | A unique identifier associated with the Tenovi Gateway (printed on the back). This is primarily useful for troubleshooting, or if a replacement Gateway is needed (Tenovi must be provided the old ID so they can replace it with the new ID after a replacement unit is shipped out). See our [Replacements API doc](/hwi-api/devices/replacing-devices/) for more information. Do NOT use this field to associate measurements with a patient, as it will change if a Gateway is replaced. |
| **sensor\_code** | The sensor code of the device (see Activating Devices for valid sensor codes) |
| **value\_1** | A first measurement value (formatted as a numeric string with 2 decimal places). See the [Device Overview documentation](/guides/device-overview/) for the values associated with each metric type. |
| **value\_2** | A second measurement value (also formatted as a numeric string with 2 decimal places). See the [Device Overview documentation](/guides/device-overview/) for the secondary values associated with each metric type. |
| **created** | A timestamp (in UTC) of when the measurement was RECEIVED by our server in `YYYY-MM-DDTHH:MM:SS.ssssssZ` format. |
| **timestamp** | A timestamp (in UTC) of when the measurement was TAKEN (as measured by the device) in `YYYY-MM-DDTHH:MM:SS.ssssssZ` format. |
| **timezone\_offset** | Offset (in hours) between timezone where measurement was taken and UTC. Can be negative. |
| **estimated\_timestamp** | Boolean indicating if the `timestamp` field is an algorithmic estimate, which is used if the timestamp reported by the sensor device was in an invalid range. See our doc on [Estimated Timestamps](/guides/estimated-timestamps) for more details. |
| **filter\_params** | A json object with any additional context information in key-value pairs. See the [Device Overview documentation](/guides/device-overview/) for the possible `filter_param` values associated with each Device type. |
## Example JSON Payload
[Section titled “Example JSON Payload”](#example-json-payload)
```json
{
"metric": "blood_pressure",
"device_name": "Tenovi BPM – L",
"hwi_device_id": "12345678-abcd-1234-abcd-1234567890ab",
"patient_id": "12345678-1234-12345678",
"hardware_uuid": "fed091a643ff",
"sensor_code": "10",
"value_1": "120.00",
"value_2": "80.00",
"created": "2021-01-15T12:15:20.123597Z",
"timestamp": "2021-01-15T12:14:49.000000Z",
"timezone_offset": -7,
"estimated_timestamp": false,
"filter_params": {
"measurement_index": 15
}
}
```
# Resending Webhooks
> Resend webhook data payloads on demand
In the event that your server is offline or fails to accept a webhook, you are able to resend JSON payloads to your server using the Tenovi web app.
## Resending Individual JSON Payloads
[Section titled “Resending Individual JSON Payloads”](#resending-individual-json-payloads)
In order to resend JSON payloads that you have missed:
1. Log into the [Tenovi](https://app.tenovi.com/) web app
2. Navigate to the [client devices](https://app.tenovi.com/client/devices/) screen
3. Find the device you wish to resend data for by searching for the gateway ID, patient ID, HWI Device ID, or other device information
4. Click on the bar graph icon on the right side for the specific device 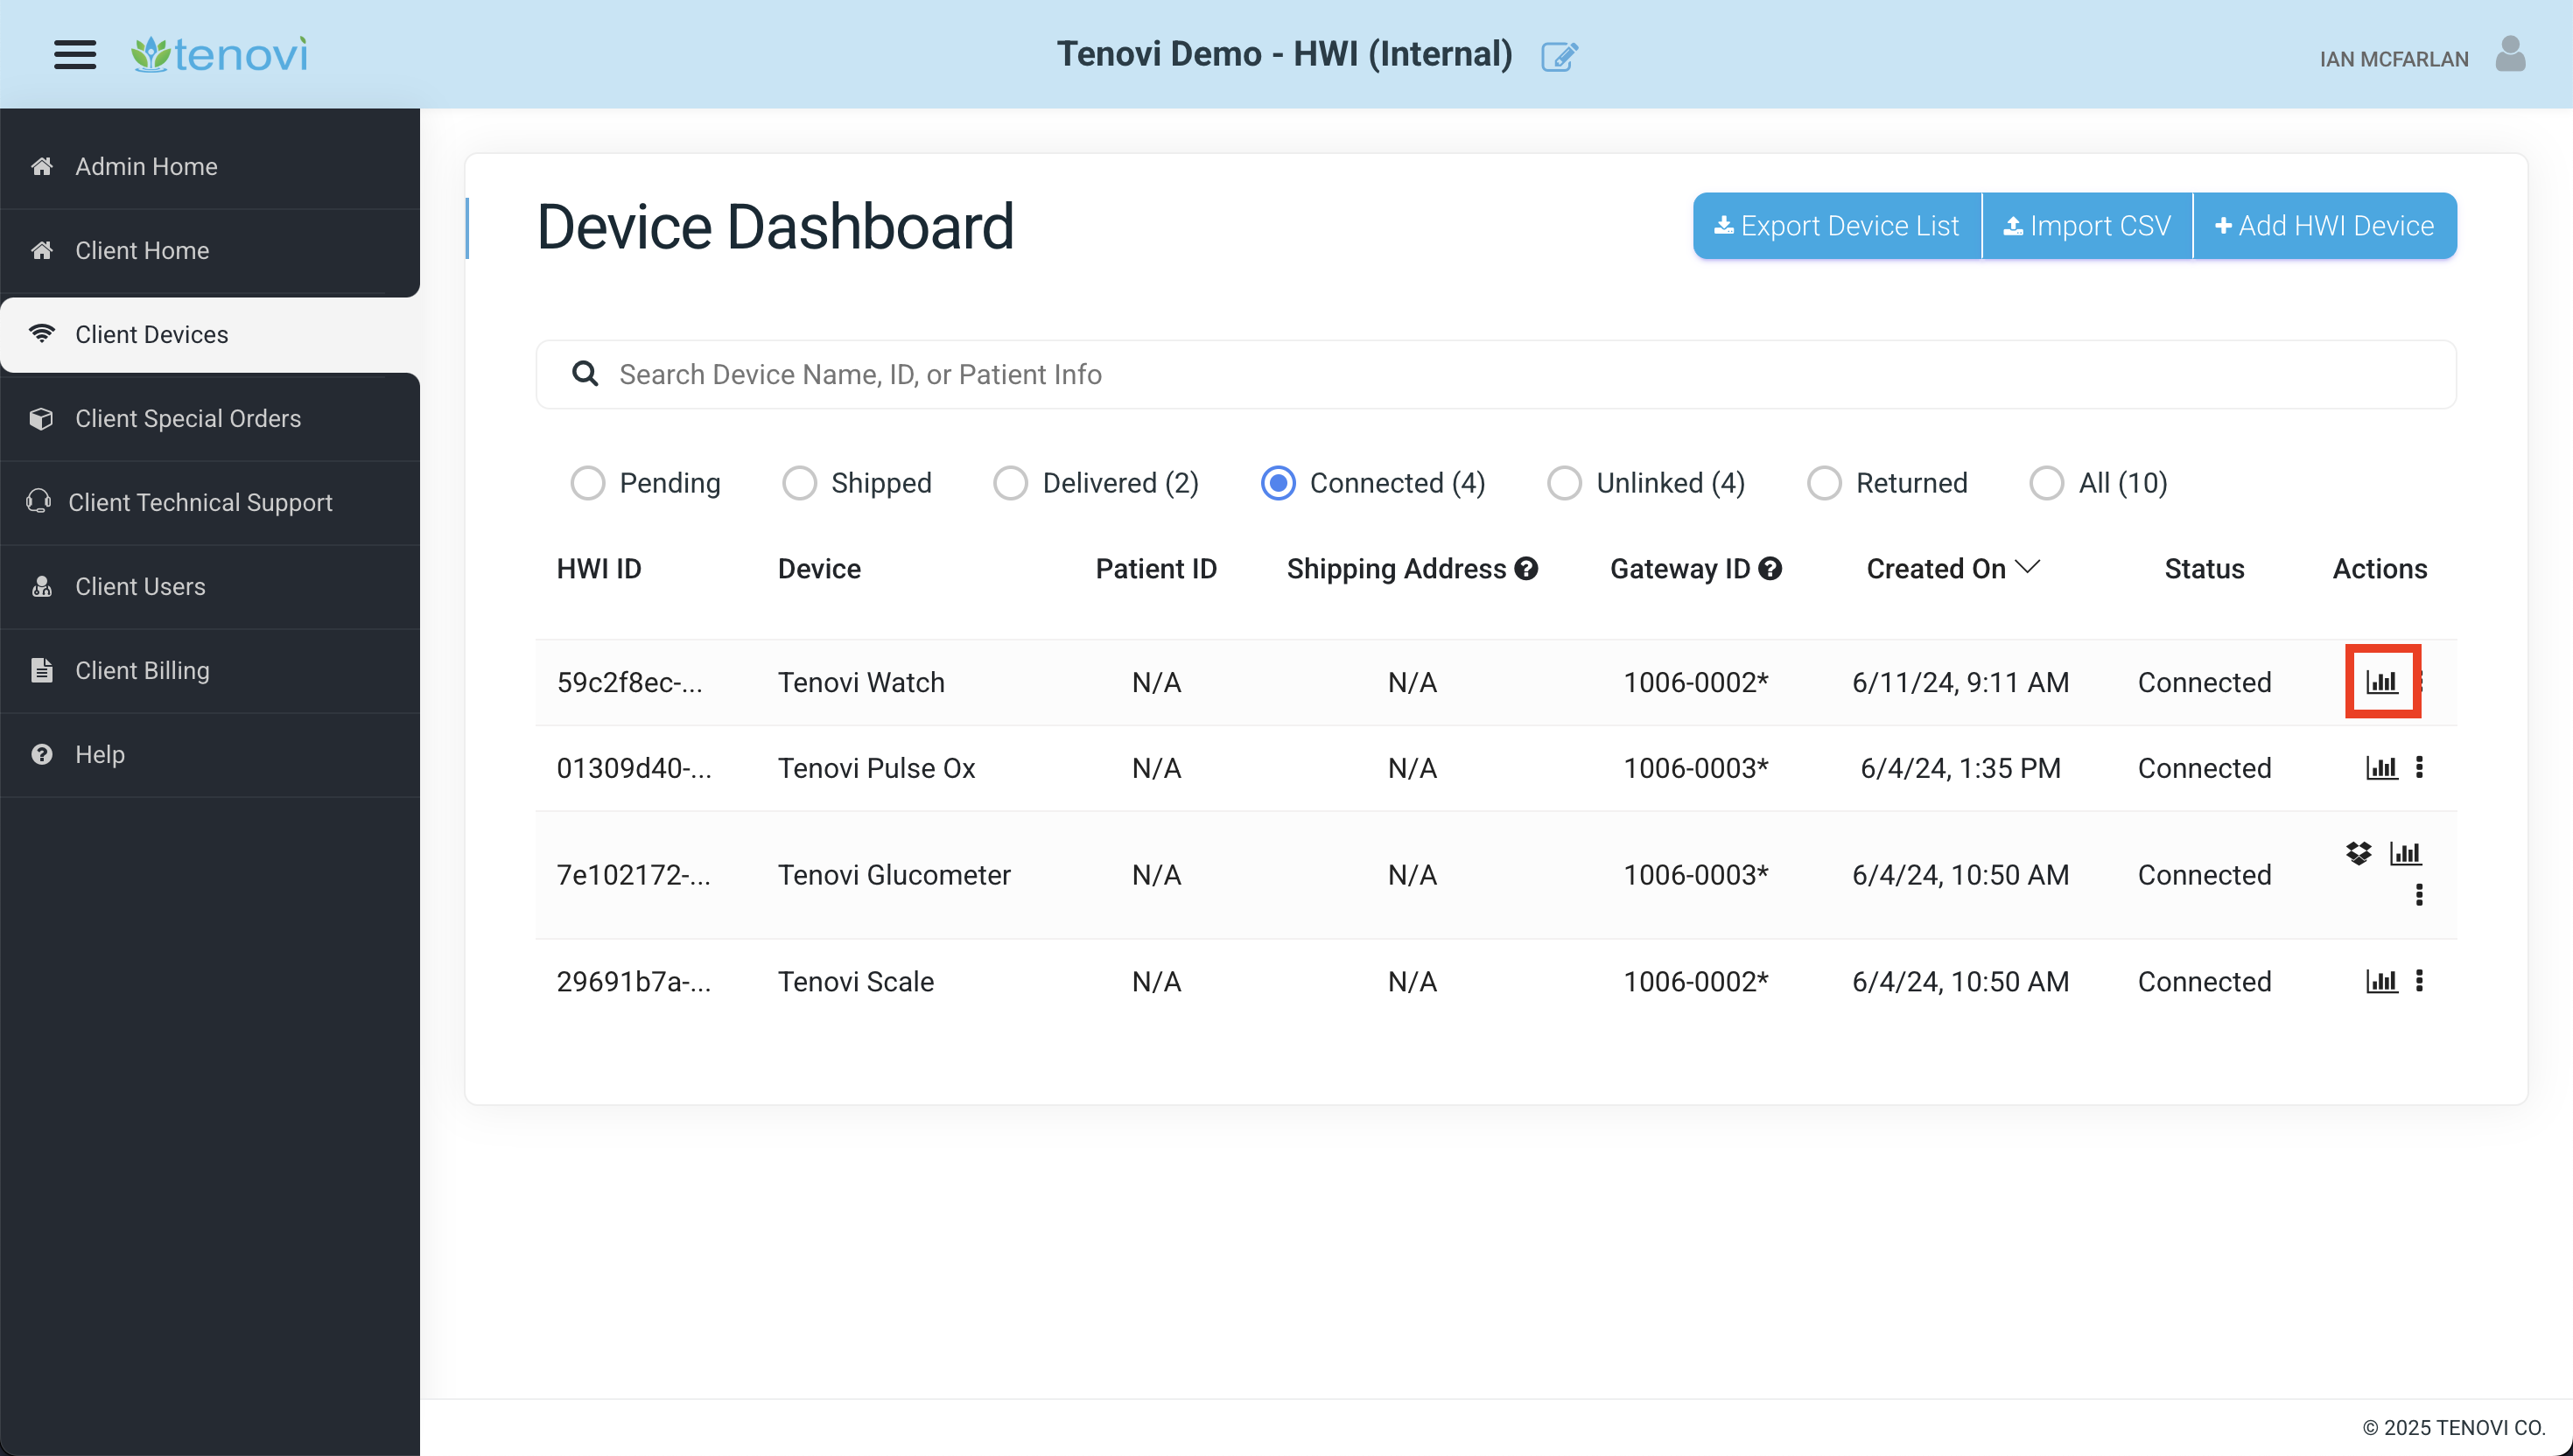
5. Each measurement will have a plus icon associated with it and an arrow icon; click the arrow icon to resend the JSON data to your webhooks 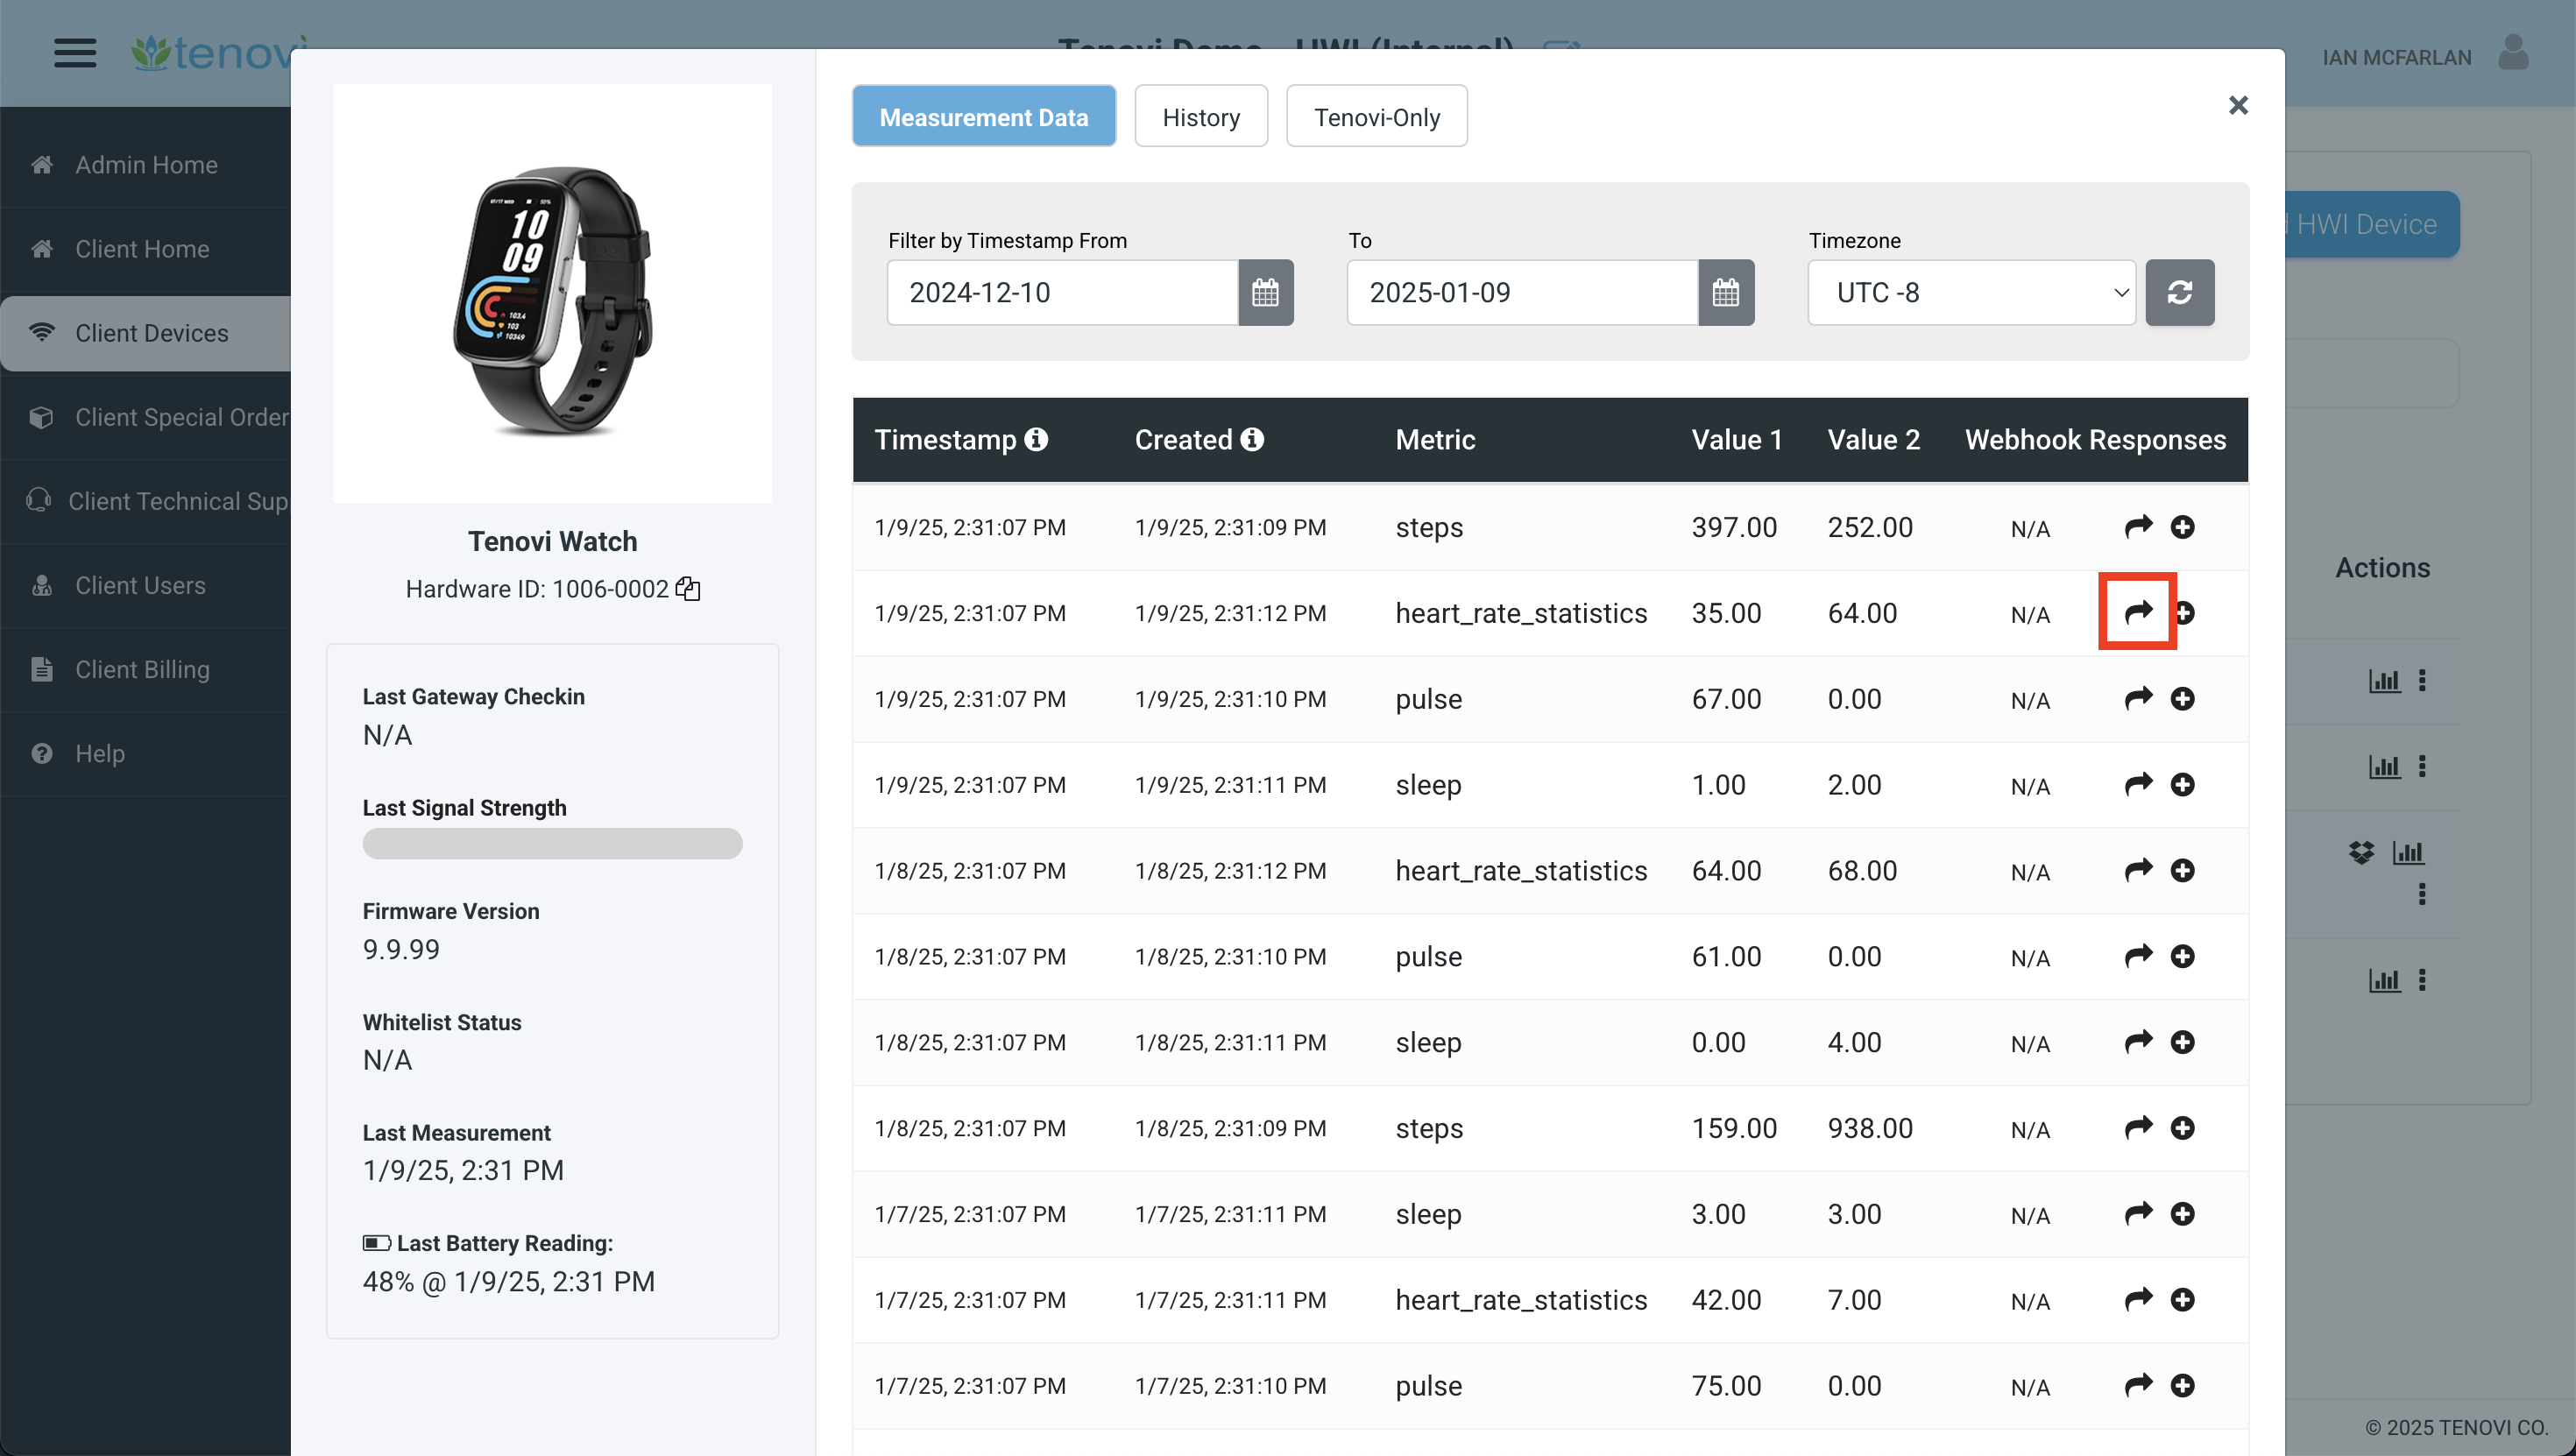
## Retrieving Many Measurements
[Section titled “Retrieving Many Measurements”](#retrieving-many-measurements)
While you are unable to bulk resend data to your servers, you can make use of GET requests with date query parameters retrieve measurements for a specific time frame. This is covered in detail in our [Measurement Data](/hwi-api/measurement-data#retrieving-measurements) document.
# Special/Bulk Order Webhooks
> How data flows with special orders, such as supply and bulk orders.
Webhooks for special and bulk orders can be configured on the HWI Settings screen of the [Tenovi web app](https://app.tenovi.com/) to relay information to your systems. This data is sent at a POST request with the JSON schema outlined below. These webhooks are separate from the normal [fulfillment webhooks](/hwi-api/webhooks/fulfillment-webhooks) that send payloads for devices dropshipped by Tenovi.
Order Types
Any order in the Special Orders screen of the Tenovi web app will send webhook payloads. This includes supply, bulk, replacement, return labels, and demo units.
## Special Order Webhook Structure
[Section titled “Special Order Webhook Structure”](#special-order-webhook-structure)
| **Parameter** | **Description** |
| ---------------------- | -------------------------------------------------------------------------------------------------------------------------------------------------------------------------------------------------------------------------------------------- |
| **request\_id** | The root order id (for ASR plans, equivalent to the ID returned on the Supply Request creation) |
| **order\_number** | The Special Order number shown on the Tenovi Web App |
| **order\_type** | The Special Order type: DE = Demo BU = Bulk SU = Supplies RE = Replacement RL = Return Label |
| **hardware\_uuid** | The related Gateway ID or IMEI, if applicable |
| **client\_device\_id** | The ID of the ClientDevice associated with this order, if applicable |
| **patient\_id** | The External Patient ID associated with this device, if it was provided when the device was requested (see [Activating/Requesting Devices](/hwi-api/devices/activating-devices)) |
| **status** | Readable order status: Pending Shipped Delivered Returned |
| **created\_on** | The date & time the order was requested, in `YYYY-MM-DDTHH:MM:SS.ssssssZ` format |
| **updated\_on** | The date & time the order was last updated, in `YYYY-MM-DDTHH:MM:SS.ssssssZ` format |
| **tracking\_link** | The tracking link for this order, if it has been shipped |
| **contents** | An array of objects describing what is in the Special Order |
| **contents.name** | The name of the included device/supply item. See our [Device Overview](/guides/device-overview/) page for a complete listing of available device types and our [Supply Types API endpoint](/asr-api/supply-types) for relevant supply types. |
| **contents.quantity** | The quantity |
| **contents.kit\_id** | The Kit ID, if applicable (applies to Bulk Orders only) |
| **manifest** | An object containing details on Gateway and IMEIs included in the Special Order |
Note
If you require shipping information such as address, name, tracking URL, please see our [GET Bulk Orders](/hwi-api/bulk-orders/) API endpoint.
## Example JSON Payloads
[Section titled “Example JSON Payloads”](#example-json-payloads)
Below are examples of JSON payloads for supply orders and bulk orders. You can send test data using the Testing Tools on the [HWI Settings Screen and using API calls](/hwi-api/webhooks/testing-webhooks).
### Supply Order
[Section titled “Supply Order”](#supply-order)
```json
{
"request_id": "12345678-abcd-1234-abcd-1234567890ab"
"order_number": "240123",
"order_type": "SU",
"hardware_uuid": "1234abcd5678",
"client_device_id": "12345678-abcd-1234-abcd-1234567890ab",
"patient_id": "12345",
"status": "Pending",
"created_on": "2024-05-11T12:00:00.000000Z",
"updated_on": "2024-05-11T12:00:00.000000Z",
"shipped_on": "2024-05-11T12:00:00.000000Z",
"delivered_on": "2024-05-11T12:00:00.000000Z",
"tracking_link": "https://tools.usps.com/",
"contents": [
{
"name": "Glucometer Strips",
"quantity: 1,
"kit_id": 0,
}
]
}
```
### Bulk Order
[Section titled “Bulk Order”](#bulk-order)
```json
{
"request_id": "12345678-abcd-1234-abcd-1234567890ab",
"order_number": "240123",
"order_type": "BU",
"hardware_uuid": "1234abcd5678",
"client_device_id": "12345678-abcd-1234-abcd-1234567890ab",
"patient_id": "12345",
"status": "Pending",
"created_on": "2024-05-11T12:00:00.000000Z",
"updated_on": "2024-05-11T12:00:00.000000Z",
"shipped_on": "2024-05-11T12:00:00.000000Z",
"delivered_on": "2024-05-11T12:00:00.000000Z",
"tracking_link": "https://tools.usps.com/",
"contents": [
{
"name": "Tenovi BPM - Wide Range",
"quantity": 5,
"kit_id": 0
}
],
"manifest": [
{
"order_section": "Loose Items",
"kitted_items": [],
"loose_items": [
{
"imei": "123123123123123",
"device_type": "Tenovi Cellular Pulse Ox"
},
{
"device_type": "Gateway",
"gateway_id": "1234ABCD1234"
},
{
"device_type": "Tenovi BPM - Wide Range",
"mac_address": "1A2B3C2A2B2C"
}
]
},
{
"order_section": "Kit 1",
"kitted_items": [
{
"kit_number": 0,
"gateway_id": "1234ABCD1234",
"contents": [
{
"device_type": "Gateway",
"gateway_id": "1234ABCD1234"
},
{
"device_type": "Tenovi BPM - Wide Range",
"mac_address": "1A2B3C2A2B2C"
}
]
},
{
"kit_number": 1,
"gateway_id": "1234ABCD1234",
"contents": [
{
"device_type": "Gateway",
"gateway_id": "1234ABCD1234"
},
{
"device_type": "Tenovi BPM - Wide Range",
"mac_address": "1A2B3C2A2B2C"
}
]
}
],
"loose_items": []
}
]
}
```
# Testing Webhooks
> Sending test data through webhooks
To aid in development and debugging issues with webhooks, Tenovi has two methods for testing webhooks: using the [Tenovi](https://app.tenovi.com/) web app, and through API calls.
## Test Data via Tenovi Web App
[Section titled “Test Data via Tenovi Web App”](#test-data-via-tenovi-web-app)
When you log into the [Tenovi web app](https://app.tenovi.com/), on the HWI Settings screen you can generate API keys and define webhooks for [measurements](/hwi-api/webhooks/measurement-webhooks), [fulfillment](/hwi-api/webhooks/fulfillment-webhooks), and [special/bulk orders](/hwi-api/webhooks/special-order-webhooks). For all of these types of webhooks, there is a send test data button that will open a modal.

Here you can set some basic data points you wish to send to your webhooks. This enables developers to test and integrate with the Tenovi API without the need to place many test orders or take many measurements on specific devices.
## Test Data via API
[Section titled “Test Data via API”](#test-data-via-api)
For more granular control over the type of test data sent to your servers, you can make use of a series of API calls.
1. [GET `webhooks`](https://api2.tenovi.com/hwi-redoc/#operation/webhooks_list) will retrieve a list of webhooks you have defined for your integration. This includes a UUID for each of your webhooks
2. Using a UUID of a webhook you can then request a test JSON payload be sent to a specific webhook using [POST `test-webhooks`](https://api2.tenovi.com/hwi-redoc/#operation/test-webhooks_create)
This method allows for you to set very granular test data points to aid you in getting better coverage in your API integration.
# Webhooks Overview
> How Tenovi webhooks work
The preferred method of getting data from Tenovi and its supported devices is to setup webhooks to push data from Tenovi servers to yours. This enables near real-time [fulfillment updates](/hwi-api/webhooks/fulfillment-webhooks/), [measurement metrics](/hwi-api/webhooks/measurement-webhooks/), and updates for [special/bulk orders](/hwi-api/webhooks/special-order-webhooks).
Note
Tenovi servers are configured with a 30 second timeout when pushing data to your servers. There is no automatic retry mechanism but a CSV of failed webhooks can be downloaded from the Tenovi Web App when viewing the Devices screen.
Webhooks POST data to URLs you specify on the [HWI Settings](https://app.tenovi.com/) screen of the Tenovi web app. All data sent via the API is in JSON format.

Various [testing tools are available](/hwi-api/webhooks/testing-webhooks) when working with webhooks to send test JSON payloads to your server. And, in the event your server is down or fails to accept a webhook payload you can request the webhook to [resend the data](/hwi-api/webhooks/resending-webhooks/).
## Optional Authentication
[Section titled “Optional Authentication”](#optional-authentication)
Header-based authentication methods (e.g. Basic Auth) can be optionally included in the POST request, if required.
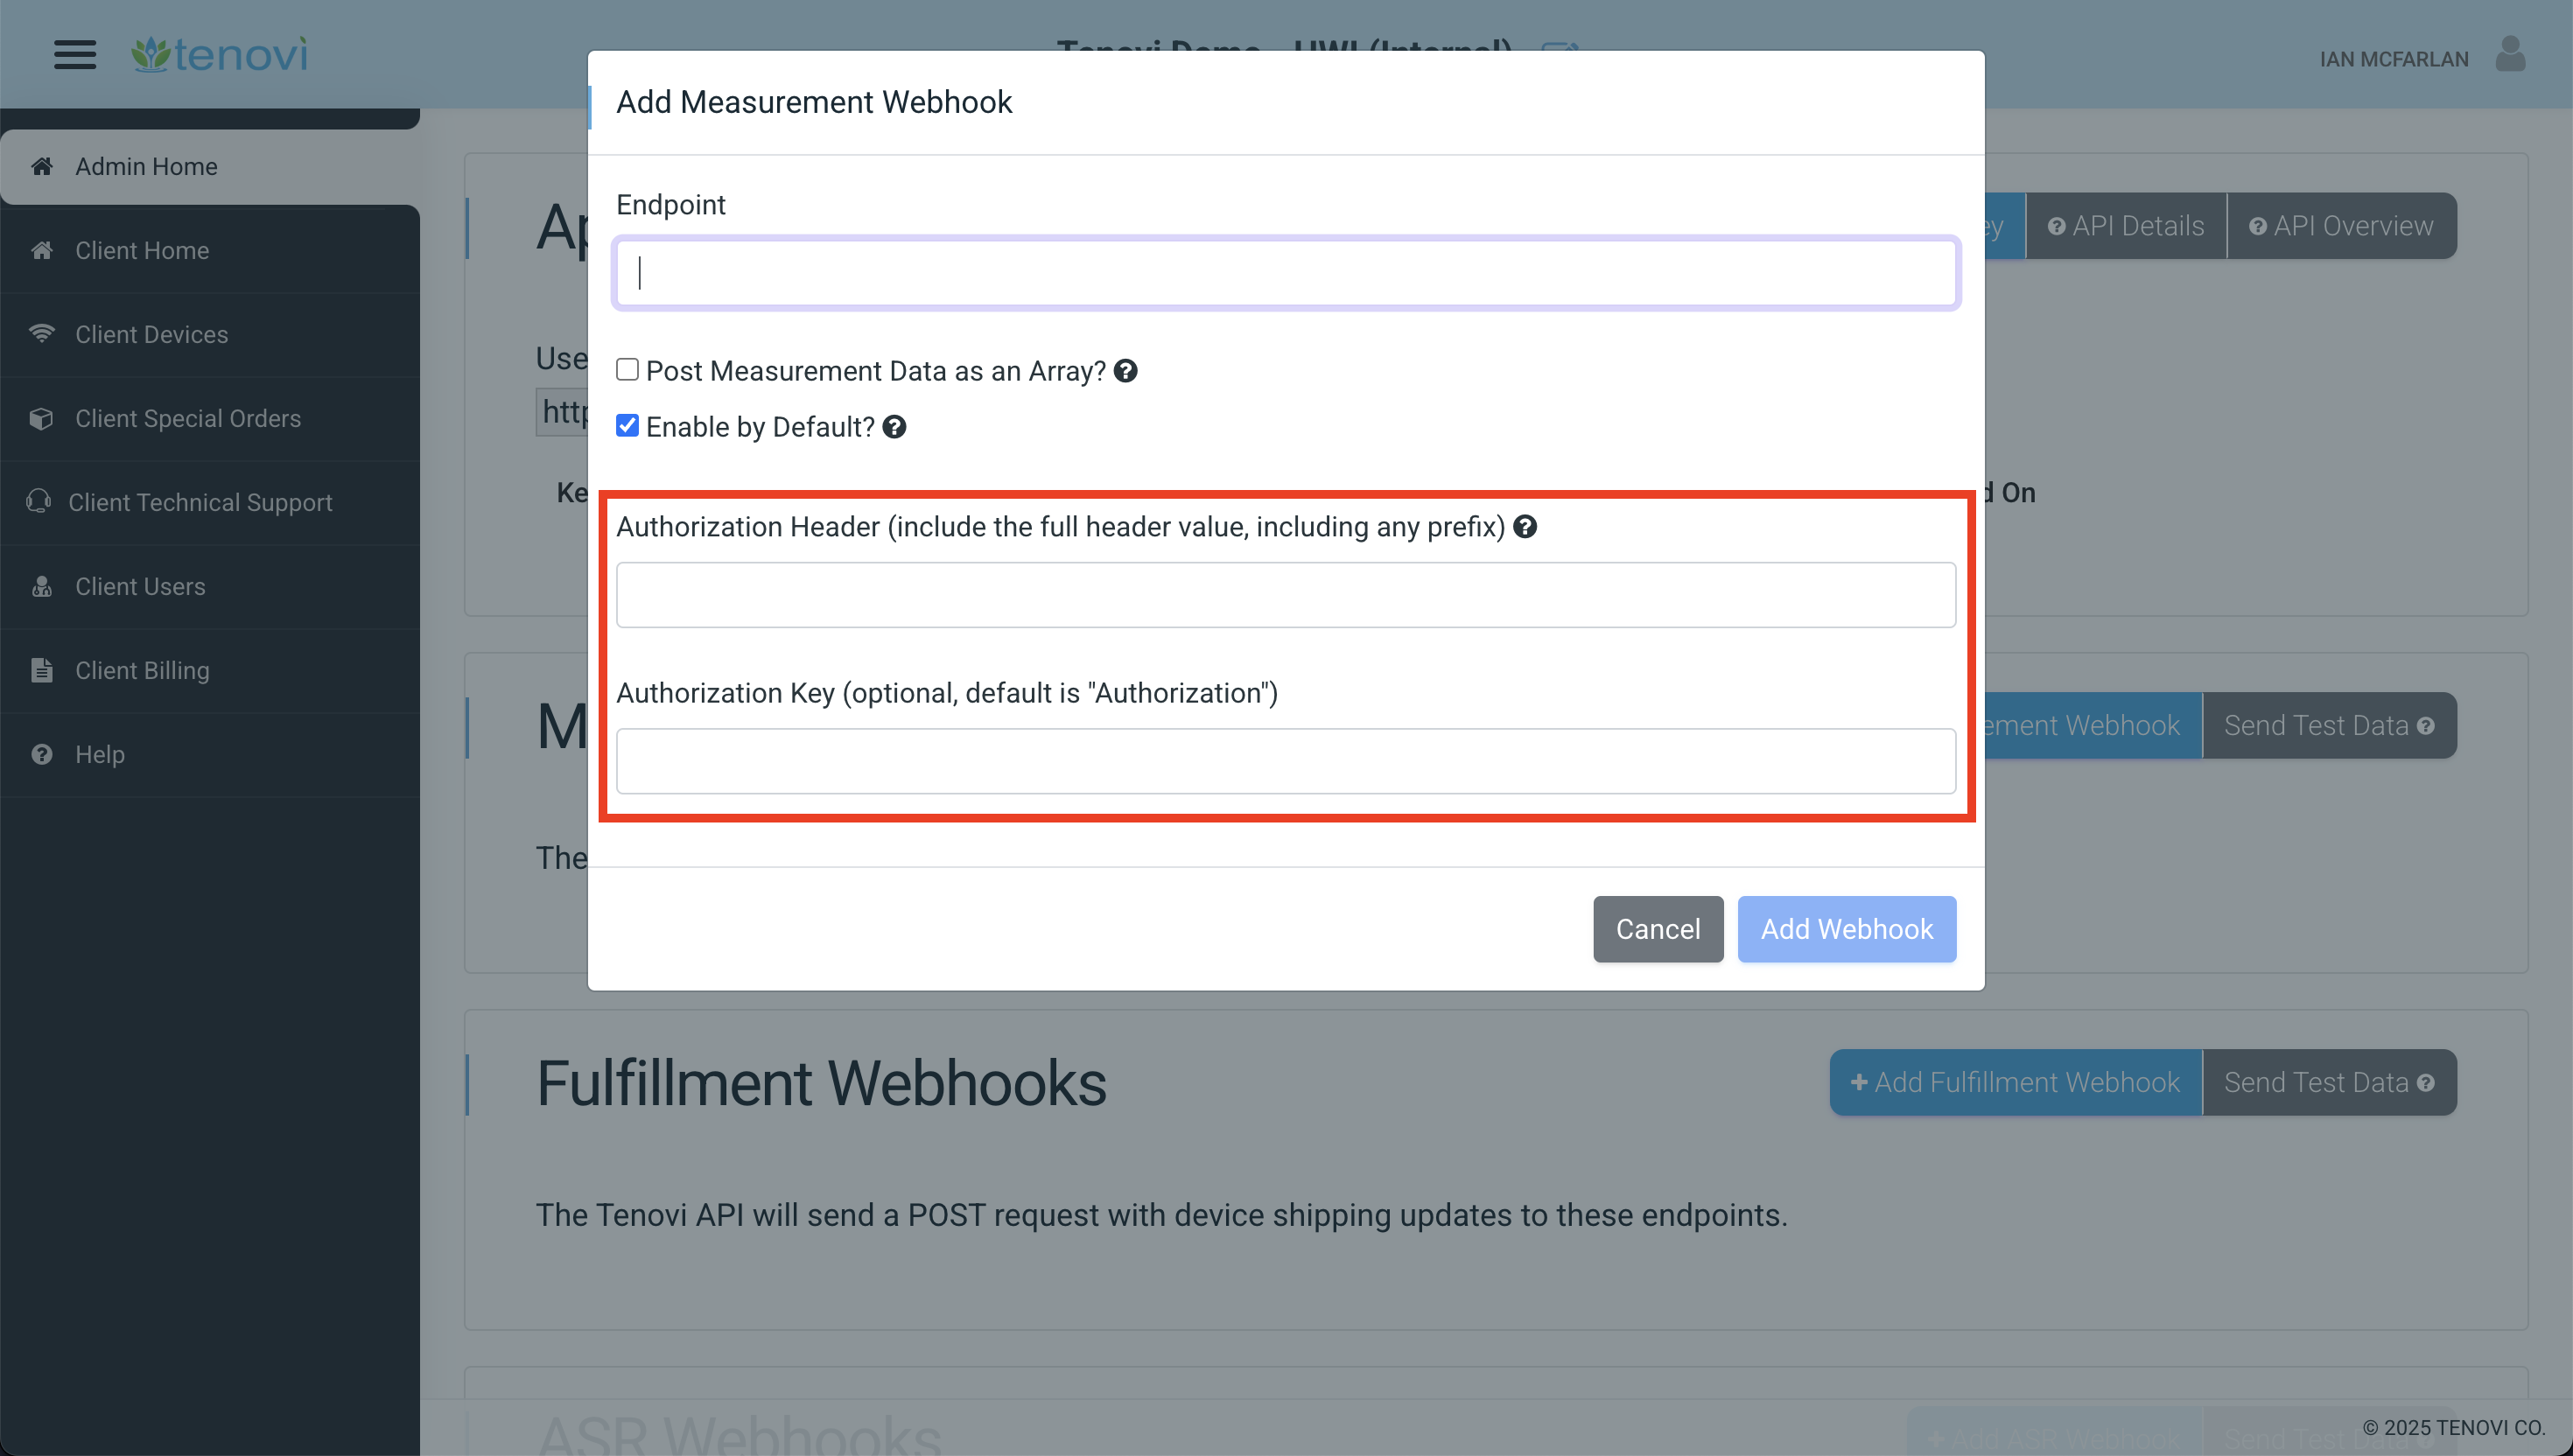
## Multiple Webhooks
[Section titled “Multiple Webhooks”](#multiple-webhooks)
Multiple Webhooks can be added at the same time. The default behavior is for all measurements to flow through all measurement webhooks, and all fulfillment data to flow through fulfillment webhooks, and all special/bulk order data to flow through special order webhooks defined on the HWI Settings when you are logged into the [Tenovi web app](https://app.tenovi.com)
# Backfilling Measurement Data
> A walkthrough on how to backfill health metrics.
Tenovi delivers measurements in real time via webhooks. However, there are scenarios where you may need to retrieve measurements on demand:
* Your webhook endpoint was unreachable during a window of device activity
* You are seeding a new system with historical data
* You need to audit or verify that your records are complete
The HWI API provides two endpoints for pulling measurements directly.
* [GET HWI Device Measurements](https://api2.tenovi.com/hwi-redoc/#tag/hwi-device-measurements/operation/hwi-devices_measurements_listurl)
* [GET HWI Patient Measurements](https://api2.tenovi.com/hwi-redoc/#tag/hwi-patient-measurementsurl)
Caution
As of May 5, 2026, requests with no time range specified will default to the last 30 days of data. Requests spanning more than 30 days without pagination will be truncated at 1,000 results.
Use `timestamp__gte` and `timestamp__lt` to control the window, or adopt pagination to retrieve full result sets. See the [Pagination Guide](/hwi-api/pagination/) for usage and migration notes
## Endpoints
[Section titled “Endpoints”](#endpoints)
| Endpoint | Use Case |
| -------------------------------------------------------- | -------------------------------------------------------- |
| `GET /clients/{client_domain}/hwi/device-measurements/` | Fetch measurements for a single device |
| `GET /clients/{client_domain}/hwi/patient-measurements/` | Fetch measurements for all devices assigned to a patient |
Note
If a patient has multiple devices, GET Patient Measurements will return data across all of them in one response. Using GET Device Measurements requires a separate request per device.
### Filtering by Date Range
[Section titled “Filtering by Date Range”](#filtering-by-date-range)
To backfill a specific window, use the `timestamp__gte` and `timestamp__lt` query parameters.
```js
GET /clients/{client_domain}/hwi/patient-measurements/?patient_id={id}& timestamp__gte={ISO8601}& timestamp__lt={ISO8601}
```
Example:
```js
GET /clients/{client_domain}/hwi/patient-measurements/?patient_id=abc123×tamp__gte=2024-01-01T00:00:00Z& timestamp__lt=2024-01-31T23:59:59Z
```
Note
Timestamps must be in ISO 8601 UTC format.
### Pagination
[Section titled “Pagination”](#pagination)
Measurement endpoints support pagination. See the [Pagination Guide](/hwi-api/pagination/) for usage, response formats, and migration notes. On May 5, 2026 all measurement endpoints will either return paginated results if you supply `page=` or will be truncated.
## Process
[Section titled “Process”](#process)
Using either a list of Patient IDs or a list of HWI Device IDs you can backfill or verify data by:
1. Getting a list of relevant IDs (Patient IDs or HWI Device IDs)
2. For each ID, make a GET request with the relevant date range. Use pagination to iterate through results (see [Pagination Guide](/hwi-api/pagination/)).
3. As each page of measurements is returned, check whether each record already exists in your system.
4. If a measurement isn’t saved in your system, you can then save it to get your system in-sync with Tenovi.
## Testing with Postman
[Section titled “Testing with Postman”](#testing-with-postman)
You can test both endpoints using the [Tenovi Postman collection](/tools/postman-collection) before implementing them in your system. The collection includes pre-configured requests for both GET Device Measurements and GET Patient Measurements.
# Bulk Unlinking Devices
> A walkthrough on how to create tooling to bulk unlink devices
After working with Tenovi devices overtime, you can run into instances where you need to unlink many devices at once. The most common situations for this involve device audits, unenrolling many patients, etc.
Once you have a list of devices you can then make use of the [`unlink-gateway`](/hwi-api/devices/unlinking-devices) endpoint.
## Getting a List of Devices to Unlink
[Section titled “Getting a List of Devices to Unlink”](#getting-a-list-of-devices-to-unlink)
In order to unlink devices, you will need the appropriate HWI Device IDs of the individual devices. Using the [`hwi-devices`](https://api2.tenovi.com/hwi-redoc/#tag/hwi-devices/operation/hwi-devices_list) endpoint, you can get a list of all devices on your account. This endpoint is not pagniated and will, by default, return all devices on your account regardless of [their status](/hwi-api/webhooks/fulfillment-webhooks#fulfillmentdevice-status-definitions) (shipped, delivered, connected, unlinked, etc.).
Pair this list down to the devices you wish to unlink by leaning upon the `patient.external_id` field, `hardware_uuid` (Gateway) field, or other unique identifiers.
## Looping the `unlink-gateway` API Call
[Section titled “Looping the unlink-gateway API Call”](#looping-the-unlink-gateway-api-call)
Using the list of applicable HWI Device IDs, you can then loop through the list and send a GET request to the [`unlink-gateway`](/hwi-api/devices/unlinking-devices) API endpoint.
This API call requires a valid HWI Device ID. Example URL:
```js
https://api2.tenovi.com/clients/{your_client_domain_here}/hwi/unlink-gateway/{hwi_device_id_here}/
```
Note
Each API Key has a rate limit of 1 request per second. All requests to the API must be performed over HTTPS.
## External Tool vs Main Software Stack
[Section titled “External Tool vs Main Software Stack”](#external-tool-vs-main-software-stack)
You can bake this kind of process into your main software stack if you choose. However, since this operation should be infrequently done and should only be performed when absolutely neccessary with the proper oversight, it’s recommended to create tooling outside your main software stack.
A simple method for doing this would be to lean on Postman, or a similar desktop HTTP request client, to process the list of HWI Device IDs. Postman has a feature called [Postman Collection Runners](https://learning.postman.com/docs/collections/running-collections/intro-to-collection-runs/) that enable you to loop through lists of data making API calls for each iteration.
Tenovi Postman Collection
Tenovi provides a [complete and comprehensive Postman collection](/tools/postman-collection) with the most common API calls.
# Gateway Connectivity Report
> Build a connectivity health report for all Gateways on your account using the hwi-gateways and gateway-info endpoints.
This recipe builds a connectivity health report across all Gateways on your account. It combines the [`hwi-gateways` endpoint](https://api2.tenovi.com/hwi-redoc/#tag/hwi-gateways/operation/hwi-gateways_list) for a paginated list with the [`gateway-info` endpoint](https://api2.tenovi.com/hwi-redoc/#tag/hwi-gateway-info) to pull signal strength, last check in time, firmware version, and whitelisted devices per Gateway. Use this for proactive monitoring, identifying Gateways that have gone silent, or validating a deployment before go live.
The process for getting a Gateway connectivity report involves:
1. Page through [`GET /hwi-gateways/`](https://api2.tenovi.com/hwi-redoc/#tag/hwi-gateways/operation/hwi-gateways_list) to collect all Gateway UUIDs on your account.
2. For each Gateway you want to inspect further, call [`GET /gateway-info/{gateway_uuid}/`](https://api2.tenovi.com/hwi-redoc/#tag/hwi-gateway-info) to retrieve detailed connectivity data.
The result is a ranked list of Gateways grouped by signal health.
Download AI Prompt for this Recipe
Rather than a code sample you would need to adapt, the prompt below gives an AI coding assistant everything it needs to generate a working script in the language of your choice, scoped to the data points that matter to your program. Copy it and paste it into your assistant of choice. It will ask you a few questions before it writes anything.
Never paste a live API key into an AI assistant. The prompt leaves the key as a placeholder and instructs the assistant to read it from an environment variable or your existing secret store at runtime.
[Download AI Prompt for Gateway Connectivity Report](/ai-prompts/recipes/gateway-connectivity-report.txt)
## Before you start
[Section titled “Before you start”](#before-you-start)
You will need an active API key and your Client Domain. All requests are made against `https://api2.tenovi.com/clients/{CLIENT_DOMAIN}/hwi/` over HTTPS. See [API URL Config and Client Domain](/hwi-api/api-url-config/) for details.
Each API key is limited to 1 request per second. This matters for this recipe. See [Scoping Step 2](#scoping-step-2) below.
## Two endpoints, two different questions
[Section titled “Two endpoints, two different questions”](#two-endpoints-two-different-questions)
The list endpoint and the detail endpoint do not return the same connectivity field, and the difference is the point of this report.
| Field | `hwi-gateways` (list) | `gateway-info` (detail) |
| ---------------------- | --------------------- | ----------------------- |
| `gateway_uuid` | ✅ | ✅ |
| `last_signal_strength` | ✅ | ✅ |
| `last_measurement` | ✅ | ❌ |
| `last_checkin_time` | ❌ | ✅ |
| `assigned_on` | ✅ | ✅ |
| `shipped_on` | ✅ | ✅ |
| `firmware_version` | ❌ | ✅ |
| `bootloader_version` | ❌ | ✅ |
| `provisioned` | ❌ | ✅ |
| `whitelisted_devices` | ❌ | ✅ |
Timestamps
All timestamps returned by the HWI API are UTC in ISO 8601 format. Compute staleness thresholds in UTC so that daily reports do not drift by a day.
`last_measurement` tells you whether the patient is taking readings. `last_checkin_time` tells you whether the Gateway is reaching the Tenovi network at all. A Gateway that has never checked in is a hardware, power, or cellular coverage issue.
## Step 1: Fetch All Gateways
[Section titled “Step 1: Fetch All Gateways”](#step-1-fetch-all-gateways)
Page through `hwi-gateways` to collect every Gateway UUID associated with your account. Set `page_size` to a value that works for your account size. The maximum page size is 1000. Larger pages mean fewer round trips but slower individual responses, so for accounts under a few thousand Gateways a page size of 100 is a reasonable starting point.
```plaintext
GET /clients/{CLIENT_DOMAIN}/hwi/hwi-gateways/?ordering=-last_measurement&page_size=100
```
The result from this endpoint is paginated, with `next` and `previous` links in the root of the JSON response. See [Pagination](/hwi-api/pagination/) for how to walk the full result set.
```json
{
"count": 1,
"next": "https://api2.tenovi.com/clients/{CLIENT_DOMAIN}/hwi/hwi-gateways/?page=2",
"previous": null,
"results": [
{
"gateway_uuid": "AABBCC001122",
"last_signal_strength": 28,
"last_measurement": "2026-07-30T14:15:22Z",
"shipped_on": "2026-06-01T00:00:00Z",
"assigned_on": "2026-05-15T00:00:00Z"
}
]
}
```
### Useful Query Parameters
[Section titled “Useful Query Parameters”](#useful-query-parameters)
| Parameter | Description |
| ------------------------------- | ------------------------------------------------------------------------------------------- |
| `ordering` | Sort by `assigned_on`, `shipped_on`, or `last_measurement`. Prefix with `-` for descending. |
| `last_measurement__isnull=true` | Filter to Gateways that have never sent a measurement. |
| `shipped_on__isnull=false` | Filter to Gateways that have been dropshipped. |
Signal strength and last measurement are both returned here. If you only need a signal and measurement report, Step 1 is sufficient on its own and no further calls are required.
## Step 2: Get Detailed Gateway Info
[Section titled “Step 2: Get Detailed Gateway Info”](#step-2-get-detailed-gateway-info)
For each `gateway_uuid`, call the [`gateway-info` endpoint](https://api2.tenovi.com/hwi-redoc/#tag/hwi-gateway-info).
```plaintext
GET /clients/{CLIENT_DOMAIN}/hwi/gateway-info/{gateway_uuid}/
```
UUID format
The Gateway UUID must be passed with no hyphens. `AABBCC001122` will resolve. `AABB-CC00-1122` will not.
**Example response:**
```json
{
"gateway_uuid": "AABBCC001122",
"firmware_version": "2.170.38",
"bootloader_version": "1.0.4",
"provisioned": true,
"last_signal_strength": 28,
"last_checkin_time": "2026-07-30T14:15:22Z",
"assigned_on": "2026-05-15T00:00:00Z",
"shipped_on": "2026-06-01T00:00:00Z",
"whitelisted_devices": [
{
"sensor_code": "10",
"mac_address": "1A2B3C4D5E6F",
"whitelist_status": "CO",
"created": "2026-06-05T00:00:00Z",
"modified": "2026-06-05T00:00:00Z"
}
]
}
```
### Scoping Step 2
[Section titled “Scoping Step 2”](#scoping-step-2)
Step 2 requires one call per Gateway. At a rate limit of 1 request per second, a fleet of 5,000 Gateways takes roughly 83 minutes to inspect in full.
You might not need to call `gateway-info` for every Gateway, depending on your use case. Use the Step 1 response to identify candidates and inspect only those.
For example, a Gateway with a recent `last_measurement` and a healthy signal is already reporting normally and needs no detail call. The Gateways worth inspecting are the ones with a null or stale `last_measurement`, or a low signal strength, because those are the ones where you need `last_checkin_time` and `provisioned` to tell you what is actually wrong.
On a healthy fleet this reduces Step 2 from thousands of calls to a small subset, and brings the report runtime from hours to minutes.
### Key Gateway Fields
[Section titled “Key Gateway Fields”](#key-gateway-fields)
| Field | Notes |
| ----------------------------------- | --------------------------------------------------------------------------------------------------------------------------------------------------------------------------------------- |
| `last_signal_strength` | Integer between 0 and 30. |
| `last_checkin_time` | Last time the Gateway connected to the Tenovi network; `null` if never connected. |
| `provisioned` | Boolean. If `false`, the Gateway has not completed provisioning. |
| `firmware_version` | Current Gateway firmware. Useful for identifying Gateways that predate a newly available device. |
| `bootloader_version` | Bootloader running on the Gateway. Informational. |
| `whitelisted_devices` | Devices locked to this Gateway. `whitelist_status` is `RE` (Requested) or `CO` (Confirmed). Most devices are not whitelisted, so an empty array is normal and is not a fault condition. |
| `whitelisted_devices[].sensor_code` | Identifies the device type on a whitelist entry. Each device page lists its Sensor Code. See [Available Devices](/devices/). |
Note
`gateway-info` only works for Gateways already associated with your account, either via a fulfillment request, device activation, or bulk order pre activation. It cannot be used to validate an arbitrary Gateway ID.
## Step 3: Build the Report
[Section titled “Step 3: Build the Report”](#step-3-build-the-report)
With data from both endpoints, group Gateways into buckets. A sample of what this could look like:
| Group | Criteria |
| --------- | -------------------------------------- |
| Excellent | Signal strength >= 20 |
| Moderate | Signal strength 9-19 |
| Poor | Signal strength <= 8 |
| Offline | Last check-in time is null |
| Inactive | Last check-in time is more than X days |
X is a threshold you define. It signifies the point at which you consider a Gateway or patient inactive, and it depends on the program you are running. A daily monitoring program may treat 3 days as inactive. A monthly compliance program may not flag anything until 30 days. There is no single correct value, so set it to match your clinical workflow.
If whitelisting is a concern of yours, you could extend this report to also list any devices (or the count of devices) that are whitelisted. If you have an extensive re-issue program where you re-use Gateways between patients as they enroll and unenroll into your programs, you should also be cognizant of requested and confirmed status of whitelisted devices as these can impact a patient’s first experience with their devices and Gateway.
### Acting on the Results
[Section titled “Acting on the Results”](#acting-on-the-results)
The report is only useful if each bucket routes somewhere.
| Finding | Likely cause | Next step |
| ------------------------------------------------- | -------------------------------------------------------- | -------------------------------------------------------------------------------------------- |
| `last_checkin_time` is null | Never powered on, no cellular coverage, or not delivered | Confirm delivery and that the patient has plugged the Gateway in |
| Check-in recent, `last_measurement` null or stale | Hardware is working, patient is not taking readings | Route to your clinical or care management team |
| Poor signal, checking in | Marginal cellular coverage at the patient location | Advise repositioning the Gateway to an area with better reception (often closer to a window) |
| `provisioned: false` | Provisioning did not complete | [Contact Tenovi support](https://portal.tenovi.com/tickets-view) |
| Patient no longer enrolled | Gateway still assigned | [Unlink the device](/hwi-api/devices/unlinking-devices/) |
## Common Issues
[Section titled “Common Issues”](#common-issues)
**Gateway not found** The Gateway is not yet associated with your account. It must be linked via a device activation or bulk order before `gateway-info` will return data.
**`last_checkin_time` is null** The Gateway was assigned or shipped but has never connected. Check that the patient has plugged it in and that it reached a cellular signal.
**`provisioned: false`** The Gateway has not completed provisioning. [Contact Tenovi support](https://portal.tenovi.com/tickets-view) if this persists after the Gateway has been powered on and connected.
**`whitelist_status` stays at `RE`** The whitelist request has not been confirmed by the Gateway. This only applies to accounts using device whitelisting. You can clear this request via the Tenovi web app by searching for your Gateway and using the device topology map to view and edit whitelist status on a per device basis.
**Requests failing after the first few** Each API key is limited to 1 request per second. Throttle your Step 2 loop accordingly, and scope it to candidate Gateways rather than the full fleet.
# Parallel Processing with Multiple API Keys
> Use multiple API keys to fan out high-volume API requests and avoid rate limiting.
When activating large numbers of devices, pulling measurements for many patients, or running batch operations in a short window, sequential API calls can be slow and are at greater risk of hitting rate limits. This recipe shows how to partition work across multiple Tenovi API keys to process requests in parallel safely.
* Activating or updating hundreds or thousands of devices in a single batch job
* [Bulk unlinking](/recipes/bulk-unlinking/) many devices from Gateways
* [Backfilling measurement data](/recipes/backfilling-measurement-data) after a webhook outage
* Any operation where sequential calls would take too long or risk throttling
## Setup API Keys
[Section titled “Setup API Keys”](#setup-api-keys)
Tenovi API keys are scoped to a [client account](/hwi-api/api-url-config#using-your-client-domain) (`CLIENT_DOMAIN`). You can create multiple API keys for the same account in the [Tenovi Web App](https://app.tenovi.com/), each key maintains its own rate limit bucket. By distributing work across keys in parallel workers, you multiply your effective throughput.
```plaintext
Work Queue
├── Worker 1 → API Key A → Tenovi API
├── Worker 2 → API Key B → Tenovi API
├── Worker 3 → API Key C → Tenovi API
└── Worker N → API Key N → Tenovi API
```
Note
Each API Key has a rate limit of 1 request per second. All requests to the API must be performed over HTTPS.
## Patterns
[Section titled “Patterns”](#patterns)
Two common patterns for working with parallel processing are using worker pools with key rotation, and queue-based with a key pool.
### Worker Pool with Key Rotation
[Section titled “Worker Pool with Key Rotation”](#worker-pool-with-key-rotation)
The safest approach is a fixed worker pool where each worker is pinned to a single API key. This avoids key contention and makes rate limit errors easy to attribute to a specific worker.
### Queue-Based with Key Pool
[Section titled “Queue-Based with Key Pool”](#queue-based-with-key-pool)
For larger jobs or jobs that need retry logic, use a shared queue with a pool of workers that each pull from the queue and use their own key.
## Error Handling Rate Limit Responses
[Section titled “Error Handling Rate Limit Responses”](#error-handling-rate-limit-responses)
If you receive a `429 Too Many Requests` response:
1. Stop sending requests on that key immediately.
2. Wait before retrying — use exponential backoff starting at 2 seconds.
3. Do not switch to another key to bypass the limit. Each key has its own bucket; rotating keys does not reset a rate limit on the key that was throttled.
## Tracking Results and Failures
[Section titled “Tracking Results and Failures”](#tracking-results-and-failures)
Always persist results as you go rather than at the end. For large batches, encountering an erro mid-run would lose all progress otherwise. Retry failed items as a separate pass before escalating.
## Considerations
[Section titled “Considerations”](#considerations)
**Key security** Store API keys in environment variables or a secrets manager. Never hardcode them in source files.
**Idempotency** Tenovi device activation is not idempotent by default. If a request succeeds but your system does not record it (e.g., due to a crash), retrying will create a duplicate device. Check for existing devices by `patient__external_id` or `hardware_uuid` before retrying a failed activation.
**Order sensitivity** If your operations have dependencies (e.g., create patient before activating device), do not parallelize across dependency boundaries. Parallel processing is safe for independent, same-type operations.
# Granular Shipping Status with USPS Tracking API
> Combine Tenovi fulfillment webhooks with the USPS Tracking v3 API to get detailed, event-level delivery status for dropshipped devices.
Tenovi’s fulfillment webhooks provide high-level shipping status (e.g., `Shipped`, `Delivered`). For more granular, event-level tracking — such as “Out for Delivery”, “Delivery Attempted”, or “In Transit to Next Facility” — you can extract the USPS tracking number from the Tenovi `tracking_link` and call the USPS Tracking v3 API directly.
This recipe is useful when you need to:
* Surface detailed delivery status in your own UI
* Trigger workflows on specific USPS events (e.g., alert staff when delivery is attempted but fails)
* Proactively identify stalled shipments before the patient reports a problem
Note
This recipe applies to USPS shipments only. Tenovi may use other carriers depending on the order type and account configuration. Check the `tracking_link` domain to confirm the carrier before calling any tracking API.
## Prerequisites
[Section titled “Prerequisites”](#prerequisites)
* A [USPS Web Tools account](https://developers.usps.com) with API access
* OAuth 2.0 credentials (Client ID and Client Secret) from the USPS Developer Portal
* Tenovi fulfillment webhooks configured on your account ([Fulfillment Webhooks](/hwi-api/webhooks/fulfillment-webhooks))
## Step 1 – Capture the Tracking Link from the Fulfillment Webhook
[Section titled “Step 1 – Capture the Tracking Link from the Fulfillment Webhook”](#step-1--capture-the-tracking-link-from-the-fulfillment-webhook)
When a device is shipped, Tenovi sends a fulfillment webhook with `status: "Shipped"` or `status: "Dropshipped"`. The `tracking_link` field contains the full carrier URL.
**Example fulfillment webhook payload:**
```json
{
"hwi_device_id": "12345678-abcd-1234-abcd-1234567890ab",
"patient_id": "patient-external-id-001",
"hardware_uuid": "aabbcc001122",
"sensor_code": "10",
"device_name": "Tenovi BPM - Wide Range",
"status": "Shipped",
"tracking_link": "https://tools.usps.com/go/TrackConfirmAction?tLabels=9400111899223512345670"
}
```
## Step 2 – Extract the Tracking Number
[Section titled “Step 2 – Extract the Tracking Number”](#step-2--extract-the-tracking-number)
Parse the tracking number from the `tracking_link` URL.
**Example Tracking Link**
`https://tools.usps.com/go/TrackConfirmAction?tLabels=9400111899223512345670`
**Example Tracking Number**
`9400111899223512345670`
## Step 3 – Authenticate with USPS
[Section titled “Step 3 – Authenticate with USPS”](#step-3--authenticate-with-usps)
The [USPS Tracking v3 API](https://developers.usps.com/trackingv3r2#tag/Resources/operation/get-package-tracking) uses [OAuth 2.0 client credentials](https://developers.usps.com/Oauth). Request an access token before making tracking calls. Cache this token and reuse it until it expires. Do not request a new token on every call.
## Step 4 – Call the USPS Tracking v3 Endpoint
[Section titled “Step 4 – Call the USPS Tracking v3 Endpoint”](#step-4--call-the-usps-tracking-v3-endpoint)
See the official [USPS Tracking v3 docs](https://developers.usps.com/trackingv3r2) for full schemas and information on this endpoint. Use the `Event` field from `TrackSummary` to trigger workflows in your system.
```http
GET https://apis.usps.com/tracking/v3/tracking/{trackingNumber}
```
**Optional query parameters:**
| Parameter | Description |
| --------------- | ----------------------------------------------------------- |
| `expand=DETAIL` | Returns the full event history rather than just the summary |
**Example response (abbreviated):**
```json
{
"TrackSummary": {
"EventTime": "8:00 am",
"EventDate": "October 20, 2025",
"Event": "DELIVERED",
"EventCity": "PORTSMOUTH",
"EventState": "NH",
"EventZIPCode": "03801",
"EventCountry": "",
"FirmName": "",
"Name": "JOHN DOE",
"AuthorizedAgent": "false",
"DeliveryAttributeCode": "01"
},
"TrackDetail": [
{
"EventTime": "6:14 am",
"EventDate": "October 20, 2025",
"Event": "OUT FOR DELIVERY",
"EventCity": "PORTSMOUTH",
"EventState": "NH"
},
{
"EventTime": "11:52 pm",
"EventDate": "October 19, 2025",
"Event": "ARRIVED AT POST OFFICE",
"EventCity": "PORTSMOUTH",
"EventState": "NH"
}
]
}
```
## Polling vs. Webhook-Driven Tracking
[Section titled “Polling vs. Webhook-Driven Tracking”](#polling-vs-webhook-driven-tracking)
The USPS Tracking API is a pull-based API - it does not push events to you. You have two options:
**Webhook-driven polling (recommended)** Poll the USPS API only after receiving a Tenovi `Shipped` webhook. Poll on a schedule (e.g., every 4–6 hours) until the event is `DELIVERED` or `RETURN TO SENDER`, then stop.
**Scheduled polling** Query all active shipments on a fixed schedule. Simpler to implement but generates unnecessary API calls for shipments that have already been delivered.
## Common Issues
[Section titled “Common Issues”](#common-issues)
**401 Unauthorized** Your USPS access token has expired. Refresh it using the token endpoint before retrying.
**Tracking number not found** The package may not yet be in the USPS system. This is normal in the first few hours after the `Shipped` webhook fires. Retry after 4–6 hours.
**Carrier is not USPS** Check the domain in `tracking_link`. UPS links use `ups.com`, FedEx uses `fedex.com`. You will need separate integrations for each carrier.
**`tracking_link` is null** Tenovi only populates this field once the shipment has left the warehouse. If the status is `Dropship Requested` or `Pending Shipment`, the link will not yet be available.
# Postman Collection & Environment
> Get up to speed using Postman for development with Tenovi API calls
In order to help you get up to speed with developing against the Tenovi API, we have put together an environment and collection of API calls using [Postman](https://www.postman.com/).
To get started, simply download the ZIP file that contains both the Postman environment and collection, then import this into your Postman app. Be sure to set the [client domain](/hwi-api/api-url-config/) and [API key](/hwi-api/overview#getpost-requests) associated with your account in the Postman environment.
All API calls listed in the collection follow the same naming conventions as found in our [API Reference](https://api2.tenovi.com/hwi-redoc/) document. As we expand the API and featureset, this Postman collection will also be updated.
## Setup
[Section titled “Setup”](#setup)
1. Download the Postman environment and collection files below.
2. Extract the JSON files from the ZIP file.
3. In Postman, import the `Tenovi_API.postman_environment.json` file
* Mac: `cmd + O`
* Windows/Linux: `ctrl + O`
4. Open the newly imported environment `Tenovi API` and set the `client_domain` and `api_key` to those for your account. These are found on the HWI Settings page in the [Tenovi web app](https://app.tenovi.com/)
5. Import the `Tenovi_API_Calls.postman_collection.json` file from the download
6. Start to test API calls using your now configured environment.
## Downloads
[Section titled “Downloads”](#downloads)
Download Postman Environment & Collection
* [Postman Environment & Collection](/Tenovi_API_Postman_Collect_And_Environment.zip) - last updated August 4, 2025.
# Activity Watch
> Visualization guidance for activity watch metrics
Activity watches transmit daily activity and wellness metrics including step counts, heart rate statistics, and sleep duration.
## Applicable Devices
[Section titled “Applicable Devices”](#applicable-devices)
* [Tenovi Watch](/devices/tenovi-watch)
## Metrics
[Section titled “Metrics”](#metrics)
| Name | API Format | Value 1 | Value 2 |
| --------------------- | ----------------------- | ---------------------- | ------------------- |
| Steps | steps | Hourly Steps (steps) | N/A |
| Heart Rate Statistics | heart\_rate\_statistics | Average Pulse (bpm) | Maximum Pulse (bpm) |
| Sleep | sleep | Hours of Sleep (hours) | N/A |
## Visualization Recommendations
[Section titled “Visualization Recommendations”](#visualization-recommendations)
*Coming soon — guidance on chart types, ranges, thresholds, and display best practices for these metrics.*
# Blood Pressure Monitors
> Visualization guidance for blood pressure monitor metrics including systolic/diastolic blood pressure, pulse, and irregular heartbeat detection
Blood pressure monitors transmit cardiovascular metrics including systolic and diastolic blood pressure readings, heart rate, and irregular heartbeat detection. Each reading is transmitted as a discrete measurement event.
## Applicable Devices
[Section titled “Applicable Devices”](#applicable-devices)
* [A\&D BPM](/devices/and-bpm)
* [Omron BPM](/devices/omron-bpm)
* [Tenovi BPM](/devices/tenovi-bpm)
* [Tenovi Cellular BPM](/devices/tenovi-cellular-bpm)
* [Welch Allyn 1500 Series BPM](/devices/welch-allyn-1500-bpm)
* [Welch Allyn 1700 Series BPM](/devices/welch-allyn-1700-bpm)
## Metrics
[Section titled “Metrics”](#metrics)
| Name | API Format | Value 1 | Value 2 |
| ------------------- | --------------------- | -------------------- | ------------------- |
| Blood Pressure | `blood_pressure` | Systolic BP (mmHg) | Diastolic BP (mmHg) |
| Heart Rate | `pulse` | Pulse (beats/minute) | N/A |
| Irregular Heartbeat | `irregular_heartbeat` | 1 (detected) | N/A |
## Best Practices
[Section titled “Best Practices”](#best-practices)
**Raw data access** — All visualizations should provide clinicians with the option to review the underlying raw data in table or CSV format with ease. This supports clinical documentation workflows and allows verification of trends observed in charts.
**Time scope controls** — Provide the ability to adjust the timespan of data — allowing clinicians to view an entire day, week, or month while having the ability to zoom into a specific hour. This is critical for correlating changes with clinical events.
**Hover tooltips** — Data points should display tooltips on mouse-over revealing granular details such as precise timestamps, exact values, and reading context. This allows clinicians to inspect individual measurements without navigating away from the chart view.
Sample patient context
The following visualizations use sample data for a fictional “Patient B” — a 62-year-old with stage 1 hypertension. Over the course of a week, Patient B’s readings trend upward, with one irregular heartbeat event detected on Day 5.
### Blood Pressure
[Section titled “Blood Pressure”](#blood-pressure)
Display systolic and diastolic blood pressure readings over time. Two chart approaches are recommended: a dual-line chart for trend visibility, and an overlapping bar chart for individual reading comparison.
#### Option A: Dual-line chart
[Section titled “Option A: Dual-line chart”](#option-a-dual-line-chart)
Shows systolic and diastolic as two separate lines over time. Best for identifying trends and correlating changes between the two values.
Blood pressure — Patient B (5-day view)
Systolic (mmHg)Diastolic (mmHg)
| Spec | Value |
| ------------------ | ----------------------------------------------------------- |
| **Chart type** | Dual-line chart (shared Y-axis) |
| **X-axis** | Time (day/week/month with zoom to individual readings) |
| **Y-axis** | Blood pressure (mmHg), range 60–200 |
| **Systolic line** | Tenovi blue (#29ADE3) |
| **Diastolic line** | Navy (#3478A4) |
| **Threshold** | Optional dashed red line at 140 mmHg (stage 1 hypertension) |
#### Option B: Overlapping bar chart
[Section titled “Option B: Overlapping bar chart”](#option-b-overlapping-bar-chart)
Each reading is shown as two overlapping bars — the taller bar represents systolic, the shorter bar represents diastolic. Both bars start from the baseline (0 mmHg). This approach makes it easy to compare individual readings side-by-side.
Blood pressure — Patient B (5-day view, overlapping bars)
Systolic (mmHg)Diastolic (mmHg)
| Spec | Value |
| ----------------- | ----------------------------------------------------------------- |
| **Chart type** | Overlapping bar chart (both bars start from 0) |
| **X-axis** | Time (one bar group per reading) |
| **Y-axis** | Blood pressure (mmHg), range 0–200 |
| **Systolic bar** | Tenovi blue at 85% opacity (#29ADE3) — taller |
| **Diastolic bar** | Amber at 85% opacity (#E6A817) — shorter, same width, overlapping |
| **Threshold** | Optional dashed red line at 140 mmHg |
***
### Pulse & Irregular Heartbeat
[Section titled “Pulse & Irregular Heartbeat”](#pulse--irregular-heartbeat)
Pulse is displayed as a bar chart with one bar per reading. When an irregular heartbeat is detected during a reading, a prominent red marker is placed on that bar to draw immediate clinician attention.
Irregular heartbeat detection
When `irregular_heartbeat = 1`, this indicates the device detected an arrhythmia during the reading. This should be displayed with a **visually heavy red marker** that demands clinician attention. Multiple irregular heartbeat events can be recorded close to one another — the marker alone (without a text label) is sufficient to flag each event without visual clutter.
Pulse — Patient B (5-day view)
Pulse (BPM)Irregular heartbeat detected
| Spec | Value |
| ----------------------- | -------------------------------------------------------------------------------- |
| **Chart type** | Bar chart (one bar per reading) |
| **X-axis** | Time (day/week/month) |
| **Y-axis** | Pulse (BPM), range 40–120 |
| **Bar color** | Tenovi blue (#29ADE3) |
| **Irregular HB marker** | Red circle with ”!” — placed above the bar. No text label (markers may cluster). |
| **Marker color** | #c94444 — visually heavy to demand attention |
| **Marker trigger** | `irregular_heartbeat = 1` for that reading |
# Fetal Doppler
> Visualization guidance for fetal doppler metrics
Fetal dopplers transmit fetal heart rate measurements and may report invalid event indicators when a reading could not be obtained.
## Applicable Devices
[Section titled “Applicable Devices”](#applicable-devices)
* [Tenovi Fetal Doppler](/devices/tenovi-fetal-doppler)
## Metrics
[Section titled “Metrics”](#metrics)
| Name | API Format | Value 1 | Value 2 |
| ---------------- | -------------- | ------------------------ | ------- |
| Fetal Heart Rate | fetal\_pulse | Pulse (beats per minute) | N/A |
| Invalid Event | invalid\_event | N/A | N/A |
## Visualization Recommendations
[Section titled “Visualization Recommendations”](#visualization-recommendations)
*Coming soon — guidance on chart types, ranges, thresholds, and display best practices for these metrics.*
# Glucometers
> Visualization guidance for blood glucose meter metrics
Glucometers transmit blood glucose level readings. Measurements may include contextual filter parameters such as alert, meal\_context, and measurement\_location.
## Applicable Devices
[Section titled “Applicable Devices”](#applicable-devices)
* [Tenovi Glucometer](/devices/tenovi-glucometer)
* [Tenovi Cellular Glucometer](/devices/tenovi-cellular-glucometer)
* [Trividia Glucometer](/devices/trividia-glucometer)
## Metrics
[Section titled “Metrics”](#metrics)
| Name | API Format | Value 1 | Value 2 |
| ------------- | ---------- | --------------------- | ------- |
| Blood Glucose | glucose | Glucose Level (mg/dL) | N/A |
## Visualization Recommendations
[Section titled “Visualization Recommendations”](#visualization-recommendations)
*Coming soon — guidance on chart types, ranges, thresholds, and display best practices for these metrics.*
# Inhaler Sensor
> Visualization guidance for inhaler sensor metrics
Inhaler sensors transmit medication usage events, respiratory flow and timing data, shake detection, and device status events for connected inhalers.
## Applicable Devices
[Section titled “Applicable Devices”](#applicable-devices)
* [Hailie Sensor](/devices/hailie-sensor)
## Metrics
[Section titled “Metrics”](#metrics)
| Name | API Format | Value 1 | Value 2 |
| ------------------------- | ----------------------------------- | -------------------------- | ------------------- |
| Medication Event | hailie\_medication\_event | 1 | N/A |
| Low Battery Event | low\_battery\_event | 1 or 0 (critical/low) | N/A |
| Turbohaler Rotation Event | hailie\_turbohaler\_rotation\_event | 1 or 0 (click/non-click) | N/A |
| Respiratory Flow Log | hailie\_respiratory\_flow\_log | Max Flow Rate (L/M) | Avg Flow Rate (L/M) |
| Respiratory Timing Log | hailie\_respiratory\_timing\_log | Duration (s) | Time to Peak (s) |
| Shake Detection Event | hailie\_shake\_detection\_event | 1 or 0 (valid/not) | Shake Duration (s) |
| Inhaler Installed Event | hailie\_inhaler\_installed\_event | 1 or 0 (installed/removed) | N/A |
| Medication Cap Event | hailie\_medication\_cap\_event | 1 or 0 (cap on/off) | N/A |
## Visualization Recommendations
[Section titled “Visualization Recommendations”](#visualization-recommendations)
*Coming soon — guidance on chart types, ranges, thresholds, and display best practices for these metrics.*
# Medication Adherence
> Visualization guidance for medication adherence device metrics
Covers PatchRx PatchCap and Tenovi Pillbox devices. These devices transmit medication adherence events to help track whether patients are taking their medications as prescribed.
## Applicable Devices
[Section titled “Applicable Devices”](#applicable-devices)
* [PatchRx PatchCap](/devices/patchrx-patchcap)
* [Tenovi Pillbox](/devices/tenovi-pillbox)
## Metrics
[Section titled “Metrics”](#metrics)
### PatchRx PatchCap
[Section titled “PatchRx PatchCap”](#patchrx-patchcap)
| Name | API Format | Value 1 | Value 2 |
| -------------------- | ------------------------------ | ------------------------------- | ------- |
| Open/Close Event | patchcap\_open\_close\_event | 1 or 0 (open/close) | N/A |
| No Measurement Event | no\_measurement\_event | 1 | N/A |
| Low Battery Event | low\_battery\_event | 1 | N/A |
| Time Updated Event | patchcap\_time\_updated\_event | 1 | N/A |
| Bluetooth Event | patchcap\_bluetooth\_event | 1 or 0 (connected/disconnected) | N/A |
### Tenovi Pillbox
[Section titled “Tenovi Pillbox”](#tenovi-pillbox)
| Name | API Format | Value 1 | Value 2 |
| -------------------- | -------------------------- | ------------------ | ------------------ |
| Pillbox Opened | pillbox\_opened | Day (1=Sun, 7=Sat) | AM/PM (1=AM, 2=PM) |
| Refill Initiated | pillbox\_refill\_initiated | 1 | 0 |
| Compartment Refilled | pillbox\_refilled | Day (1=Sun, 7=Sat) | AM/PM (1=AM, 2=PM) |
## Visualization Recommendations
[Section titled “Visualization Recommendations”](#visualization-recommendations)
*Coming soon — guidance on chart types, ranges, thresholds, and display best practices for these metrics.*
# Metric Visualization Guidance Overview
> Guidance for visualizing Tenovi device measurement data in client applications
Tenovi provides measurement data from a variety of remote patient monitoring devices. This section offers guidance on how to effectively visualize that data in your application, including recommended chart types, units, ranges, and display considerations for each metric type.
## Metrics Reference
[Section titled “Metrics Reference”](#metrics-reference)
The table below lists all vital metrics available across Tenovi devices. Select a device type to view detailed visualization guidance.
| Device Type | API Format | Value 1 | Value 2 | Filter Params |
| ------------------------------------------------------------------------ | -------------------------------- | ------------------------------------- | --------------------------- | ------------------------------------------------------------------------- |
| [Blood Pressure Monitors](/visualization-guides/blood-pressure-monitors) | `blood_pressure` | Systolic BP (mmHG) | Diastolic BP (mmHG) | `measurement_index` |
| [Blood Pressure Monitors](/visualization-guides/blood-pressure-monitors) | `pulse` | Pulse (beats/minute) | N/A | `measurement_index` |
| [Blood Pressure Monitors](/visualization-guides/blood-pressure-monitors) | `irregular_heartbeat` | 1 (detected) | N/A | `measurement_index` |
| [Scales](/visualization-guides/scales) | `weight` | Weight (US pounds) | N/A | — |
| [Pulse Oximeters](/visualization-guides/pulse-oximeters) | `spO2` | Oxygen Saturation (%) | Standard Deviation | `measurement_index` |
| [Pulse Oximeters](/visualization-guides/pulse-oximeters) | `pulse` | Pulse (beats/minute) | Standard Deviation | `measurement_index` |
| [Pulse Oximeters](/visualization-guides/pulse-oximeters) | `perfusion_index` | Perfusion Index (%) | Standard Deviation | `measurement_index` |
| [Glucometers](/visualization-guides/glucometers) | `glucose` | Glucose Level (mg/dL) | N/A | `alert`, `meal_context`, `measurement_location` |
| [Thermometer](/visualization-guides/thermometer) | `temperature` | Temperature (°F) | N/A | — |
| [Peak Flow Meter](/visualization-guides/peak-flow-meter) | `peak_expiratory_flow` | PEF (L/min) | N/A | `measurement_index` |
| [Peak Flow Meter](/visualization-guides/peak-flow-meter) | `forced_expiratory_volume` | FEV (L) | N/A | `measurement_index` |
| [Fetal Doppler](/visualization-guides/fetal-doppler) | `fetal_pulse` | Pulse (beats/minute) | N/A | `measurement_index`, `error` |
| [Activity Watch](/visualization-guides/activity-watch) | `steps` | Hourly Steps (steps) | N/A | — |
| [Activity Watch](/visualization-guides/activity-watch) | `heart_rate_statistics` | Average Pulse (bpm) | Maximum Pulse (bpm) | `average_heart_rate`, `max_heart_rate`, `min_heart_rate` |
| [Activity Watch](/visualization-guides/activity-watch) | `sleep` | Hours of Sleep (hours) | N/A | — |
| [Inhaler Sensor](/visualization-guides/inhaler-sensor) | `hailie_medication_event` | 1 | N/A | `angle`, `flags`, `serial_number`, `device_log_index` |
| [Inhaler Sensor](/visualization-guides/inhaler-sensor) | `hailie_respiratory_flow_log` | Max Flow Rate (L/M) | Avg Flow Rate (L/M) | `angle`, `flags`, `serial_number`, `device_log_index` |
| [Inhaler Sensor](/visualization-guides/inhaler-sensor) | `hailie_respiratory_timing_log` | Duration (s) | Time to Peak (s) | `angle`, `flags`, `serial_number`, `device_log_index` |
| [Medication Adherence](/visualization-guides/medication-adherence) | `patchcap_open_close_event` | 1 or 0 (open/close) | N/A | — |
| [Medication Adherence](/visualization-guides/medication-adherence) | `pillbox_opened` | Day (1=Sun, 7=Sat) | AM/PM (1=AM, 2=PM) | `compartment` |
| [Medication Adherence](/visualization-guides/medication-adherence) | `pillbox_refilled` | Day (1=Sun, 7=Sat) | AM/PM (1=AM, 2=PM) | `compartment` |
| [XK300 Essence](/visualization-guides/xk300-essence) | `xk_heart_rate_statistics` | Median Heart Rate (BPM) | Heart Rate POBC Score | `heart_rate_mean`, `heart_rate_variance`, `measurement_index` |
| [XK300 Essence](/visualization-guides/xk300-essence) | `xk_respiratory_rate_statistics` | Median Respiratory Rate (Breaths/min) | Respiratory Rate POBC Score | `respiratory_rate_mean`, `respiratory_rate_variance`, `measurement_index` |
| [XK300 Essence](/visualization-guides/xk300-essence) | `xk_sleep_data` | Sleep Duration (minutes) | In-Bed Duration (minutes) | `measurement_index` |
# Peak Flow Meter
> Visualization guidance for peak flow meter metrics
Peak flow meters transmit respiratory function metrics including peak expiratory flow and forced expiratory volume.
## Applicable Devices
[Section titled “Applicable Devices”](#applicable-devices)
* [Tenovi Peak Flow Meter](/devices/tenovi-peak-flow-meter)
## Metrics
[Section titled “Metrics”](#metrics)
| Name | API Format | Value 1 | Value 2 |
| ---- | -------------------------- | ----------- | ------- |
| PEF | peak\_expiratory\_flow | PEF (L/min) | N/A |
| FEV | forced\_expiratory\_volume | FEV (L) | N/A |
## Visualization Recommendations
[Section titled “Visualization Recommendations”](#visualization-recommendations)
*Coming soon — guidance on chart types, ranges, thresholds, and display best practices for these metrics.*
# Pulse Oximeters
> Visualization guidance for pulse oximeter metrics
Pulse oximeters transmit blood oxygen saturation, heart rate, and perfusion index metrics along with their standard deviations.
## Applicable Devices
[Section titled “Applicable Devices”](#applicable-devices)
* [A\&D Pulse Ox](/devices/and-pulse-ox)
* [Nonin Pulse Ox](/devices/nonin-pulse-ox)
* [Tenovi Pulse Ox](/devices/tenovi-pulse-ox)
* [Tenovi Cellular Pulse Ox](/devices/tenovi-cellular-pulse-ox)
## Metrics
[Section titled “Metrics”](#metrics)
| Name | API Format | Value 1 | Value 2 |
| ------------------- | ---------------- | --------------------- | ------------------ |
| Blood Oxygen (SpO2) | spO2 | Oxygen Saturation (%) | Standard Deviation |
| Heart Rate | pulse | Pulse (beats/minute) | Standard Deviation |
| Perfusion Index | perfusion\_index | Perfusion Index (%) | Standard Deviation |
## Visualization Recommendations
[Section titled “Visualization Recommendations”](#visualization-recommendations)
*Coming soon — guidance on chart types, ranges, thresholds, and display best practices for these metrics.*
# Scales
> Visualization guidance for scale metrics
Scales transmit body weight measurements for tracking patient weight over time.
## Applicable Devices
[Section titled “Applicable Devices”](#applicable-devices)
* [A\&D Scale](/devices/and-scale)
* [A\&D XL Scale](/devices/and-xl-scale)
* [Tenovi Scale](/devices/tenovi-scale)
* [Tenovi Bariatric Scale](/devices/tenovi-bariatric-scale)
* [Tenovi Cellular Scale](/devices/tenovi-cellular-scale)
* [Welch Allyn Scale](/devices/welch-allyn-scale)
## Metrics
[Section titled “Metrics”](#metrics)
| Name | API Format | Value 1 | Value 2 |
| ------ | ---------- | --------------------- | ------- |
| Weight | weight | Weight (in US pounds) | N/A |
## Visualization Recommendations
[Section titled “Visualization Recommendations”](#visualization-recommendations)
*Coming soon — guidance on chart types, ranges, thresholds, and display best practices for these metrics.*
# Thermometer
> Visualization guidance for thermometer metrics
Thermometers transmit body temperature readings for monitoring patient temperature over time.
## Applicable Devices
[Section titled “Applicable Devices”](#applicable-devices)
* [Tenovi Thermometer](/devices/tenovi-thermometer)
## Metrics
[Section titled “Metrics”](#metrics)
| Name | API Format | Value 1 | Value 2 |
| ----------- | ----------- | ---------------- | ------- |
| Temperature | temperature | Temperature (°F) | N/A |
## Visualization Recommendations
[Section titled “Visualization Recommendations”](#visualization-recommendations)
*Coming soon — guidance on chart types, ranges, thresholds, and display best practices for these metrics.*
# XK300 Essence
> Visualization guidance for XK300 Essence metrics including POBC scoring and sample chart implementations
The [XK Essence](/devices/xk-essence) transmits heart rate statistics, respiratory rate statistics, and sleep data collected passively without requiring patient interaction. Data is collected in configurable intervals (as granular as 60-minute increments) and transmitted every 6 hours.
## Metrics
[Section titled “Metrics”](#metrics)
| Name | API Format | Value 1 | Value 2 |
| --------------------------- | -------------------------------- | ------------------------------------- | --------------------------- |
| Heart Rate Statistics | `xk_heart_rate_statistics` | Median Heart Rate (BPM) | Heart Rate POBC Score |
| Respiratory Rate Statistics | `xk_respiratory_rate_statistics` | Median Respiratory Rate (Breaths/min) | Respiratory Rate POBC Score |
| Sleep Data | `xk_sleep_data` | Sleep Duration (minutes) | In-Bed Duration (minutes) |
Sample patient context
The following visualizations use sample data for a fictional “Patient A” — a 68-year-old with a stable resting HR around 72 BPM and RR around 16 breaths/min. On Day 5, Patient A develops an upper respiratory infection, causing elevated heart rate and respiratory rate, triggering POBC warning scores.
### Heart Rate & Respiratory Rate
[Section titled “Heart Rate & Respiratory Rate”](#heart-rate--respiratory-rate)
Display median heart rate and median respiratory rate over time. Two approaches are recommended depending on available screen real estate.
#### Option A: Combined Dual-Line Chart
[Section titled “Option A: Combined Dual-Line Chart”](#option-a-combined-dual-line-chart)
Combines both metrics into a single chart so clinicians can quickly identify correlation between heart rate and respiratory rate changes.
Heart rate & respiratory rate — Patient A (7-day view)
Heart rate (BPM)Respiratory rate (breaths/min)
| Spec | Value |
| ----------------- | ------------------------------------------------ |
| **Chart type** | Dual-axis line chart |
| **X-axis** | Time (day, with ability to zoom to hourly) |
| **Left Y-axis** | Heart rate (BPM), range 40–130 |
| **Right Y-axis** | Respiratory rate (breaths/min), range 8–30 |
| **Time controls** | Day / week / month selector with zoom capability |
#### Option B: Stacked Separate Charts
[Section titled “Option B: Stacked Separate Charts”](#option-b-stacked-separate-charts)
Separate charts for each metric, stacked vertically. Scales are independent and easier to read at a glance, especially when displayed in narrow panels.
Heart rate — Patient A (7-day view)
Median heart rate (BPM)
Respiratory rate — Patient A (7-day view)
Median respiratory rate (breaths/min)
| Spec | Value |
| --------------- | -------------------------------------------------------- |
| **Chart type** | Single-axis line chart (one per metric) |
| **X-axis** | Time (day, with ability to zoom to hourly) |
| **Y-axis (HR)** | BPM, range 40–130 |
| **Y-axis (RR)** | Breaths/min, range 8–30 |
| **Advantage** | Clearer individual scale reading; works in narrow panels |
Time scope controls
Provide the ability to adjust the timespan of data — allowing clinicians to view an entire day, week, or month while having the ability to zoom into a specific hour. This is critical for correlating changes with clinical events.
### Sleep Measurement
[Section titled “Sleep Measurement”](#sleep-measurement)
Sleep duration and in-bed duration are combined into a single stacked bar chart. This allows clinicians to quickly review many days of data to identify trends and patterns.
Day grouping rule
Group sleep data using **noon as the demarcation point** between days. This ensures whole nights are counted for a single day and sleep data for one night isn’t split across two different days.
Sleep pattern — Patient A (7-day view)
Noon-to-noon grouping. Y-axis = time of day, X-axis = day.
SleepingIn bed, not sleepingNot in bed
| Spec | Value |
| ---------------- | --------------------------------------------------------- |
| **Chart type** | Stacked vertical bar chart |
| **X-axis** | Day of week |
| **Y-axis** | Time of day (noon-to-noon, inverted so evening is at top) |
| **Green bars** | In bed and sleeping (`#2d8a5e`) |
| **Red bars** | In bed but not sleeping (`#c94444` at 70% opacity) |
| **No color** | Not in bed (background shows through) |
| **Day boundary** | Noon (12:00) — ensures whole nights are grouped together |
***
### POBC Deviations
[Section titled “POBC Deviations”](#pobc-deviations)
What is POBC?
The Probability of Change in Condition (POBC) score quantifies how unusual a patient’s recent readings are compared to their personal baseline. [Learn more about the POBC score](/devices/xk-essence/#what-is-the-pobc-score).
The POBC score is presented as a line graph with color-coded warning zones. Separate charts are shown for heart rate and respiratory rate deviations.
Heart rate POBC — Patient A (24-hour view, Day 5)
Normal range (-80 to +80)Warning zone (above +80 or below -80)
Respiratory rate POBC — Patient A (24-hour view, Day 5)
Normal range (-80 to +80)Warning zone
| Spec | Value |
| ------------------- | -------------------------------------------------------------------------------- |
| **Chart type** | Line chart with color-coded segments |
| **Y-axis** | POBC score, min -100 / max +100 |
| **X-axis** | Time in hours, show 24 hours at a time |
| **Blue line** | Score between -80 and +80 (normal) |
| **Red line** | Score above +80 or below -80 (warning — clinical assessment needed) |
| **Threshold lines** | Dashed red at +80 and -80 |
| **Value 123** | Exclude from chart — signifies insufficient data |
| **Separate charts** | Heart rate and respiratory rate POBC are independent; display as separate charts |
Handling value 123
A POBC value of 123 (or blank) indicates insufficient data to calculate a score. These values should **not** be plotted on the chart. Instead, show a gap in the line or display a “collecting data” indicator for that time period.